The 10 Best Steak Frites Hacks for a Perfect Meal”

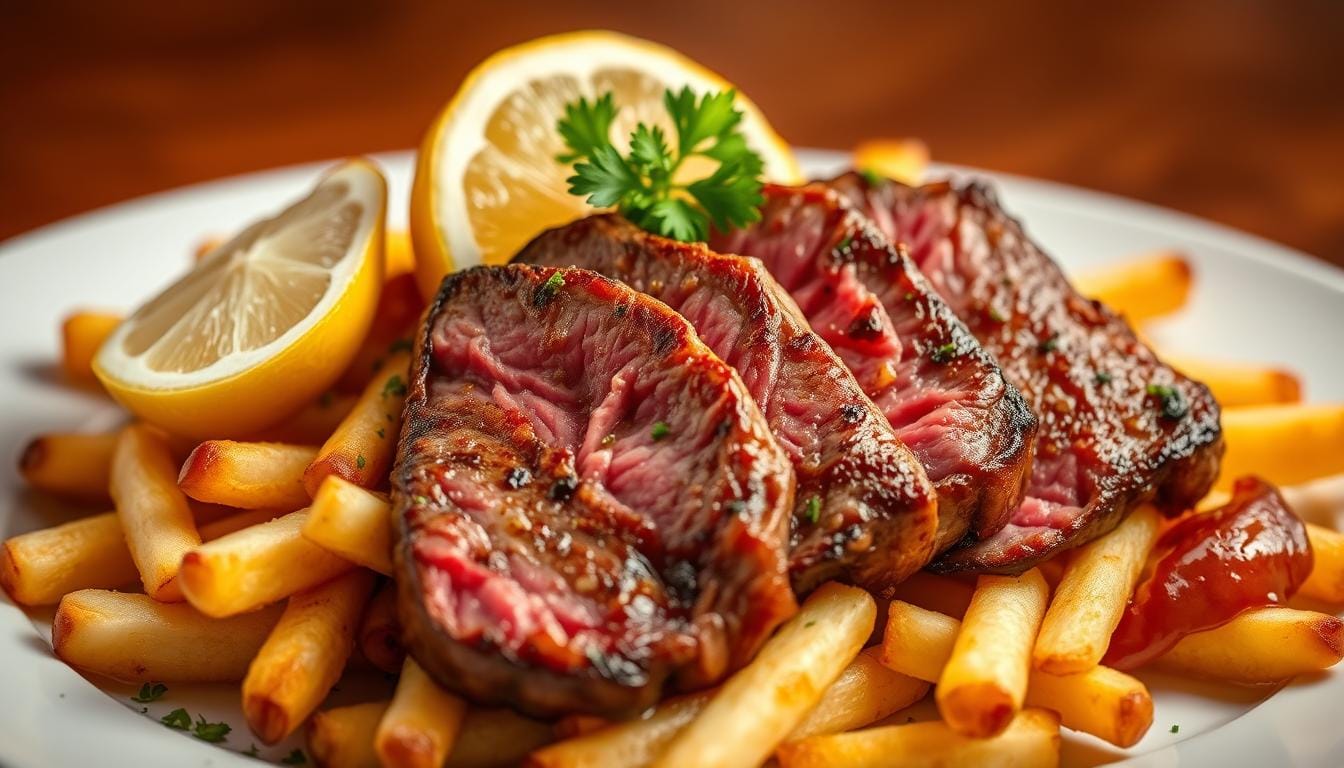
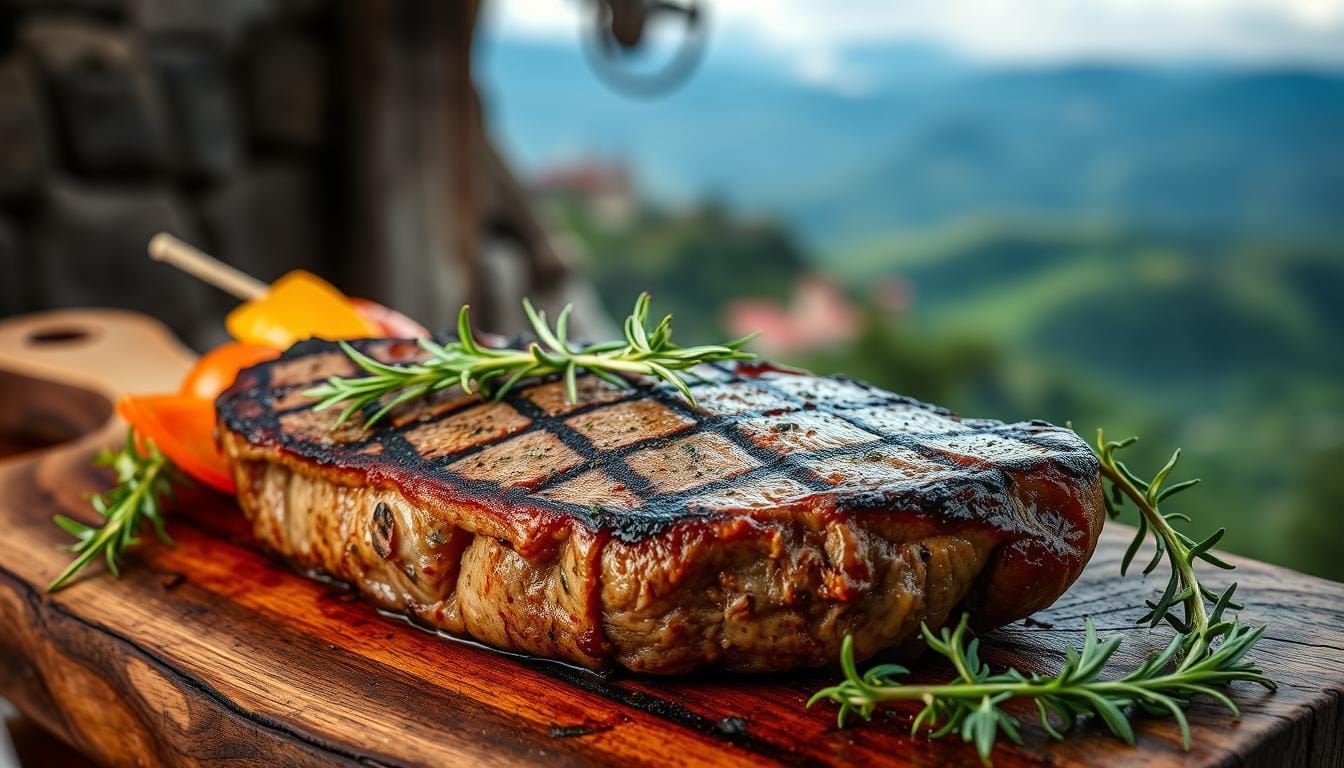
Imagine a dish that pairs a juicy steak with crispy French fries. This is steak frites, a classic dish loved by many. It’s found in many restaurants, but what makes it unforgettable?

Steak frites is more than just food; it’s an experience. From the tender steak to the flavorful fries, every bite is a delight. It’s perfect for any meal or special occasion. Its rich history and cultural significance make it a favorite worldwide.

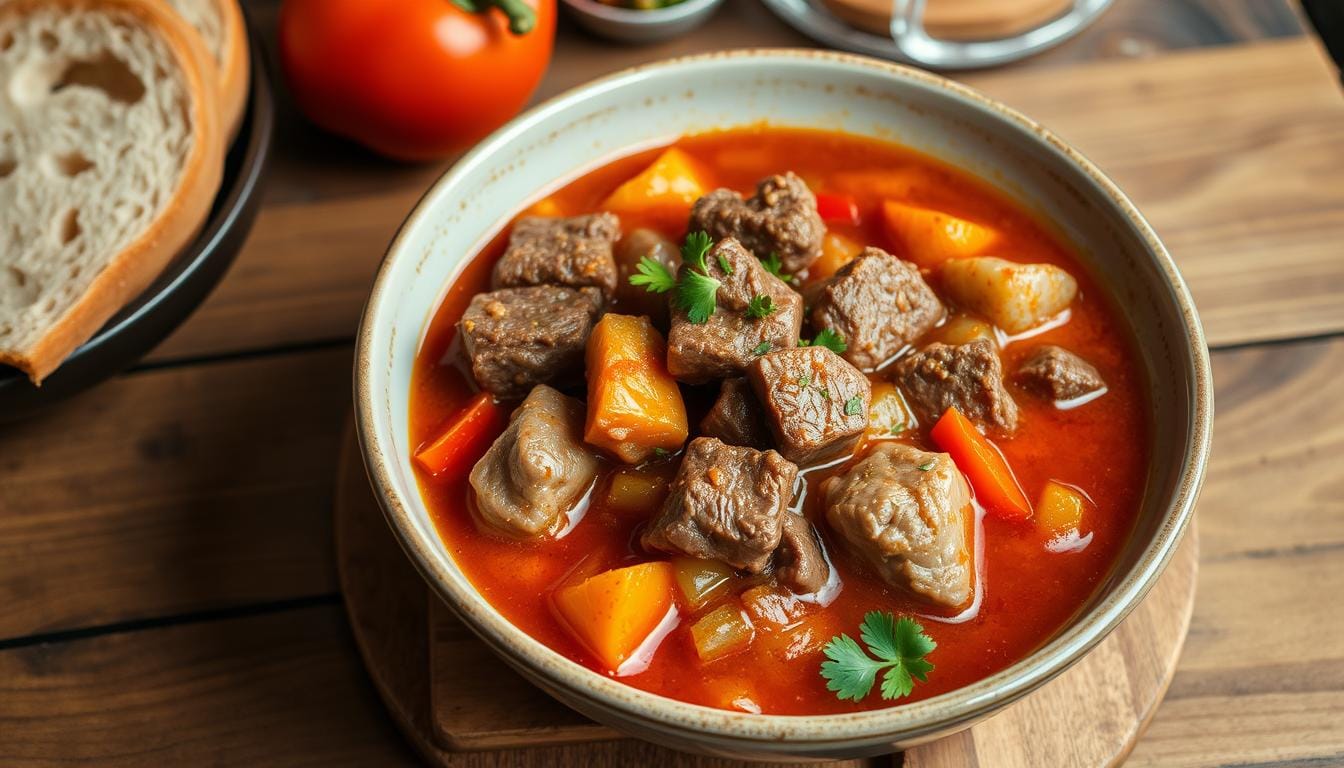
Introduction to Steak Frites

To truly enjoy this dish, you need to know its history and how it’s made. In this article, we’ll explore its origins, how to prepare it, and where to find the best. We’ll cover everything from classic to modern versions, so you can make the perfect steak frites.

Key Takeaways

  • Steak frites is a gourmet dish that combines a perfectly cooked steak with crispy French fries.
  • The best steak frites can be found in many restaurants, but it’s also possible to create an authentic experience at home.
  • Classic steak frites is a staple in French and Belgian cuisine, with a rich history and cultural significance.
  • Understanding the history and preparation of steak frites is essential to appreciating its cultural significance.
  • From traditional to modern twists, steak frites remains a beloved dish around the world.
  • Steak frites is a dish that’s perfect for special occasions or a hearty meal.

The Rich History of Steak Frites in French Cuisine

Exploring this steak takes you back to its origins. This dish has a deep history in Belgian and French cooking. It started as a simple meal for workers but now, it’s a favorite in steak restaurant menus worldwide.

Steak frites’ history is shaped by many cultures. To enjoy authentic steak , knowing its roots is key. Its journey from a humble worker’s meal to a global favorite is fascinating.

  • Its humble beginnings as a worker’s meal in Belgium and France
  • Its evolution into a popular dish in bistros and restaurants
  • Its cultural significance in modern dining, symbolizing a blend of tradition and gourmet innovation

Knowing the history of this steak frites makes your dining experience richer. Whether you love food or just great meals, its story will captivate you. It encourages you to try different versions of this classic dish.

What Makes the Perfect Steak Frites

To make the best French bistro meal , focus on key elements. Choose the right beef cut and cook it perfectly. Serve it with fries that are crispy outside and fluffy inside. A great recipe balances flavors and textures.

When making this recipe, pay attention to every detail. Season the steak right and use the right potatoes for fries. Whether you’re experienced or new, mastering steak frites takes practice and patience.

Some key elements of a perfect steak include:

  • Using high-quality ingredients, such as fresh beef and potatoes
  • Cooking the steak to the right level of doneness
  • Double-frying the fries to achieve the perfect crispiness
  • Adding the right amount of seasoning and sauce to enhance the flavors

Follow these tips to make a steak frites dish that rivals top restaurants. With practice and experimentation, you can create your own signature recipe. So, why not try and see what you can make?

Essential Ingredients for Authentic Steak Frites

To make a real grilled steak with fries, you need top-notch ingredients. Choose a tender cut like ribeye or sirloin for the best taste. For the sauce, go for classics like Béarnaise or peppercorn for that creamy touch.

For authentic Juicy steak with golden fries, the key is in the French fries. Use the right potatoes and fry them twice. This method gives you crispy outside and fluffy inside. Serve your classic steak frites with a variety of sauces, from traditional Béarnaise to new creations.

  • High-quality beef cuts, such as ribeye or sirloin
  • Specific potato varieties, like Russet or Idaho, for the best French fries
  • Traditional steak frites sauces, such as Béarnaise or peppercorn

By using these key ingredients, you can make a steak frites that’s as good as any restaurant.

Mastering the Art of Steak Preparation

To make the Parisian bistro favorite, you need to know how to prepare the steak. This means learning to grill or pan-sear it. By doing this, you can get your steak just right, whether it’s rare, medium, or well-done.

Choosing the right cut of beef is crucial for a great steak frites. You should pick a high-quality cut and cook it to the perfect doneness. Use a thermometer to check the steak’s internal temperature. For a medium-rare steak, aim for 130-135°F.

There are several ways to cook your steak, including:

  • Grilling: This method adds a smoky flavor and creates a nice char on the outside.
  • Pan-searing: This method gives a crispy crust on the outside while keeping the inside juicy.

By mastering these techniques and using a great recipe, you can make an amazing dish. With practice, you’ll learn to make steak frites that are truly exceptional. You’ll be the best steak frites maker you know.

Creating Restaurant-Quality French Fries at Home

To enjoy authentic beef and crispy fries at home, you need to master the art of making perfect French fries. This is achievable by following a few simple techniques that steak frites restaurants use. When searching for grilled steak with fries near me, you may come across various restaurants, but making it at home can be just as delicious.

The key to making great French fries is to use the right potatoes and to fry them twice. This double-frying technique ensures that your fries are crispy on the outside and fluffy on the inside, just like those served at a classic French steak and fries . To start, choose potatoes that are high in starch, such as Russet or Idaho potatoes.

Double-Frying Technique

The first fry is done at a lower temperature, around 325°F, to cook the potatoes through. Then, increase the temperature to 375°F for the second fry, which will give your fries a crispy exterior. This technique is essential for making grilled steak with fries.

Oil Temperature Control

Controlling the oil temperature is crucial when making French fries. If the oil is too hot, the fries will burn on the outside before they are fully cooked on the inside. On the other hand, if the oil is not hot enough, the fries will absorb too much oil and be greasy.

Seasoning Secrets

Once your fries are cooked, it’s time to season them. You can use a variety of seasonings, such as salt, pepper, and garlic powder, to give your fries flavor. For an extra crispy coating, try sprinkling some grated Parmesan cheese over your fries.

By following these tips, you can create restaurant-quality French fries at home to enjoy with your classic French steak and fries Whether you’re looking for a Beef and crispy fries restaurant or want to make it at home, the key to a great dish is in the details. With a little practice, you can make grilled steak with fries that rival those served at your favorite French bistro meal restaurant.

Signature Steak Frites Sauces and Accompaniments

Enjoying a classic steak frites dish is even better with the right sauce. Traditional sauces like Béarnaise or peppercorn enhance the steak and fries. You can try different sauces to find your favorite.

Some popular steak frites sauces include:

  • Béarnaise: a rich, creamy sauce made with butter, eggs, and herbs
  • Peppercorn: a light, creamy sauce with a subtle kick of pepper
  • Garlic aioli: a savory sauce made with garlic, mayonnaise, and lemon juice

Adding salads or grilled vegetables can make the dish even better. Try pairing your steak and fries with sautéed spinach or a simple green salad. This way, you can make your own perfect steak with golden fries

Whether you like traditional or modern sauces, the key is finding the right flavor balance. By trying different sauces and sides, you can make a unique and tasty dish that you’ll love.

Finding the Best Steak Frites Near You

Looking for the best traditional Parisian dish near you? Check the restaurant’s quality and the dish’s authenticity. A top steak frites spot should use high-quality ingredients, have a talented chef, and offer a cozy atmosphere. Look for places with good reviews and that serve grilled steak with fries near me.

Research popular spots for steak frites, both at home and abroad. Knowing the price points and expectations helps pick the right place. Here are key things to think about when searching for the best steak frites:

  • Quality of ingredients: Freshness and where the beef and potatoes come from.
  • Skill of the chef: Their ability to cook the dish just right.
  • Ambiance: The comfort and feel of the restaurant.
  • Reviews and recommendations: What others say about the steak frites.

High-end restaurants and casual spots both offer great steak frites. By considering these points and doing your homework, you’ll find the best steak frites near you. Enjoy a tasty and true-to-form dining experience.

Common Mistakes to Avoid When Making Steak Frites

When trying to make French bistro meal, it’s key to know the common mistakes. These mistakes can ruin the dish. Avoid overcooking the steak or undercooking the fries. Also, using low-quality ingredients or not seasoning well can make the dish less enjoyable.

A great steak frites recipe is all about balance. Your steak should be perfectly cooked, and your fries should be crispy and golden. Here are some tips to help you achieve this:

  • Choose the right cut of beef for your steak, as this will impact the tenderness and flavor.
  • Use a thermometer to ensure your oil is at the correct temperature for frying, which is crucial for achieving the perfect French fries.
  • Don’t overcrowd your pan, as this can lower the oil temperature and result in greasy or undercooked fries.

By avoiding these common mistakes, you can make a delicious and traditional Parisian dish dish. Remember, it takes practice to get it right. Don’t get discouraged if it doesn’t turn out perfectly at first. With time and patience, you’ll become a pro at making steak frites and enjoy it at home.

For authentic steak frites, use high-quality ingredients and pay attention to the recipe details. By following these tips and avoiding common mistakes, you’ll be on your way to a fantastic steak frites experience.

Common MistakeSolution
Overcooking the steakUse a thermometer to ensure the steak is cooked to the correct temperature.
Undercooking the friesDouble-fry the fries to achieve the perfect crispiness.

Conclusion: Elevating Your Steak Frites Experience

Starting your journey to enjoy steak frites means paying close attention to every detail. Learning about its rich history and cultural importance is key. Also, mastering how to prepare it and trying different sides can make your meal unforgettable.

Whether you’re enjoying the best steak frites at a fancy bistro or making it at home, use top-quality ingredients. Make sure your steak is cooked just right, your fries are crispy, and your sauce is perfect. Avoiding mistakes and getting better at making it will make every bite a pleasure.

This journey invites you to try new things and enjoy the small details of steak frites. Dive into its history, honor its tradition, and make your steak frites experience even more special.

FAQ

What is steak frites?

Steak frites is a dish from France and Belgium. It has a steak and crispy fries on the side. It’s a mix of tender meat and crunchy fries.

What is the history of steak frites?

It started as a worker’s meal in Belgium and France. Now, it’s loved worldwide in bistros. It shows a mix of tradition and new flavors.

What makes the perfect steak frites?

The perfect dish has great flavors and textures. Choose the right beef and cook it well. The fries should be crispy outside and fluffy inside.

Pay attention to seasoning the steak and using the right potatoes. These details make a great steak frites.

What are the essential ingredients for authentic steak frites?

You need the right beef, like ribeye or sirloin. The secret to perfect fries is using the right potatoes and cooking them twice.

Adding classic sauces like Béarnaise or peppercorn makes it richer.

How do you master the art of steak preparation?

Mastering steak preparation is key. Learn different cooking methods and how to get the perfect doneness. Whether rare, medium, or well-done, it’s all about the technique.

How can you create restaurant-quality French fries at home?

Making great French fries at home is possible. Use the double-frying method for crispy and fluffy fries. Control the oil temperature and season well for the best taste.

What are the signature steak frites sauces and accompaniments?

The right sauces and sides can make the dish better. Try classic Béarnaise and peppercorn sauces. Add freshness with salads or grilled vegetables.

How can you find the best steak frites near you?

Look for quality restaurants with fresh ingredients and skilled chefs. Consider the ambiance too. Popular places can give you great ideas.

What are common mistakes to avoid when making steak frites?

Avoid overcooking the steak and undercooking the fries. Use high-quality ingredients and season well. These steps will help you make a delicious steak frites.

Perfect Chicken Ghee Roast:7 Irresistible Secrets

Imagine biting into tender, juicy chicken, filled with the rich tastes of south indian spices and the scent of ghee. This is what you get from a well-made chicken ghee roast. It’s a favorite in many indian homes and restaurants. You’ll learn how to make a real chicken ghee curry that will make you want more.

Chicken ghee roast comes from historic south part of India cooking. It’s loved for its taste and smell. This guide will help you make a delicious Ghee-infused chicken dish. It’s perfect for impressing your loved ones.

Introduction to Chicken Ghee Roast

In this guide, you’ll find out about chicken roast’s rich history. You’ll learn about its key ingredients and how to make it. You’ll see how important spices and quality ghee are for a true chicken ghee roast experience.

Key Takeaways

  • Chicken ghee roast is a popular south india dish known for its rich flavors and spices.
  • The dish originated in the mangalorean cuisine and has since become a staple in indian restaurants and households.
  • Ghee is a crucial ingredient in Mangalorean Chicken Roast , adding a unique aroma and flavor to the dish.
  • The dish for chicken ghee roast involves a blend of classic spices and a specific cooking technique.
  • With practice and patience, you can master the art of preparing an authentic ghee-infused chicken dish .
  • South India Chicken Roast can be served with a variety of accompaniments, including rice, roti, and naan.

The Rich Heritage of Chicken Ghee Roast

Roasted chicken with ghee is a dish filled with tradition and cultural importance. It’s a favorite in the Mangalorean region, loved for centuries. The secret to its flavor lies in the masala, a mix of spices.

This dish is a symbol of unity, enjoyed at family gatherings and festivals. Over time, different regions have made their own versions. Yet, the core of Indian chicken curry remains the same.

Chicken ghee curry roots are in Mangalorean cuisine. It showcases the region’s rich culinary history. The dish’s unique spices and cooking methods are a testament to its cultural significance.

Origins in Mangalorean Cuisine

The Mangalorean region is famous for its diverse food traditions. Ghee-infused chicken dish is a highlight, believed to have started there. It was cooked in earthen pots over wood fires, using special spices.

Cultural Significance

Ghee-infused chicken dish is more than food; it’s a symbol of community and joy. It’s a staple at weddings and festivals in the Mangalorean region. Its unique spices and cooking methods reflect the region’s rich heritage.

Evolution of the Recipe

Ghee-infused chicken dish has changed over the years. Different regions have added their own touches. This has led to a variety of flavors and textures, all keeping the dish’s essence intact.

Essential Ingredients for the Perfect Chicken Ghee Roast

To make a delicious chicken ghee curry, you need the right ingredients. The technique is simple to follow. With the essential parts, you can make a tasty dish. The main ingredients include:

  • Chicken: Use any chicken cut you like, but boneless, skinless works best.
  • Ghee: This ingredient gives the dish its unique flavor and aroma. You can buy it or make it at home.
  • Spices: A mix of spices like cumin, coriander, and turmeric adds depth and warmth.
  • Herbs: Fresh herbs like cilantro, mint, and basil add freshness and flavor.

With these ingredients, you can make an easy and tasty authentic Mangalorean roast . It will impress your family and friends. The method is flexible, so you can change the spices and herbs to your liking. By following this simple instructions, you can enjoy a delicious and authentic Chicken Roast.

Mastering the Signature Ghee Roast Spice Blend

To make a true ghee-based chicken , you must get the spice blend right. This blend makes chicken roast stand out in Indian cuisine. Learning the authentic spices and how to enhance their flavors is key.

The spices used are cumin, coriander, and turmeric. These are common in tangy dishes. Roasting the spices brings out their aroma and taste. Grinding them ensures they mix well and spread evenly in the dish.

Understanding Spice Components

  • Cumin: adds a warm, earthy flavor
  • Coriander: adds a sweet, citrusy flavor
  • Turmeric: adds a bright, slightly bitter flavor

Mastering the ghee roast spice blend lets you make a tasty chicken ghee curry . With time and effort, you’ll get the blend just right. Then, you can enjoy the bold, spicy tastes of Indian cuisine.

Step-by-Step Authentic Chicken Ghee Roast Recipe

To make an authentic dish, follow a peninsular technique passed down through generations. This process starts with marinating chicken in spices and yogurt. Then, it’s roasted in ghee.

For a successful Chicken Roast, use top-notch ingredients and follow the cooking steps carefully. Here’s how to do it:

  • Marinate the chicken in a mix of spices, yogurt, and lemon juice for at least 30 minutes.
  • Heat ghee in a pan over medium heat and add the marinated chicken.
  • Roast the chicken until it’s golden brown and cooked through.

By following this technique, you can make an authentic Ghee-infused chicken dish. It will take your taste buds to the streets of south india cuisine. Remember to use the best ingredients and follow the cooking steps carefully for a delicious and classic dish.

The Art of Marination and Roasting

To make a delicious Chicken ghee curry, you need to learn marination and roasting. Soak the chicken in spices and yogurt to tenderize it and add flavor. With practice, you can make a tasty that will wow your loved ones.

Here are some tips to help you get started:

  • Marinate the chicken for at least 30 minutes to allow the spices to penetrate deep into the meat.
  • Use a mixture of yogurt, lemon juice, and spices to create a marinade that is both easy to make and flavorsome.
  • Roast the chicken in a preheated oven at the perfect temperature to achieve a crispy exterior and a juicy interior.

By following these tips, you can make a Ghee-infused chicken dish that’s easy and full of flavor. The secret to a great roast is the right texture. This comes from roasting at the perfect temperature. With patience and practice, you’ll master marination and roasting and enjoy a tasty chicken ghee curry.

The art of marination and roasting is about finding the right balance. Mix the right spices, marinade, and roasting temperature for a delicious chicken roast. So, try it out and enjoy the amazing flavors of a perfectly roasted chicken ghee roast.

Tips for Selecting the Best Quality Ghee

Choosing the right ghee is key for a true Chicken Roast. Ghee is a core part of indian cuisine. Its rich, nutty taste is vital for a traditional dish. Look for ghee made from pure butter with a high smoke point.

Here are some tips for picking the best ghee:

  • Check the ingredients: Make sure the ghee is pure butter, without additives or preservatives.
  • Look for a high smoke point: This shows the ghee is top-notch and good for high-heat cooking.
  • Check the flavor and aroma: Great ghee should have a deep, nutty taste and smell.

By following these tips, you can find the best ghee for your Chicken Mangalorean-style roast chicken. This will make your dish truly tasty. Remember, the quality of ghee greatly affects your dish’s flavor and aroma. So, pick carefully.

Common Mistakes to Avoid While Preparing Chicken Ghee Roast

Making a tasty ghee-infused chicken dish is easy if you pay attention. You want it to be full of flavor and tender. Knowing the common mistakes can help you avoid them.

Temperature control is key to the chicken’s texture and taste. Getting the spice mix right is also important. And timing is crucial to cook the chicken just right. By avoiding these mistakes, you’ll make a dish that’s both piquant and delicious.

Avoiding Temperature Control Issues

Make sure to cook the chicken at the right temperature. This prevents it from drying out or being undercooked. Use a thermometer to check the chicken’s internal temperature.

Achieving the Perfect Spice Balance

Finding the right spice mix is essential for a great chicken roast . Try different spice blends to find your favorite. Common spices include cumin, coriander, and turmeric. The goal is to balance the spice level so it’s enjoyable to eat.

By following these tips, you can make a tasty chicken roast. It’s easy to prepare. With practice, you’ll master your recipe and enjoy homemade chicken ghee roast.

  • Use fresh and high-quality ingredients
  • Follow a tried and tested recipe
  • Don’t overcook or undercook the chicken
  • Experiment with different spice blends

The secret to a great chicken ghee curry is balancing flavor and ease. With these tips and a bit of practice, you’ll make a dish that everyone will love.

Serving Suggestions and Accompaniments

Serving chicken ghee curry right is key to a flavorsome meal. It’s a beloved dish in indian cuisine. Its rich taste pairs well with many sides.

In usual settings, it’s often with rice, roti, or naan. These help soak up the sauce. Adding raita, salad, or pickles brings freshness and texture.

Here are some great ways to serve Ghee-infused chicken dish:

  • Steamed veggies add color and nutrients.
  • Mango lassi or chai make a refreshing drink.
  • Try different indian cuisine breads like naan or roti.

Follow these tips to make a flavorsome chicken roast meal. It will surely impress your loved ones.

Conclusion: Mastering Your Chicken Ghee Roast Journey

Starting your journey with Mangalorean-style roast chicken is exciting. It’s a path filled with practice, patience, and a love for perfecting flavors. This guide has given you the tools to make a delicious chicken ghee roast at home.

Whether you’re new to cooking or have experience, the secret to a great Chicken ghee curry t is quality ingredients and careful cooking. As you get better, you’ll learn what makes this dish so special.

Start your popular deccan chicken dish journey and enjoy a tasty adventure. With every bite, you’ll feel the rich history and cultural value of this Mangalorean dish. Let your love for real flavors lead you, and enjoy the journey of mastering chicken ghee curry.

FAQ

What is Chicken Ghee Roast?

Chicken Ghee Roast is a beloved South Indian dish. It’s known for its rich flavors and spices. This traditional Mangalorean dish features chicken cooked in aromatic spices and clarified butter (ghee).

What are the essential ingredients for Chicken Ghee Roast?

Chicken, ghee, and spices like cumin, coriander, and turmeric are key. Herbs are also important. The recipe might vary, but these ingredients are always at the core.

How do I master the signature Ghee Roast spice blend?

To master the spice blend, learn about traditional spices like cumin, coriander, and turmeric. Roasting and grinding these spices right is key. Storing the blend well and using it fresh ensures great flavor.

What is the secret to perfect marination and roasting for Chicken Ghee Roast?

Perfect marination involves soaking chicken in a spice and yogurt mix. This tenderizes the meat and adds flavor. The right roasting temperature is also key. With practice, you’ll get it just right.

How do I select the best quality ghee for Chicken Ghee Roast?

Choose high-quality ghee made from pure butter. It should have a rich, nutty flavor. The traditional method of clarifying butter is best for authentic Chicken Ghee Roast.

What are some common mistakes to avoid when preparing Chicken Ghee Roast?

Avoid temperature control issues, spice balance problems, and timing mistakes. Proper temperature is key for texture and flavor. The right spice balance is crucial to avoid too much spice or blandness. Timing affects the chicken’s quality.

What are the best serving suggestions and accompaniments for Chicken Ghee Roast?

Serve Chicken Ghee Roast with rice, roti, or naan. Add side dishes like raita, salad, and pickles. The goal is to balance flavors and textures for a delicious meal.

30-Minute Bold and Spicy Chicken and Chorizo Jambalaya

Exploring Louisiana’s rich flavors leads to chicken and chorizo jambalaya. It’s a key part of traditional Louisiana cuisine and southern comfort food. This dish’s unique taste will make you crave more. You’ll learn about its history, ingredients, and cooking methods, showing why it’s a highlight of American cuisine.

This journey takes you into Louisiana’s flavors, focusing on chicken and chorizo jambalaya. It’s a dish deeply rooted in Louisiana’s culture and history. Its rich flavors will leave you eager for more.

Introduction to Chicken and Chorizo Jambalaya

Chicken and chorizo jambalaya combines chicken, chorizo, and Louisiana’s traditional cuisine. It’s a beloved dish in southern comfort food. As you delve into it, you’ll uncover its ingredients, cooking methods, and history. This makes it a standout in American cuisine.

Key Takeaways

  • You’ll learn about the history and cultural significance of chicken and chorizo jambalaya in traditional Louisiana cuisine.
  • You’ll discover the unique blend of flavors that make chicken and chorizo jambalaya a staple of southern comfort food.
  • You’ll learn about the ingredients and cooking techniques that make this dish a true masterpiece of American cuisine.
  • You’ll explore the rich flavors of Louisiana and the significance of chicken and chorizo jambalaya in traditional Louisiana cuisine.
  • You’ll learn how to make chicken and chorizo jambalaya, a dish that combines the flavors of chicken, chorizo, and traditional Louisiana cuisine.
  • You’ll discover the importance of using high-quality ingredients and traditional cooking techniques to make authentic chicken and chorizo jambalaya.

The Rich History of Louisiana Jambalaya

Jambalaya is more than a cajun rice dish. It shows the cultural mix of Louisiana. Different groups added their own touches, making it special.

Jambalaya is a delicious sausage and rice dish. It grew from Creole and Cajun cooking. Ingredients like sausage, chicken, and rice were common, making it a favorite.

Some important parts of jambalaya’s story are:

  • It started with African, French, and Spanish cooking styles.
  • Recipes changed over time, using local ingredients and methods.
  • It’s a big part of Southern cooking, enjoyed at many events.

Learning about jambalaya’s history makes you appreciate it more. Whether it’s a flavorful jambalaya with chicken or a classic cajun rice dish, it’s a taste of Louisiana’s rich food culture.

Essential Ingredients for Authentic Chicken and Chorizo Jambalaya

To make a tasty and spicy jambalaya, you need the right ingredients. The dish includes chicken, chorizo, and various vegetables, all cooked in one pot. This method makes it easy to prepare a meal for your loved ones.

Onions, bell peppers, and tomatoes are key ingredients in chicken and chorizo jambalaya. They add flavor and texture, making the dish hearty and satisfying. You can adjust the spice level to your liking, perfect for those who enjoy a bit of heat.

Using high-quality ingredients is crucial for a spicy jambalaya recipe. Fresh vegetables and spices enhance the flavors, offering a true taste experience. With the right ingredients and a bit of practice, you can impress everyone with your delicious one-pot jambalaya.

The cooking technique is also vital in making chicken and chorizo jambalaya. You must brown the meat and vegetables first. Then, add the rice and spices for a flavorful and aromatic dish. By following these steps and using the right ingredients, you can create a delicious and spicy jambalaya for any occasion.

Understanding the Holy Trinity of Cajun Cooking

To make a real smoky chorizo and chicken dish , you must know the Holy Trinity of Cajun cooking. This group of ingredients is key in many classic dishes, like jambalaya. Onions, bell peppers, and celery are sautéed together to make a tasty base for your dish.

Exploring traditional Louisiana cuisine, you’ll see the Holy Trinity is crucial in many recipes. Mastering these base vegetables helps create a rich, flavorful start for your cajun rice dish. This is vital for southern comfort food, as it needs hearty flavors and textures.

Here are some tips for perfecting the base vegetables:

  • Use fresh, high-quality ingredients.
  • Sauté the vegetables until they’re tender and lightly browned.
  • Add a pinch of salt and pepper to enhance the flavors.

By following these tips and understanding the Holy Trinity, you’ll make a delicious cajun rice dish. It will show off the best of traditional Louisiana cuisine and southern comfort food.

Choosing the Right Rice for Your Jambalaya

Choosing the right rice is key for a tasty sausage and rice dish like jambalaya. You want rice that absorbs flavors well without getting mushy. Long-grain rice is a top pick for jambalaya because it stays firm and has a light texture.

For a One-pot rice dish, the right rice balance is crucial. You might also like jasmine rice or basmati rice for their aromatic taste. Here are some tips for picking the best rice for your jambalaya:

  • Choose a long-grain rice for a lighter texture
  • Consider using jasmine or basmati rice for a more aromatic flavor
  • Avoid using short-grain rice, as it can become too sticky

By picking the right rice, your jambalaya will be both delicious and flavorful. Whether it’s a simple one-pot dish or a more complex recipe, the right rice makes a big difference.

The Art of Cooking Perfect Chicken and Chorizo Jambalaya

Making a tasty spicy jambalaya recipe needs focus and practice. To make smoky chorizo and chicken dish” , you must prepare well, master cooking, and keep an eye on timing and heat.

A classic one-pot rice dish like jambalaya is about mixing flavors and textures. Start by sautéing onions, bell peppers, and garlic. Then, add the chicken and chorizo. Finally, mix in the rice and seasonings.

  • Choose top-notch ingredients, like fresh veggies and spices.
  • Cook the chicken and chorizo until they’re brown and crispy.
  • Stir the rice constantly to avoid burning.

By sticking to these tips and honing your cooking, you’ll make a delicious spicy jambalaya recipe. It will wow your loved ones. Serve your chicken and chorizo jambalaya hot, with fresh herbs and crusty bread on the side.

Spice Level Customization Tips

When it comes to a spicy jambalaya recipe, the heat level is up to you. You can tweak the spice by adding more or less of certain ingredients. For a flavorful jambalaya with chicken, try adding diced jalapenos or serrano peppers for an extra kick.

A delicious sausage and rice dish like jambalaya can be made to your liking. Here are some tips to adjust the spice level:

  • Add a dash of hot sauce, such as Tabasco or Frank’s RedHot, for an extra kick.
  • Use milder seasonings, like paprika or garlic powder, to reduce the heat.
  • Try different types of peppers, like bell peppers or Anaheim peppers, for flavor without the heat.

Remember, the secret to a great jambalaya is to taste and adjust as you go. Don’t hesitate to add more or less of certain ingredients to match your taste. With these tips, you can make a spicy jambalaya recipe that’s just right for you.

Common Mistakes to Avoid When Making Jambalaya

Making jambalaya can be tricky. It’s easy to mess up the flavor and texture. To make a tasty and authentic jambalaya, know the common mistakes. Getting the rice just right is key.

Rice Texture Problems

Bad rice can spoil the dish. Use the right rice and follow the cooking guide. The rice should be fluffy, not too sticky or dry.

Seasoning Balance Issues

Seasoning is another big mistake. Jambalaya needs a perfect mix of spices and herbs. Too much or too little seasoning can ruin the taste.

Knowing these mistakes helps you make a great jambalaya. It will impress everyone at your table.

Serving Suggestions and Accompaniments

There are many ways to serve your delicious jambalaya with chicken. Try it with crusty bread for dipping the savory sauce. Or, pair it with a fresh salad of mixed greens, cherry tomatoes, and a light vinaigrette.

Jambalaya is great for any gathering, from casual to formal. Add garnishes like chopped scallions, diced bell peppers, or paprika. You can also offer:

  • Roasted vegetables, such as asparagus or Brussels sprouts
  • Grilled meats, like sausage or chicken
  • Steamed seafood, such as shrimp or crawfish

Use a centerpiece, like fresh fruit or flowers, to make your dish look great.

Trying different serving ideas can make your jambalaya even better. It’s perfect for family gatherings or formal events. Your guests will love the flavorful jambalaya with chicken.

Making Jambalaya Ahead: Storage and Reheating Guide

Making a smoky chorizo and chicken dish is great because you can prep it early. It’s perfect for when you’re busy or for big events. Knowing how to store and reheat it is key.

You can store your cajun rice dish in the fridge for 3 days or freeze it for 3 months. Always use airtight containers to keep it fresh.

Proper Storage Methods

  • Use airtight containers to prevent moisture and other flavors from affecting your jambalaya.
  • Label and date the containers so you can easily identify the contents and how long they’ve been stored.
  • Store the containers in the refrigerator at a temperature of 40°F (4°C) or below.

Reheating Without Losing Flavor

To reheat your smoky sausage and chicken meal without losing flavor, use the microwave, oven, or stovetop. Add a bit of water or broth to keep it moist. This helps prevent the cajun rice dish from drying out.

Regional Variations of Jambalaya

Jambalaya is a dish with many faces in traditional Louisiana cuisine. From the spicy jambalaya recipe of rural areas to the flavorful jambalaya with chicken in cities, each region has its own twist.

In Louisiana’s heart, you’ll find two main jambalaya styles: Creole and Cajun. Both share a common heritage but differ in ingredients and cooking techniques. Creole jambalaya is more refined, focusing on delicate flavors and aromas. On the other hand, Cajun jambalaya is heartier and more rustic.

Creole vs. Cajun Styles

Creole jambalaya often includes sausage, chicken, and seafood. Cajun jambalaya, however, uses sausage and chicken. Creole jambalaya is cooked more delicately to keep flavors intact.

Modern Interpretations

Recently, jambalaya has seen a modern twist. Chefs now experiment with new ingredients and techniques. You can find everything from spicy jambalaya recipe to flavorful jambalaya with chicken and sausage. Whether you prefer traditional or something new, there’s a jambalaya for you.

Health Benefits and Nutritional Information

Enjoying your sausage and rice dish is not just tasty. It’s also good for you. This easy one-pot jambalaya is a healthy meal choice. It has sausage, chicken, and veggies, which are full of important nutrients.

The sausage in jambalaya is rich in iron and zinc. The rice adds fiber and carbohydrates for energy. Plus, it’s loaded with veggies like onions, bell peppers, and tomatoes. These are full of vitamins and antioxidants.

Some key health benefits of jambalaya are:

  • High protein content to support muscle growth and repair
  • Good source of fiber to support healthy digestion
  • Rich in vitamins and minerals, such as iron and zinc

A balanced jambalaya recipe is nutritious and filling. Knowing the nutritional value of your meal lets you enjoy it guilt-free. It’s a healthy and delicious southern comfort food.

Conclusion: Mastering Your Chicken and Chorizo Jambalaya Journey

As you finish your journey with chicken and chorizo jambalaya, you now know a lot about this beloved dish from Louisiana. You’ve learned about its rich culture, key ingredients, and cooking methods. You can now make a spicy jambalaya recipe that will wow your family and friends.

You’re ready to try different versions of jambalaya, adding your own twist while keeping the tradition alive. Whether you like it more Creole or Cajun, you can make a dish that’s both tasty and true to its roots.

Jambalaya is all about being flexible. You can adjust the spice, the protein, and even the rice to your liking. Keep working on your jambalaya skills, aiming to make it even better with every try.

Start your cooking journey with excitement. Let the smells of chicken, chorizo, and veggies take you to Louisiana’s lively streets. Enjoy every bite and share your amazing chicken and chorizo jambalaya with others. It’s a dish that shows off Southern hospitality and great cooking.

FAQ

What is chicken and chorizo jambalaya?

Chicken and chorizo jambalaya is a tasty rice dish from Louisiana. It has tender chicken, flavorful chorizo sausage, and aromatic vegetables. All these ingredients are cooked together in one pot.

What are the essential ingredients for authentic chicken and chorizo jambalaya?

For real chicken and chorizo jambalaya, you need chicken, chorizo sausage, and the Holy Trinity. This includes onions, bell peppers, and celery. You also need long-grain rice, tomatoes, and Cajun or Creole seasonings.

What is the Holy Trinity of Cajun cooking and how does it impact the flavor of jambalaya?

The Holy Trinity of Cajun cooking is onions, bell peppers, and celery. These vegetables are key in many Cajun and Creole dishes, like jambalaya. They add layers of flavor and depth.

How do I choose the right type of rice for my jambalaya?

Use long-grain rice, like Basmati or Jasmine, for jambalaya. These types of rice stay firm and soak up flavors well without getting mushy.

What are some common mistakes to avoid when making jambalaya?

Avoid overcooking the rice to prevent it from becoming mushy. Also, make sure the seasoning is balanced and manage the heat to avoid burning or uneven cooking.

How can I customize the spice level of my chicken and chorizo jambalaya?

To adjust the spice, change the chorizo amount, add more or less seasoning, or add hot sauce. Start with a moderate spice and add more to your liking.

Can I make jambalaya ahead of time and reheat it?

Yes, jambalaya is great for making ahead. Cool it completely before refrigerating. Reheat it gently with a bit of broth or water to keep it moist.

What are some regional variations of jambalaya?

There are Creole and Cajun jambalayas, with Creole using tomatoes and Cajun not. Modern versions might add different proteins or veggies for a twist.

What are the health benefits and nutritional information of chicken and chorizo jambalaya?

Chicken and chorizo jambalaya is nutritious. It has protein, fiber, and complex carbs from the chicken, sausage, and rice. It’s also full of vitamins and minerals, making it a balanced meal.

“Beef Wellington Tart: 5-Star Path to Gourmet Perfection

Imagine a dish that mixes the richness of beef with the flakiness of puff pastry. This creates a truly unforgettable gourmet beef dish experience. The beef wellington tart is a masterful twist on the classic recipe, perfect for any occasion. It’s sure to impress your dinner party guests with its savory puff pastry and tender beef.

As you explore the world of beef wellington tart, you’ll find it’s easy to make. A homemade beef wellington recipe needs just a few ingredients. This makes it easy for anyone to improve their cooking skills. The result is a mouth-watering beef wellington tart that will leave your guests wanting more.

In this article, you’ll learn how to make an exquisite beef wellington tart. It’s a true showstopper for any gourmet beef dish enthusiast. You’ll learn about puff pastry, seasoning techniques, and more. This will help you create a truly exceptional culinary experience.

Key Takeaways

  • Discover the simplicity of creating a beef wellington tart from scratch
  • Learn the secrets to crafting a flaky and savory puff pastry
  • Understand the importance of selecting the right cut of beef for your tart
  • Master the art of seasoning and preparing your beef for the perfect flavor
  • Elevate your culinary skills with a homemade beef wellington recipe
  • Impress your dinner party guests with a truly unforgettable gourmet beef dish

Understanding the Beef Wellington Tart Evolution

The classic beef wellington has changed a lot over time. It now comes in a tart form that’s both fancy and tasty. This new version is perfect for special events.

The story of beef wellington is really interesting. Its change into a tart shows how creative chefs can be. Making a beef wellington tart is a big job, but it’s worth it.

Origins of Traditional Beef Wellington

The old beef wellington has a beef filet covered in duxelles, wrapped in puff pastry. It’s a favorite at fancy restaurants. Now, it’s easier for home cooks to make thanks to its tart form.

Modern Transformation into Tart Form

The beef wellington tart is easier to serve and can be made in many ways. You can add different fillings and toppings. This makes it a fun dish to try new things with.

Benefits of the Tart Variation

The tart version of beef wellington is great because it’s easy to serve and you can change it up. The pastry crust gets crisper, adding more flavor and texture. It’s perfect for any occasion, whether it’s a big event or just a regular meal.

Essential Ingredients for the Perfect Beef Wellington Tart

To make a tasty Beef Wellington Tart, you need the right ingredients. A homemade beef wellington recipe calls for top-notch beef, puff pastry, and spices.

Here are the key ingredients you’ll need:

  • 1 pound of beef fillet
  • 1/2 cup of mushroom duxelles
  • 1/4 cup of all-purpose flour
  • 1/2 teaspoon of salt
  • 1/4 teaspoon of black pepper

For an easy beef wellington recipe, choose fresh, quality ingredients. They ensure great taste and texture.

With the right ingredients and a simple recipe, you can wow your dinner guests with a Beef Wellington Tart.

IngredientQuantity
Beef fillet1 pound
Mushroom duxelles1/2 cup
All-purpose flour1/4 cup

Selecting and Preparing Your Beef Cut

Choosing the right cut of beef is key for beef wellington tart preparation. You need a cut that’s tender and full of flavor. Look for a cut with good marbling and the right thickness.

Start by picking a cut from the short loin or rib section. These are tender and taste great. You might also like a filet mignon or ribeye, depending on your taste.

Choosing the Right Cut of Beef

Some top cuts for beef wellington are:

  • Tenderloin
  • Strip loin
  • Porterhouse

After picking your cut, prepare it well. Season it with salt, pepper, and herbs or spices you enjoy.

Proper Seasoning Techniques

Seasoning is vital in beef wellington tart preparation. You want to enhance the beef’s natural flavors. Try a mix of thyme, rosemary, and garlic for extra depth.

Meat Temperature Guidelines

Cooking the beef to the right temperature is crucial. For medium-rare, aim for 130-135°F (54-57°C). For medium, cook to 140-145°F (60-63°C). Use a meat thermometer to get it just right for your dinner party main course.

Mastering the Puff Pastry Base

To make a top-notch savory puff pastry dish, like the best beef wellington, mastering the base is key. This base is the foundation of your dish. It needs careful attention to detail to achieve a flaky, buttery crust that complements the filling.

When making the base, aim for a dough that’s both flaky and tender. Use cold ingredients like butter and ice-cold water. Gently fold the dough to create layers that give your pastry its signature texture.

  • Keep your ingredients cold, as this will help to create a flaky texture
  • Don’t overwork the dough, as this can lead to a tough, dense pastry
  • Use a light touch when rolling out the dough, to avoid compressing the layers

By following these tips and practicing, you’ll soon make a delicious and appealing savory puff pastry dish. It’s perfect for serving as the best beef wellington recipe.

Creating the Classic Duxelles Filling

To make a tasty beef wellington, start with a classic duxelles filling. This filling makes the dish special. It’s a mix of sautéed mushrooms and herbs, with a bit of cream and seasoning.

When picking mushrooms, you have many choices. Button, cremini, and shiitake are popular. Each has its own taste and texture. You can pick one or mix them for more flavor.

Mushroom Selection Tips

  • Choose fresh mushrooms with no signs of spoilage
  • Opt for a variety of mushroom types for added depth of flavor
  • Consider using dried mushrooms for added umami flavor

Start by cooking the mushrooms in butter and oil until they’re soft and smell great. Add chopped herbs and a bit of cream for creaminess. Season with salt, pepper, and nutmeg to enhance the taste.

Cooking and Seasoning Process

The magic happens in cooking and seasoning. Cook the mushrooms until they’re soft and the liquid is gone. Then, add salt, pepper, and herbs to taste. Remember to adjust the seasoning as you go.

Achieving Perfect Consistency

Getting the filling just right is key. It should be creamy but not too runny. Add cornstarch or flour to thicken it. Cook until it’s hot and the flavors blend well.

Mushroom VarietyFlavor ProfileTexture
ButtonMild and earthyTender and soft
CremimiEarthy and nuttyFirm and meaty
ShiitakeRich and smokyFirm and chewy

Step-by-Step Assembly of Your Beef Wellington Tart

To make a stunning Beef Wellington Tart, start by placing the puff pastry base on a flat surface. Make sure it’s evenly rolled out. Then, spread the duxelles filling over the center, leaving a small border around the edges. This step is key to a easy beef wellington recipe that tastes great and looks good.

Next, add the beef in the center of the duxelles. Make sure it’s aligned with the pastry edges. Brush the pastry edges with water to help them stick. Then, place the second piece of puff pastry on top, pressing the edges to seal. Use a knife or pastry brush to make a decorative edge.

Remember, the secret to a great homemade beef wellington recipe is simplicity and elegance. Don’t overfill the tart, and ensure the pastry is evenly rolled out. This way, you’ll make a Beef Wellington Tart that will wow your guests.

Here’s a quick summary of the assembly process:

  • Place the puff pastry base on a flat surface
  • Spread the duxelles filling over the center of the pastry
  • Add the seasoned beef cut
  • Place the second piece of puff pastry on top
  • Seal the edges and create a decorative border

Perfecting the Baking Process

To get a perfectly baked beef wellington tart, focus on the baking process. This dish is often the main attraction at dinner parties. Its success depends on the right temperature and timing.

You want your beef wellington tart to impress your guests. It should have a flaky crust and tender filling.

When baking your beef wellington tart, consider these key factors:

  • Temperature: Preheat your oven to the correct temperature for even cooking.
  • Timing: Watch the clock to avoid overcooking, which can make the pastry dry and tough.
  • Visual doneness indicators: Look for a golden-brown crust and a cooked-through filling to know if it’s ready.

Resting and serving tips are also important for a successful dinner party main course. Let your beef wellington tart rest for a few minutes before slicing and serving. This makes each bite more flavorful and tender.

By perfecting the baking process and presenting your beef wellington tart with flair, you’ll create an unforgettable dining experience for your guests.

With these tips and a bit of practice, you’ll be well on your way to creating a show-stopping beef wellington tart. Remember to stay focused on the details. Don’t be afraid to experiment and try new things – it’s all part of the culinary journey.

Baking TemperatureBaking TimeVisual Doneness Indicators
400°F (200°C)25-30 minutesGolden-brown crust, cooked-through filling

Common Challenges and Troubleshooting

When making beef wellington tart, you might face some common problems. These can affect how good your dish tastes. Knowing how to fix these issues is key to making the best beef wellington recipe.

Some issues include a soggy crust, overcooked beef, or uneven filling. To prevent these, stick to the recipe and chill the pastry. Also, cook the beef to the perfect temperature.

Here are some tips to help you overcome common challenges:

  • Use high-quality ingredients for the best flavor and texture.
  • Avoid overworking the pastry to prevent a tough or soggy crust.
  • Cook the beef to the right temperature to avoid overcooking or undercooking.

By following these tips and being mindful of potential challenges, you can make a delicious beef wellington tart. It will impress your guests. Stay calm and patient during preparation. Don’t be afraid to try new things to find the best beef wellington recipe for you.

Wine Pairing and Serving Suggestions

Choosing the right wine for your Beef Wellington Tart can make a big difference. A red wine with moderate tannins works well. It balances the bold flavors of the beef and pastry.

For a memorable dinner, pick a wine that matches your dish’s bold tastes. Cabernet Sauvignon, Merlot, or Syrah are great choices. They have strong flavors that won’t overwhelm the dish.

Red Wine Recommendations

  • Cabernet Sauvignon: pairs well with the bold flavors of the beef
  • Merlot: offers a smooth and approachable flavor profile
  • Syrah: provides a spicy and peppery flavor to complement the pastry

Complementary Side Dishes

Think about side dishes that will make your meal even better. Roasted veggies like asparagus or Brussels sprouts are good choices. Or, a simple green salad with a light vinaigrette works well too.

These sides balance the richness of the Beef Wellington Tart. They make the meal more satisfying and complete.

Making Your Beef Wellington Tart Ahead of Time

Timing is key when making a tasty Beef Wellington Tart. You can prepare it ahead and store it safely. This way, you can enjoy it whenever you want, without the rush of last-minute prep.

To store your Beef Wellington Tart, use an airtight container in the fridge for up to 24 hours. Make sure it’s away from foods with strong smells. When you’re ready, reheat it in a 375°F oven for 15-20 minutes, until it’s golden and hot.

Storage Guidelines

  • Store in an airtight container
  • Keep away from strong-smelling foods
  • Refrigerate for up to 24 hours

Reheating Instructions

To reheat your Beef Wellington Tart, follow these steps:

  1. Preheat the oven to 375°F (190°C)
  2. Place the tart on a baking sheet
  3. Reheat for 15-20 minutes, or until golden brown and heated through

By following these easy steps, you can enjoy your Beef Wellington Tart anytime. It’s perfect for any occasion, from special events to weeknight dinners. Your Beef Wellington will surely impress everyone.

Storage MethodReheating Time
Airtight container15-20 minutes
RefrigeratorUp to 24 hours

Seasonal Variations and Creative Twists

Mastering the art of a delicious beef wellington tart opens up a world of possibilities. You can try seasonal variations and creative twists to make your dish stand out. Use fresh ingredients like wild mushrooms in fall or asparagus in spring to add new flavors and textures.

Here are some ideas for seasonal variations:

  • Summer: Add diced bell peppers or zucchini to the duxelles for color and flavor.
  • Winter: Use dried cranberries or cherries for a sweet and tangy twist.
  • Spring: Top with fresh arugula or spinach for a peppery taste and freshness.

Creative twists can include different cheeses like goat cheese or feta. You can also add spicy elements like diced jalapenos or red pepper flakes for a kick. The possibilities are endless, letting your imagination create a unique and delicious dish.

Consider this quote to inspire your creativity:

“The best recipes are the ones that are inspired by the seasons and the freshest ingredients available.”

With a bit of experimentation and creativity, you can make a beef wellington tart that’s not just delicious but also beautiful. So, don’t be afraid to try new things – your taste buds will love it!

Conclusion: Mastering Your Gourmet Beef Wellington Tart

Mastering the best beef wellington recipe in tart form is a rewarding journey. You’ve learned to choose the right beef, prepare the puff pastry, and make a tasty duxelles filling. Now, you can make a gourmet dinner party main course that will wow your guests.

With the techniques and tips shared, you’re ready to make your Beef Wellington Tart. You’ll get a golden-brown crust and tender meat. Just remember to follow the temperature and timing tips for perfect results.

Now’s the time to try out your skills and add your own twist to this classic dish. The more you practice, the better you’ll get. Soon, you’ll be a true master of the Beef Wellington Tart.

FAQ

What is a beef wellington tart?

A beef wellington tart is a fancy version of the classic dish. It has a flaky pastry crust. Inside, you’ll find a tender beef filet and a tasty mushroom filling.

What are the benefits of the tart variation compared to traditional beef wellington?

The tart version is easier to serve and customize. It looks better and tastes great. It’s a fun twist on the classic dish.

What are the essential ingredients for a homemade beef wellington tart?

You’ll need top-quality beef, puff pastry, and mushrooms for the filling. Don’t forget spices and seasonings to add flavor.

How do I choose the right cut of beef for my beef wellington tart?

Choose a tender cut like beef tenderloin or filet mignon. Season it well and cook it right for the best taste and texture.

What tips can you provide for mastering the puff pastry base?

Focus on making the pastry flaky and buttery. Roll, chill, and bake it right for the perfect crust.

How do I make the classic duxelles filling for my beef wellington tart?

To make the duxelles, choose and cook the mushrooms well. Season them right and get the filling just right.

What are the most important steps in assembling my beef wellington tart?

Assemble the tart by combining the pastry, filling, and beef carefully. Pay attention to detail for a beautiful tart.

How can I ensure my beef wellington tart is baked to perfection?

Bake it at the right temperature and time. Use visual cues and rest it well for the best results.

What are some common challenges I may face when making a beef wellington tart, and how can I troubleshoot them?

Common issues include a soggy crust or overcooked beef. Know the causes and fix them for a great tart.

What wine pairings and side dish suggestions do you have for serving a beef wellington tart?

Pair it with a bold red wine. Serve with roasted veggies or a fresh salad for a complete meal.

Can I make my beef wellington tart ahead of time, and how do I properly store and reheat it?

Yes, you can make it ahead. Store it right and reheat it well to keep the flavors and texture perfect.

What are some seasonal variations or creative twists I can try with my beef wellington tart?

Try new ingredients and flavors to keep it exciting. Use local produce or spices for a unique twist.

Salata de Boeuf: 6 Secrets to the Perfect Recipe

Imagine a dish that mixes the richness of beef with the freshness of veggies, all held together by a tangy dressing. This is what you get from a traditional Romanian salad, or salata de boeuf. It’s more than just a meal; it’s an experience that brings people together.

Exploring the beef salad, you’ll learn about its rich heritage and cultural importance. It’s a staple in many homes, great for both special occasions and everyday meals. Its unique mix of flavors and textures will have you craving more.

Key Takeaways

  • You will learn about the traditional romanian salad called salata de boeuf
  • Salata de boeuf is a festive meat salad perfect for special occasions
  • This dish combines the richness of beef with the freshness of vegetables
  • Salata de boeuf has a rich heritage and cultural significance
  • You will discover how to make salata de boeuf for your loved ones
  • Salata de boeuf is a dish that brings people together

The Rich Heritage of Salata de Boeuf

Exploring Romanian cuisine, you’ll find Salata de Boeuf is more than a recipe. It’s a cultural icon. This classic Romanian Christmas dish has been a holiday favorite for centuries. It showcases the country’s rich culinary traditions.

The origins of Salata de Boeuf are fascinating. It started in the 19th century as a way to use leftover beef. Today, it’s a beloved salad. If you want to make beef salad, it’s easy. Just mix boiled beef, veggies, and a tangy dressing.

Origins in Romanian Cuisine

Romanian cuisine is known for its hearty dishes, and Salata de Boeuf is a prime example. It’s served as a side or main course. Its enduring popularity shows its true delight.

Cultural Significance

Salata de Boeuf is deeply rooted in Romanian culture. It’s served at holidays and special events. Its presence celebrates the country’s heritage. Learning to make this delicious Romanian salad is a cultural journey.

Essential Ingredients for the Perfect Romanian Beef Salad

To make a real traditional beef, you must pick top-notch ingredients. The best recipe starts with tender beef, fresh veggies, and special condiments. These add to the taste. Choose beef, veggies, and condiments wisely for the best flavor.

For a great recipe, use ingredients that go well together. Some key ones are:

  • Beef: Pick a tender cut like top round or ribeye for juicy, tasty bites.
  • Vegetables: Go for fresh, crunchy ones like onions, carrots, and peas for texture and taste.
  • Condiments: Mix mayonnaise, mustard, and pickles for a tangy, creamy dressing.

With these ingredients and a good recipe, you can make a tasty Romanian beef salad. The quality of your ingredients affects the taste and feel of your salad. So, choose the best for a memorable meal.

Kitchen Tools and Equipment You’ll Need

To make a tasty salata , you need the right tools. Having the right utensils makes chopping, slicing, and mixing easier. This ensures your salad is perfect.

For a traditional romanian salad the right tools are key. You’ll need a sharp knife, a cutting board, and a big bowl. These tools help you prepare ingredients fast, letting you focus on cooking.

Essential Utensils

  • Sharp knife for chopping the beef and vegetables
  • Cutting board for preparing the ingredients
  • Large bowl for mixing the salata de boeuf

Optional Equipment

Some optional tools can make things easier. A food processor can chop veggies fast. A salad spinner dries lettuce leaves. These tools save time and effort, letting you focus on cooking.

With the right tools, making a delicious dish is easy. Choose fresh ingredients and follow the recipe closely. This way, your salad will be perfect.

Preparing Your Salata de Boeuf: Step-by-Step Guide

To make a tasty dish, follow a simple recipe. The secret to a great dish is in how you prepare each part. Start by cooking the meat, then the veggies, and finally, put everything together. This guide will show you how to make this traditional salad step by step.

First, prepare the meat. Boil the beef until it’s tender, then chop it into small pieces. Use a sharp knife to chop it quickly and efficiently. While the meat cooks, start chopping the onions, carrots, and potatoes.

Meat Preparation

Here are the steps for meat preparation:

  • Boil the beef in a large pot of water until it’s tender.
  • Remove the beef from the water and let it cool.
  • Chop the beef into small pieces and set it aside.

Vegetable Cooking

Cooking the veggies is the next step. Boil the chopped veggies in water until they’re tender. Add some salt and pepper to taste.

Assembly Instructions

Now, it’s time to put the this beef salad together. Mix the chopped beef, cooked veggies, and mayonnaise in a bowl. Top with chopped fresh parsley for garnish.

By following this simple recipe, you can make a delicious Romanian beef salad. It’s sure to impress your family and friends.

Traditional Decoration Techniques

When serving a festive meat salad, like a classic Romanian Christmas dish, presentation matters a lot. You want your dish to look good and make your guests excited. Traditional decoration techniques can help a lot.

Decorating your meat salad can be fun. Try using fresh herbs like parsley or dill for color. Edible flowers, like violas or pansies, can add elegance. You can also use chopped nuts or seeds for texture.

To make your dish stand out, use themed serving dishes or platters. A traditional wooden platter or a decorative ceramic bowl can be perfect. Decorative utensils, like wooden spoons or tongs, can also enhance the presentation.

Here are some tips for decorating your festive meat salad:

  • Use fresh and high-quality ingredients for the best taste and look.
  • Be creative and try different decoration methods.
  • Choose decorations that fit the theme and occasion.

By using these decoration techniques, you can make a stunning and tasty festive meat salad. It will surely impress your guests, whether it’s a traditional Romanian Christmas dish or a modern twist.

Make-Ahead Tips and Storage Guidelines

When making this Romanian salad , think about how long it takes to prepare and how to store it. This way, your dish stays fresh and tasty. You can prep the ingredients ahead of time, which is great for those with busy schedules.

Here are some tips to enhance your salata :

  • Prepare the ingredients , such as beef, vegetables, and condiments, up to a day in advance.
  • Store the prepared ingredients in separate containers to maintain their texture and flavor.
  • Assemble the salata de boeuf just before serving to ensure the best flavor and texture.

By using these tips, you can enjoy your beef salad

perfectly. The ingredients can stay fresh in the fridge for up to 24 hours. This makes it perfect for meal prep or special events.

The shelf life of salata de boeuf varies based on storage and ingredients. Usually, it lasts up to 3 days in the fridge. Always keep it in a covered container and at a steady fridge temperature.

Storage MethodShelf Life
RefrigeratorUp to 3 days
FreezerUp to 2 months

Common Mistakes to Avoid

When making a traditional romanian salad it’s key to avoid common mistakes. These can ruin the dish’s quality. To make the best salata de boeuf, know these mistakes and how to avoid them.

Some common mistakes to avoid include:

  • Overcooking the beef, which can make it tough and dry
  • Using low-quality ingredients, which can affect the flavor and texture of the salad
  • Not following the recipe, which can result in an unbalanced or incomplete dish

To create a delicious classic dish , avoid these mistakes. Use fresh, high-quality ingredients. Follow the recipe carefully. Cook the beef just right. With practice and patience, you’ll master the best salata recipe. Enjoy this traditional romanian salad at its finest.

Dietary Modifications and Substitutions

Preparing a tasty salata might require some changes to fit everyone’s taste. The recipe can be tweaked to meet various needs, making it perfect for any event. You can try different options to make your dish more inclusive and fun for all.

For a vegetarian twist, swap the beef with plant-based choices. Grilled portobello mushrooms, roasted eggplant, or sautéed spinach are great alternatives. They bring flavor and texture without losing the dish’s core. For those who can’t have gluten, use gluten-free crackers or croutons instead of bread.

Variations for Special Diets

  • Use gluten-free ingredients for the dressing and seasonings
  • Replace beef with vegetarian options like mushrooms or eggplant
  • Choose low-sodium ingredients to accommodate dietary restrictions

With these simple tweaks, you can make a beef salad, that suits everyone’s taste. Whether it’s for a big gathering or a special event, the recipe can be adjusted to please all. A bit of creativity can turn your salata de boeuf into a hit for everyone.

Serving Suggestions and Pairing Ideas

There are many ways to serve a traditional romanian salad. You can have it as a main dish, a side, or even a snack. The key is to find the right sides to enhance the flavors of the salad.

Traditional sides for this salad include mamaliga (polenta), cartofi prajiti (fried potatoes), and pain de casa (homemade bread). These sides match the salad’s flavors and add a real touch to the dish.

Modern Serving Options

You can also try new ways to serve your festive meat salad. Here are some ideas:

  • Serve it in a tarane (flatbread) bowl
  • Pair it with salata de vinete (eggplant salad)
  • Use it as a topping for a mititei (Romanian sausage) sandwich

These modern ideas can make the traditional romanian salad more exciting. They appeal to a broader audience.

Exploring different serving and pairing options can help you enjoy your traditional romanian salad more. It can become a favorite dish in your kitchen.

AccompanimentDescription
MamaligaA type of polenta that pairs well with the flavors of the festive meat salad
Cartofi prajitiFried potatoes that add a crispy texture to the dish
Pain de casaHomemade bread that complements the flavors of the salad

Special Occasion Tips

For special times like Christmas or Easter, Salata de Boeuf is a perfect choice. It can add a special touch to your menu. Here are some tips to make it memorable for your guests:

Use the best beef salad, recipe as your main dish. Decorate it with fresh herbs and edible flowers for a festive look. Here are some ideas to get you started:

  • Use a decorative bowl or platter to serve the Salata de Boeuf
  • Add some festive touches like candles, flowers, or ribbons to the table
  • Pair the Salata de Boeuf with some traditional Romanian dishes, such as sarmale or mamaliga

By following these tips, you can create a memorable and enjoyable experience. Make your special occasion even more special with a delicious beef salad, . Remember to choose the best Salata de Boeuf recipe to ensure it’s a hit.

With these special occasion tips, your Romanian salad will be a true showstopper. Create a memorable experience for your loved ones. So go ahead, give it a try, and enjoy the best beef salad recipe at your next special occasion.

OccasionDishDecoration
ChristmasSalata de BoeufFresh herbs, edible flowers
EasterSalata de BoeufCandles, ribbons

Conclusion

The traditional Romanian beef salad, is a true culinary gem. It beautifully mixes Romania’s rich heritage with today’s tastes. With the guide and tips from this article, you can make this tasty dish at home. It will surely impress your loved ones with its real flavors.

Salata de Boeuf is great as a light main dish or for special events. It’s a versatile salad that will quickly become a favorite. Enjoy the cultural richness of Romania with every bite. Bon appétit!

FAQ

What is Salata de Boeuf?

Salata de Boeuf is a tasty Romanian beef salad. It started in the 19th century to use leftover beef. Now, it’s a favorite in Romanian food.

What are the essential ingredients for Salata de Boeuf?

You need top-quality beef, onions, peppers, tomatoes, vinegar, oil, and spices for Salata de Boeuf.

What kitchen tools and equipment do I need to make Salata de Boeuf?

You’ll need knives, cutting boards, and serving dishes for Salata de Boeuf. A food processor can also help with prep.

How do I prepare Salata de Boeuf step-by-step?

Preparing Salata de Boeuf involves several steps. You’ll need to prepare the meat, cook the veggies, and assemble the salad. A detailed guide will help you make a delicious Romanian beef salad.

How can I decorate Salata de Boeuf traditionally?

Salata de Boeuf looks as good as it tastes. Use herbs, sliced veggies, or edible flowers to decorate it traditionally.

Can I make Salata de Boeuf ahead of time?

Yes, you can make Salata de Boeuf ahead of time. It’s great for busy days. Just follow the prep timeline and storage tips to keep it fresh.

What are some common mistakes to avoid when making Salata de Boeuf?

Avoid overcooking the beef and using low-quality ingredients. Stick to the recipe to make a great Romanian beef salad.

Can Salata de Boeuf be modified for different dietary needs?

Yes, you can make Salata de Boeuf for different diets. Try vegetarian or gluten-free versions to make it for everyone.

How can I serve and pair Salata de Boeuf?

Serve Salata de Boeuf with traditional or modern sides. Pair it with various dishes and drinks for a great meal.

How can I make Salata de Boeuf a centerpiece for special occasions?

Salata de Boeuf is perfect for holidays like Christmas and Easter. Add special touches like decorations and pairings to make it memorable.

Original Texas Chili Con Carne: 3 Easy Steps to Make It Perfectly

Exploring chili con carne, you’ll find the authentic Texas recipe is a Texas staple. It’s known for its bold flavors and hearty ingredients. This dish has been passed down through generations, carrying a rich history and cultural significance.

The authentic chili recipe focuses on the right ingredients and techniques. The original Texas chili con carne is a must-try for chili lovers. Its bold flavors and hearty ingredients make it a favorite dish.

Key Takeaways

  • The authentic original Texas chili con carne recipe is a staple of Texas cuisine
  • The original Texas chili con carne is known for its bold flavors and hearty ingredients
  • The authentic chili recipe has been passed down through generations
  • The dish is a favorite among chili enthusiasts across the United States
  • The original Texas chili con carne recipe is a must-try for anyone who loves chili
  • The authentic original Texas chili con carne recipe is a traditional dish with a rich history and cultural significance
  • The authentic chili recipe is all about using the right ingredients and techniques

The Rich History of Original Texas Chili Con Carne

Exploring traditional Texas chili reveals a centuries-old story. It’s a blend of Mexican, Spanish, and American flavors. Known for its bold taste and spicy kick, it’s a hit among chili lovers. Texas is the heart of spicy beef chili.

The roots of Texas chili con carne are deeply tied to the state’s culture. San Antonio’s Chili Queens were key in making it popular. They served it to both locals and visitors. Over time, different parts of Texas developed their own chili styles.

Origins in San Antonio’s Chili Queens

The Chili Queens of San Antonio were street vendors known for their chili. They mixed beef, spices, and chili peppers for a spicy dish. Their recipe has been passed down, with each cook adding their own flair.

Evolution Through Texas History

As Texas grew, so did its chili. Each region developed its own chili style, using local ingredients. From West Texas’s spicy beef to East Texas’s milder chili, each has its own twist.

RegionChili Style
West TexasSpicy beef chili
East TexasMilder chili
San AntonioTraditional Texas chili

Why No Beans in Traditional Texas Chili

Traditional Texas chili is known for not having beans. This debate among chili fans is ongoing. The focus is on the beef and spices, creating a rich broth without beans.

Essential Ingredients for Authentic Texas Chili

Making a tasty homemade chili con carne starts with the right ingredients. Choose the best to make your beef chili recipe flavorful. Use chuck or brisket beef for slow cooking.

Choosing the right chili peppers is key. Pick from jalapenos, serranos, or Anaheim peppers for heat. Don’t forget fresh spices like cumin, garlic, and oregano for depth.

Here are the must-haves for your homemade chili con carne:

  • Grass-fed beef
  • Fresh chili peppers
  • Onions and garlic
  • Cumin and other spices
  • Tomato paste or diced tomatoes

With these top-notch ingredients, your beef chili recipe will be rich and flavorful. Quality ingredients make a great homemade chili con carne. So, don’t cut corners.

IngredientQuantity
Beef1 lb
Chili peppers2-3
Onions1
Garlic3 cloves

Choosing and Preparing Your Meat

Choosing the right meat is key to making the best chili in Texas. For a classic texan chili, pick a cut of beef that’s full of flavor and tender. You can choose from chuck, brisket, or round. Each has its own special qualities, so think about what you want in your chili.

To get your meat ready, trim it well. This means removing extra fat and cutting it into small, even pieces. Good meat trimming is important for tender and tasty chili. Also, browning your meat before adding it to the chili enhances the beefy flavor of a classic texan chili.

Best Cuts of Beef for Chili Con Carne

  • Chuck: This cut is known for its rich, beefy flavor and is a popular choice for chili.
  • Brisket: This cut is tender and flavorful, making it a great option for a classic texan chili.
  • Round: This cut is leaner than chuck or brisket, but still packed with flavor.

By picking the right beef and preparing it well, you’re on your way to a delicious, authentic classic texan chili. It’s sure to impress anyone. Whether you’re an experienced chili cook or just starting, using quality ingredients and proper preparation is the secret to the best chili in Texas.

Authentic Texas chili con carne relies heavily on its spice blend. It combines chili peppers, cumin, and garlic for a unique taste. To make a real Texas chili, you must balance these spices and seasonings.

A typical spice blend for Texas chili con carne includes:

  • Chili peppers, such as ancho or guajillo
  • Ground cumin
  • Garlic powder
  • Paprika
  • Cayenne pepper

These spices and seasonings are key to a real chili recipe. By mixing the flavors of these ingredients, you’ll make a delicious Texas chili con carne.

The secret to great Texas chili con carne is its spice blend. Using top-notch chili con carne ingredients and a true recipe, you’ll make a dish that’s true to Texas.

Traditional Cooking Methods and Techniques

Preparing authentic homemade chili con carne requires the right cooking method. You want your beef chili recipe to be rich and flavorful. Traditional cooking techniques are key to achieving this.

Start with cast iron cookware for slow cooking. It distributes heat evenly. This cookware is great for chili, as it creates a flavorful crust on the bottom.

Temperature Control Tips

Temperature control is vital when cooking beef chili. You need low, steady heat for flavors to blend. Here are some tips:

  • Use a thermometer to monitor the temperature of your cookware
  • Adjust the heat as needed to maintain a steady temperature
  • Avoid overheating, as this can cause the chili to become tough and dry

Cooking Time Guidelines

Cooking time varies with cookware and heat. Generally, cook your chili for at least an hour. Stir occasionally to meld flavors and tenderize the meat.

Mastering the Perfect Chili Consistency

To get the perfect original texas chili con carne, it’s key to know about simmering and thickening. Simmering the chili for a long time lets the flavors mix well. This makes a rich and spicy beef chili experience.

Here are some tips for the perfect chili consistency:

  • Use the right ratio of meat to liquid, ensuring that the chili is not too thick or too thin.
  • Simmer the chili for at least an hour to allow the flavors to meld together.
  • Use thickening agents such as cornstarch or flour to achieve the desired consistency.

By following these tips, you’ll make a delicious and authentic original texas chili con carne. The secret to a great spicy beef chili is slow simmering. This lets the flavors grow and the texture thicken.

Common Mistakes to Avoid When Making Texas Chili

Making traditional Texas chili can be tricky. There are common mistakes that can ruin the dish. To make the best chili, know these errors and avoid them. Pay attention to temperature, spicing, and texture.

Common mistakes include temperature control errors, spicing mishaps, and texture problems. These can affect the chili’s taste and feel.

Temperature Control Errors

Temperature is key when making Texas chili. If it’s too hot, the chili can burn or get too thick. If it’s too cold, it won’t cook right, making it unpleasant.

Spicing Mishaps

Spicing is crucial for the best chili. Too much or too little spice can mess up the flavor. Taste and adjust as you go to get the perfect taste.

Texture Problems

Texture matters a lot in Texas chili. If ingredients aren’t cooked right, the chili can be too thick or thin. Cook until tender and adjust to your liking.

Knowing these mistakes and avoiding them can make a delicious Texas chili. With practice, you’ll get it just right. Enjoy the best chili in Texas.

MistakeEffect on ChiliSolution
Temperature Control ErrorsAffects texture and flavorMonitor temperature closely
Spicing MishapsThrows off flavor profileTaste and adjust seasoning
Texture ProblemsAffects overall textureCook ingredients until tender

Regional Variations of Texas Chili Con Carne

As you travel through Texas, you’ll find many classic texan chili variations. Each region has its own special taste and ingredients. From West Texas’s spicy chili to East Texas’s milder versions, every area puts its own spin on chili con carne ingredients.

Some notable regional variations include:

  • North Texas: known for its beef-based chili, often made with chili con carne ingredients like ground beef, tomatoes, and beans.
  • South Texas: famous for its venison-based chili, which adds a rich, gamey flavor to the traditional classic texan chili recipe.
  • West Texas: home to some of the spiciest chili in the state, often made with chili con carne ingredients like jalapenos, habaneros, and other hot peppers.

These regional variations show the diversity and creativity of Texas chili. They offer a lot of inspiration for your own classic texan chili recipes. Whether you like spicy chili or prefer it milder, there’s something for everyone.

Exploring these regional variations helps you appreciate Texas’s rich chili history and culture. It also inspires you to make your own unique chili recipes with traditional classic texan chili ingredients.

RegionChili StyleKey Ingredients
North TexasBeef-basedGround beef, tomatoes, beans
South TexasVenison-basedVenison, onions, garlic
West TexasSpicyJalapenos, habaneros, hot peppers

Authentic Serving Suggestions and Garnishes

Serving your chili right can make a big difference. You’ve worked hard on your homemade chili con carne. Now, it’s time to show it off. Classic choices like cornbread, salad, and crusty bread are great with your chili.

When serving Texas chili, keep it simple. Don’t add too many toppings or sides. Let your chili’s flavors be the star. For something new, try these:

  • Fresh cilantro or scallions for added freshness
  • A dollop of sour cream or Greek yogurt for a tangy contrast
  • Crispy tortilla strips or croutons for a satisfying crunch

How you serve your chili matters a lot. Simple and authentic presentation lets your chili’s true flavors shine. This will make your guests remember the meal.

With these tips, your homemade chili con carne will impress everyone. Be creative and serve your chili with pride!

Traditional AccompanimentsModern Serving Ideas
CornbreadFresh cilantro or scallions
SaladSour cream or Greek yogurt
Crusty breadCrispy tortilla strips or croutons

Conclusion: Preserving the Legacy of True Texas Chili

Exploring the world oforiginal Texas chili con carne reveals a deep history and cultural importance. Modern twists are interesting, but sticking to the traditionalbeef chili recipe is key to keeping true Texas chili alive.

The Chili Queens of San Antonio and the dish’s evolution in Texas are vital parts of its story. Learning about the ingredients, techniques, and serving customs helps keep the authentic flavors and cultural heritage alive for future generations.

Enjoying Texas chili is more than just a meal. It’s a chance to connect with a tradition that has deeply influenced Texas’s culinary scene. With every bite, you celebrate a part of Texas’s rich history and culture.

FAQ

What makes the original Texas chili con carne recipe authentic?

The authentic Texas chili con carne recipe is known for its bold flavors and hearty ingredients. It has a rich history, passed down through generations in Texas. The dish’s origins are tied to San Antonio’s Chili Queens.

The recipe is authentic because it doesn’t include beans. It uses high-quality, carefully selected ingredients. This makes it truly authentic.

Why are there no beans in traditional Texas chili?

Traditional Texas chili con carne doesn’t have beans. This is because it comes from Mexico’s culinary traditions. Chili was originally made without beans there.

The absence of beans is key to authentic Texas chili. It focuses on the rich, spicy flavors of the chili itself.

What are the essential ingredients for making authentic Texas chili con carne?

Essential ingredients include high-quality beef and a blend of dried chili peppers. Cumin, garlic, and other spices are also crucial. The quality of these ingredients greatly affects the dish’s flavor and authenticity.

What are the best cuts of beef to use for Texas chili con carne?

The best cuts for Texas chili con carne are chuck, brisket, or shoulder. These are well-suited for slow cooking. They become tender and flavorful during the long cooking process.

Proper meat trimming and browning are also key. They help achieve the perfect texture.

What is the secret spice blend that makes Texas chili con carne authentic?

The secret spice blend includes chili peppers, cumin, garlic, and other spices. This blend is critical for the dish’s unique flavor. It sets Texas chili apart from other types of chili.

What are some common mistakes to avoid when making Texas chili con carne?

Common mistakes include temperature control errors and spicing mishaps. The right balance of spices is essential for authentic flavors. Texture problems, like tough meat or watery chili, can also be avoided with proper techniques.

What are some of the regional variations of Texas chili con carne?

Texas chili con carne has many regional variations. From spicy chili in West Texas to milder versions in East Texas, each region has its own twist. These variations often use different meats or unique spice blends.

Florentine style Steak: The 5-Star Italian Delight

Imagine sinking your teeth into a tender, juicy Florentine style steak

The rich flavors take you straight to Italy’s heart. This

Authentic Florentine steak

experience is a mix of tradition, culture, and amazing taste. It’s a must-try for steak lovers. Its roots in Italian cuisine make it a fine dining favorite.

It’s known for its unique cooking methods and top-notch quality.

Let’s dive into the world of

Florentine style steak

. We’ll see what makes it so unique, from its history to cooking secrets. Whether you’re a foodie or new to

traditional Florentine steak

, this trip will deepen your love for Italian cuisine.

Key Takeaways

  • Discover the rich history and cultural significance of Florentine style steak
  • Learn the secrets of preparing an authentic Bistecca alla Fiorentina
  • Explore the unique characteristics of traditional Florentine steak
  • Understand the importance of quality ingredients in Florentine style steak
  • Get insider tips on how to cook the perfect authentic Florentine steak

The Rich Heritage of Florentine Style Steak

Florentine style steak, also known as Bistecca alla Fiorentina, has a long history. It comes from Tuscany’s culinary traditions. To enjoy the best Bistecca alla Fiorentina recipe, knowing its origins is key. The traditional cooking method is deeply rooted in Tuscan culture, making it a beloved Italian grilled steak.

The cultural importance of Florentine steak in Italian cuisine is clear. It’s a dish that brings families together. The traditional Tuscan steak recipe has been passed down through generations, with each family adding their own twist. Whether you want to try the best Tuscan T-bone steak or learn how to cook it like a pro, understanding its heritage is essential.

Origins in Tuscany’s Culinary History

Tuscany’s culinary history is filled with hearty dishes made with local ingredients. The region’s cattle farms raised high-quality beef, which became the star ofBistecca alla Fiorentina . The traditional recipe focuses on using the finest ingredients and cooking techniques to highlight the steak’s natural flavors.

Evolution Through the Centuries

Over the centuries, Bistecca alla Fiorentina has evolved with new ingredients and cooking techniques. Yet, its core remains the same. It has become a key part of Italian cuisine, enjoyed worldwide. Today, you can find variations of the best Traditional Florentine beef in restaurants globally, each with its own twist on the classic Tuscan steak recipe.

Cultural Significance in Italian Cuisine

In Italian cuisine, Italian grilled steak is more than a dish; it’s a symbol of tradition and community. The traditional cooking method is often passed down through generations, with each family adding their own secret ingredients and techniques. Whether you’re looking to try the best Florentine steak recipe or simply want to learn more about Tuscan steak recipe’s cultural significance, its importance in Italian cuisine is undeniable.

What Makes a True Florentine Style Steak Special

A true authentic Tuscan T-bone steak is a culinary masterpiece from Tuscany. It’s made with the finest ingredients for an unforgettable meal. The steak’s char and tender texture show the region’s cooking skill.

Some key factors that set a true Florentine style steak apart include:

  • High-quality meat, carefully sourced from local farms to guarantee tenderness and flavor
  • Traditional cooking methods, such as grilling over wood fires, to infuse the steak with a unique smoky flavor
  • Attention to detail, from the precise seasoning to the presentation, to create a truly immersive culinary experience

In a traditional Bistecca alla Fiorentina house, every detail is thought out. It’s like dining in Tuscany’s sun-kissed hills. Food lovers can see the hard work and dedication in every bite.

Enjoying a traditional Florentine steak is like tasting history. Whether in a Florence style steakhouse or at home, the secret is in the tradition and ingredients. These make the dish truly special.

Essential Characteristics of Authentic Bistecca alla Fiorentina

To truly enjoy Bistecca alla Fiorentina, knowing its key traits is crucial. When learning how to cook Florentine steak, focus on the right cut, meat quality, and size. These elements are key to a great steak and the success of Florentine steak seasoning.

Specific Cut Requirements

The cut of meat is key for an authentic Bistecca alla Fiorentina. It should come from the rear of the short loin, near the spine. This area is tender and flavorful, perfect for the best Florentine steak recipe.

Meat Quality Standards

Meat quality is vital for an authentic Bistecca alla Fiorentina. The steak should be from high-quality beef, preferably from a trusted source. It should be fresh, with just the right amount of marbling for tenderness and flavor.

Traditional Size and Thickness

The traditional size and thickness of a Bistecca alla Fiorentina matter too. It should be about 1.5 to 2 inches thick, serving one or two. This size ensures even cooking and a beautiful presentation of the Florentine steak seasoning.

Selecting the Perfect Cut for Your Florentine Steak

Choosing the right cut of meat is key to a traditional Florentine steak. A high-quality cut makes the dish taste better and feel more tender. Look for a cut that’s thick, juicy, and has a good mix of marbling and tenderness.

In a Florence style steakhouse, chefs pick cuts from the rib or loin. These areas have the most tender and flavorful meat. The cut should be 1-2 inches thick to cook it just right. For an authentic Florentine steak, the T-bone or porterhouse is best. It has both the sirloin and tenderloin.

Here are some tips for selecting the perfect cut:

  • Look for a cut with a good balance of marbling and tenderness
  • Choose a cut that is at least 1-2 inches thick
  • Consider the T-bone or porterhouse cut for an authentic Florentine steak

By following these tips, you’ll make a delicious and authentic traditional Florentine steak. It will impress everyone. Whether you’re at a Florence style steakhouse or cooking at home, the quality of the cut is what matters most.

Cut of MeatThicknessMarbling
T-bone1-2 inchesGood balance
Porterhouse1-2 inchesGood balance

Traditional Florentine Steak Seasoning Techniques

To get the real taste of Florentine steak, knowing the traditional seasoning ways is key. The secret to a tasty Florentine steak seasoning is finding the right mix of herbs and spices. When you learn how to cook Florentine steak, remember that seasoning is as important as cooking.

A traditional Florentine steak seasoning usually has salt, black pepper, and fresh herbs like rosemary and thyme. The best Florentine steak recipe often involves rubbing the steak with these herbs and spices. Then, let it sit for a while to let the flavors soak into the meat.

  • Using garlic and lemon zest to add a bright, citrusy flavor
  • Adding a pinch of red pepper flakes for a spicy kick
  • Mixing in some chopped fresh parsley for a fresh, herbaceous note

Seasoning is just the start when it comes to how to cook Florentine steak. By using old techniques and top-notch ingredients, you can make a truly authentic and tasty Florentine steak. It’s sure to wow anyone.

Seasoning IngredientQuantityPurpose
Salt1-2 tablespoonsEnhances flavor and texture
Black pepper1-2 teaspoonsAdds depth and complexity
Fresh herbs (rosemary, thyme, etc.)1-2 tablespoonsProvides aromatic flavor and fragrance

Master the Art of Cooking Florentine Steak

To cook Florentine steak like a pro, you need to know the traditional ways. How to cook Florentine steak is a common question. The answer is simple: use quality ingredients and follow the traditional cooking methods.

A traditional Florentine steak is grilled to perfection. It gets a nice char on the outside and stays juicy inside. The secret is to cook it to medium-rare. Use a thermometer to check the steak’s internal temperature.

  • Use fresh herbs and extra-virgin olive oil for the best taste.
  • Don’t overcrowd the grill or grill pan for even cooking.
  • Let the steak rest for a few minutes before serving. This lets the juices spread evenly.

Follow these tips and use a traditional Florentine steak recipe. You’ll make a dish that’s full of flavor and true to its Italian roots. With time and effort, you’ll become a pro at cooking Florentine steak. Your friends and family will be impressed by your cooking skills.

Common Mistakes to Avoid When Preparing Bistecca alla Fiorentina

When making an authentic Florentine steak, details matter a lot. A traditional steak, found in Florence style steakhouses, needs careful temperature control, seasoning, and resting. This ensures the perfect taste and texture.

To make a delicious, authentic dish, here are some mistakes to steer clear of:

  • Temperature control errors: Cooking the steak at the wrong temperature can result in an overcooked or undercooked dish.
  • Seasoning mistakes: Using the wrong seasonings or seasoning at the wrong time can alter the flavor of the steak.
  • Resting time issues: Not allowing the steak to rest for the recommended time can result in a loss of juices and flavor.

A genuine authentic Florentine steak, found in traditional Florence style steakhouses, is a culinary delight. It needs attention to detail and traditional methods. By avoiding common mistakes and following traditional techniques, you can create a truly delicious and authentic traditional Florentine steak.

Remember, practice makes perfect, and with patience and attention to detail, you can master the art of preparing an authentic Florentine steak, just like those served in the heart of Florence.

MistakeConsequenceSolution
Temperature control errorsOvercooked or undercooked steakUse a thermometer to ensure accurate temperature control
Seasoning mistakesAltered flavorUse traditional seasonings and season at the right time
Resting time issuesLoss of juices and flavorAllow the steak to rest for the recommended time

Perfect Wine Pairings for Your Florentine Steak

Enjoying a delicious Florentine steak is even better with the right wine. Whether you’re dining out or cooking at home, picking a wine that matches the steak’s flavors is key. Top restaurants for Florentine steak often have a wide wine selection, but you can choose wisely with some knowledge.

A great seasoning for your steak can highlight its natural taste. The right wine can make this even better. For a traditional Tuscan taste, try a Chianti Classico or a Brunello di Montalcino. These wines have bold flavors and high acidity, perfect for cutting through the steak’s richness.

Traditional Tuscan Wines

  • Chianti Classico: a classic Tuscan wine with bright acidity and moderate tannins
  • Brunello di Montalcino: a full-bodied wine with high acidity and firm tannins
  • Vernaccia di San Gimignano: a crisp and refreshing white wine with citrus notes

International Wine Options

For international wines, consider a Cabernet Sauvignon from California or a Malbec from Argentina. These wines have rich, full-bodied flavors that match the bold taste of the Florentine steak.

WineOriginFlavor Profile
Chianti ClassicoTuscany, ItalyBright acidity, moderate tannins
Cabernet SauvignonCalifornia, USARich, full-bodied, high tannins

Top Restaurants Serving Authentic Florentine Steak in Florence

Looking for where to eat Florentine steak? Traditional restaurants in Florence are the place to go. They offer a unique dining experience. Here, you can enjoy the rich flavors and characteristics of this Italian specialty.

To find the top restaurants for Florentine steak, look for places that use high-quality ingredients and traditional cooking methods. Some popular options include:

  • Trattoria Sostanza, known for its classic Florentine steak
  • Il Latini, a traditional restaurant serving authentic Tuscan cuisine
  • La Giostra, a historic restaurant offering a range of Florentine specialties

Supporting local businesses and traditional restaurants helps preserve Florence’s cultural heritage and traditional cuisine. So, when searching for where to eat Florentine steak, choose a restaurant that serves authentic Florentine steak and supports the local community.

RestaurantAddressPhone Number
Trattoria SostanzaVia del Porcellana, 25r+39 055 212242
Il LatiniVia de’ Palchetti, 6r+39 055 210916
La GiostraBorgo Pinti, 12r+39 055 241341

Bringing Florence to Your Kitchen: Tips from Italian Chefs

To make a real traditional Florentine steak, follow Italian chefs’ advice. Learn the best Florentine steak recipe to bring Florence’s flavors home.

Professional Secrets

Italian chefs stress the need for top-notch ingredients and traditional cooking methods. Here are some secrets:

  • Choose a thick T-bone or porterhouse steak.
  • Season with salt, black pepper, and extra-virgin olive oil.
  • Cook over high heat for a crispy crust.

Equipment Recommendations

For the perfect traditional Florentine steak, you need the right tools. Use a cast-iron skillet or grill pan, a meat thermometer, and a sharp knife.

By using these tips, you can make a tasty and authentic best Florentine steak recipe. It will take you straight to Florence’s heart.

Conclusion: Embracing the Timeless Tradition of Florentine Steak

The Florentine style steak is more than just a delicious meal. It shows the deep culinary history of Italy. For centuries, Italian chefs have worked hard to make this traditional Florentine steak perfect.

Learning about the Florentine style steak helps us enjoy its special flavors and cooking methods. You can enjoy it at a famous Florentine restaurant or make it at home. Either way, diving into the tradition of the authentic Florentine steak is a rewarding experience.

FAQ

What is Florentine style steak?

Florentine style steak, also known as Bistecca alla Fiorentina, is a traditional Italian dish. It comes from the Tuscany region of Italy. This steak is a thick, bone-in T-bone or porterhouse, cooked with special methods and seasonings.

What makes Florentine style steak unique?

Several things make Florentine style steak special. It uses high-quality, locally-sourced beef. It’s grilled over charcoal or wood fire. The seasoning is simple: just salt, pepper, and sometimes rosemary.

This results in a flavorful, tender, and juicy steak. It highlights the natural taste of the meat.

How is Florentine steak prepared?

To prepare Florentine steak, it’s grilled over high heat. This is often done with charcoal or wood fire. The steak is seasoned with salt and pepper, and sometimes rosemary.

The goal is to sear the outside while keeping the inside rare to medium-rare. This gives it a unique texture and flavor.

What is the ideal size and thickness for a Florentine steak?

The traditional Florentine steak is very thick. It’s 1.5 to 2 inches thick and can weigh up to 3 to 4 pounds. Its large size and thick cut are key for the perfect balance of charred outside and rare to medium-rare inside.

What type of meat is used for Florentine steak?

Authentic Florentine steak comes from high-quality, locally-sourced beef. This is often from Chianina or Maremmana cattle breeds native to Tuscany. The meat is well-marbled and of exceptional quality for the best flavor and texture.

How should Florentine steak be seasoned?

The seasoning for Florentine steak is simple. It’s just salt and pepper. Some recipes might include a sprig of fresh rosemary. But the focus is on letting the natural flavors of the beef shine. Too much seasoning is avoided to keep the authentic taste.

What are the best wine pairings for Florentine steak?

Full-bodied red wines from Tuscany pair well with Florentine steak. Chianti, Brunello di Montalcino, or Montepulciano d’Abruzzo are good choices. These wines complement the rich, beefy flavors of the steak.

Where can I find authentic Florentine steak in Florence?

In Florence, top restaurants for Florentine steak include Trattoria Sabatino, Osteria dell’Enoteca, and Buca Mario. These places pride themselves on using the finest local ingredients and traditional Florentine methods.

How can I recreate the authentic Florentine steak experience at home?

To make authentic Florentine steak at home, use high-quality, locally-sourced beef. You’ll need a hot grill or broiler and a light touch with seasoning. Pay attention to cooking times and temperatures, and let the steak rest properly. This will help you achieve the perfect Florentine-style dish.

Chicken Scarpaniello : 5 Easy Steps to Perfection

Exploring Italian cuisine, you’ll find chicken scarpaniello. It’s a dish full of bold flavors and rich history. This spicy chicken recipe is loved in Italy and around the world. It comes from Southern Italy, showing the country’s culinary skill.

The Italian chicken recipe is more than just a dish. It’s a part of Italian culture. It’s made with hot cherry peppers, garlic, and white wine. These ingredients mix to create a unique taste that makes it stand out.

Key Takeaways

  • Chicken scarpaniello is a traditional italian chicken dish with a rich history in Southern Italy.
  • The dish is known for its bold flavors, which are achieved by combining chicken with hot cherry peppers, garlic, and white wine.
  • Chicken scarpaniello is a popular spicy chicken recipe that has gained worldwide recognition.
  • The cultural significance of chicken scarpaniello is deeply rooted in Italian cuisine and tradition.
  • Preparing chicken scarpaniello requires attention to detail and the use of high-quality ingredients.
  • Chicken scarpaniello can be served with a variety of side dishes, making it a versatile option for any meal.

The Rich History of Chicken Scarpaniello in Italian Cuisine

Exploring traditional Italian cuisine, you’ll find Chicken Scarpaniello is a favorite dish with a deep history. It comes from Southern Italy, where it was a peasant dish. Over time, it spread across Italy, becoming a key part of Italian comfort food.

This dish is special because it brings people together. It’s a hit at family gatherings and special events. The smell of sizzling sausage and chicken fills the air, making everyone happy.

Origins in Southern Italy

Southern Italy is famous for its bold flavors and hearty dishes. Chicken Scarpaniello is a perfect example. It uses fresh ingredients like garlic, onions, and hot peppers, mixed with sausage and chicken.

Evolution of the Recipe

The recipe for Chicken with sausage and peppers has changed over time. Different parts of Italy have added their own touches. Some add white wine, while others spice it up with hot peppers. But the core ingredients of chicken, sausage, and veggies stay the same.

Cultural Significance

This spicy chicken skillet is more than a meal; it’s a sign of Italian hospitality and community. It’s a favorite at family gatherings and special events. Sharing it with loved ones creates a warm and welcoming atmosphere.

RegionVariationIngredients
Southern ItalyClassicChicken, sausage, garlic, onions, hot peppers
Northern ItalyWhite wine variationChicken, sausage, garlic, onions, white wine
Central ItalySpicy variationChicken, sausage, garlic, onions, hot peppers, red pepper flakes

Essential Ingredients for the Perfect Chicken Scarpaniello

To make a real dish, you need some key ingredients. You’ll need chicken breast or thighs, hot cherry peppers, garlic, white wine, and Italian seasonings. The quality of these ingredients is very important. It greatly affects the taste of the dish.

When you’re making this italian dish, remember these important ingredients:

  • Chicken breast or thighs
  • Hot cherry peppers
  • Garlic
  • White wine
  • Italian seasonings

These ingredients are found in most Italian markets or well-stocked supermarkets. As you collect them, you’ll see how simple and elegant this classic easy recipes is. With these ingredients, you can make a tasty and authentic Spicy chicken and sausage that will wow everyone.

https://www.youtube.com/watch?v=VjXkTfiRWIA

Using top-quality ingredients and a traditional recipe, you can enjoy a delicious and satisfying chicken dish for any event. Whether you’re an experienced chef or just starting out, this easy recipes will quickly become a favorite.

Understanding the Unique Flavors of Traditional Chicken Scarpaniello

This Chicken with sausage and peppersis a spicy Italian dish loved for its bold flavors. It combines hot cherry peppers, garlic, and white wine for a unique taste. When making this recipe, it’s key to balance the flavors for the best taste.

The hot cherry peppers in Chicken recipe give it a spicy kick. Garlic and herbs add depth and aroma. The white wine balances the flavors, making a rich sauce that goes well with the chicken. This recipe is a favorite in Italian cooking, thanks to its balanced flavors.

The Flavor Profile

To enjoy Chicken Scarpaniello’s unique flavors, know the parts that make it. Key elements include:

  • Hot cherry peppers, which add a spicy kick
  • Garlic and herbs, which provide depth and aroma
  • White wine, which helps to balance the flavors and create a rich sauce

By mixing these ingredients, you’ll make a tasty Classic scarpariello recipe. This dish is a true Italian classic, with a spicy flavor that will make you want more.

Step-by-Step Preparation Guide

To make an authentic Scarpaniello, follow a few simple steps. This dish is a classic in Italian cuisine. With these recipes, you can make a tasty chicken and sausage dish at home.

Start by seasoning and browning the chicken in a pan. This step gives the chicken a crispy outside and a juicy inside. Then, mix hot cherry peppers, garlic, and white wine to make the signature sauce.

Preparing the Chicken

This step is key to a flavorful dish. Here are some tips for preparing the chicken:

  • Season the chicken with salt, pepper, and your favorite herbs
  • Brown the chicken in a pan with some olive oil
  • Set the chicken aside and proceed with creating the sauce

Creating the Signature Sauce

The sauce is what makes Scarpaniello special. To make the sauce, you’ll need:

IngredientQuantity
Hot cherry peppers2-3
Garlic3-4 cloves
White wine1 cup

With these recipes, you can make a delicious chicken and sausage dish. It’s sure to impress your family and friends. Remember to balance the flavors and adjust the seasoning for the perfect taste.

Common Mistakes to Avoid When Making Chicken Scarpaniello

When making this italian dish, watch out for common mistakes. Overcooking the chicken is a big one. It can make the chicken dry and tough, ruining the taste of your chicken . Cook the chicken until it’s just done, then let it rest before serving.

Another mistake is not balancing the flavors in your spicy chicken recipe. This can make the dish too spicy or too bland. To get it right, taste the sauce as you go and adjust the seasoning. Adding a bit of lemon juice can also brighten the flavors.

Here are some additional tips to keep in mind:

  • Use high-quality ingredients, including fresh hot cherry peppers and good quality wine.
  • Don’t overcomplicate the recipe is a simple, rustic dish that’s meant to be hearty and flavorful.
  • Let the dish rest for a few minutes before serving, allowing the flavors to meld together.

By following these tips and avoiding common mistakes, you can make a delicious italian dish. The secret to a great spicy chicken recipe is balance and restraint. Don’t be afraid to experiment and adjust the flavors to your taste.

MistakeSolution
Overcooking the chickenCook until just done, then let rest
Unbalanced flavorsTaste and adjust seasoning as you go
Using low-quality ingredientsChoose fresh, high-quality ingredients

Pairing Your Chicken Scarpariello With Side Dishes

Traditional Italian cuisine shines when paired with the right side dishes. Classic scarpariello recipe is no exception. You can pick from many options that enhance its rich flavors. Whether it’s classic Italian comfort food or simple recipes, there’s something for everyone.

Traditional Italian Accompaniments

Classic side dishes like pasta, risotto, and polenta are perfect with Scarpariello. They soak up the sauce beautifully. Don’t forget about garlic bread or a caprese salad for a taste of Italy.

Modern Serving Suggestions

For a fresh twist, try roasted vegetables, sautéed spinach, or grilled asparagus. These add color and freshness. They also complement the Scarpariello well. Other great choices include:

  • Roasted sweet potatoes
  • Grilled bell peppers
  • Sautéed mushrooms

Choosing the right side dishes makes for a complete and tasty meal. It highlights the beauty of traditional cuisine and simple recipes.

Tips for Achieving Restaurant-Quality Results at Home

To get restaurant-quality chicken scarpaniello, pay attention to the details. Use fresh chicken and hot cherry peppers for the best taste.

Here are some tips for a great scarpaniello:

  • Cook slowly to let flavors mix well.
  • Add Italian seasonings for depth in the sauce.
  • Don’t overcook the chicken to keep it juicy.

Follow these tips and improve your cooking. You’ll make a chicken scarpaniello as good as any restaurant. Remember, the key to a great italian dish is in the details, so don’t be afraid to experiment and try new things.

With patience and practice, you’ll enjoy a delicious scarpaniello at home.

Regional Variations and Family Recipes

Classic scarpariello recipe is a dish that has grown and changed over time. Different places have added their own special touches. In Italy, it’s spicy with hot cherry peppers. In New York, it’s savory with sausage and peppers.

In the United States, Italian-American versions of chicken scarpariello are very popular. Restaurants across the country offer their own takes on this classic dish. Each version has its own unique flavors and ingredients.

New York Style Adaptations

In New York, chicken scarpariello is made with sausage and peppers. It’s a hearty dish perfect for cold winter nights. This version is a favorite in Italian-American cuisine.

Italian-American Interpretations

Italian-American cooks mix traditional ingredients with new ideas. They add cherry tomatoes or fresh basil for extra flavor. Chicken scarpariello’s many variations show the creativity and passion of Italian-American cooks.

Make-Ahead and Storage Guidelines

Preparing a tasty chicken scarpaniello, an italian chicken dish, is easy. You can make it ahead and store it in the fridge or freezer. This makes it perfect for busy weeknights.

To prepare ahead, cook the chicken scarpaniello a day before and chill it. You can also freeze it in a sealed container or bag. Here are some tips:

  • Keep the chicken scarpaniello chilled at 40°F (4°C) or below in the fridge.
  • Freeze it at 0°F (-18°C) or below.
  • Reheat it to 165°F (74°C) to ensure it’s safe to eat.

By following these tips, you can enjoy your chicken scarpaniello whenever you like. It’s a flavorful italian chicken dish with a spicy chicken recipe.

These guidelines make it easy to have a tasty chicken scarpaniello ready when you need it. It’s great for busy people or home cooks who love to try new recipes.

Storage MethodTemperatureShelf Life
Refrigerate40°F (4°C)1-2 days
Freeze0°F (-18°C)3-4 months

Conclusion: Mastering the Art of Chicken Scarpaniello

Classic scarpariello recipe is a beloved dish in Italian cuisine. By following the recipes and techniques in this article, you can make it in your kitchen. It’s all about your passion for authentic, flavorful dishes.

Explore the rich history and cultural importance of this iconic dish. Try different flavors and cooking methods. With time and practice, you’ll make scarpaniello that wows everyone. Enjoy the mix of juicy chicken, bold spices, and herbs.

FAQ

What is Chicken Scarpaniello?

Chicken Scarpaniello is a tasty Italian dish from Southern Italy. The name “Scarpaniello” means “little shoe” in Italian, because of the chicken’s shape. It’s famous for its bold taste, made with chicken, hot cherry peppers, garlic, and white wine.

What are the essential ingredients for Chicken Scarpaniello?

To make Chicken Scarpaniello, you need chicken, hot cherry peppers, garlic, white wine, and Italian seasonings. Using high-quality ingredients is key to its great flavor.

What unique flavors does Chicken Scarpaniello offer?

Chicken Scarpaniello’s flavors come from hot cherry peppers, garlic, and white wine. The peppers add spice, while garlic and herbs give depth. The wine balances the flavors, making the sauce rich and smooth.

What are some common mistakes to avoid when making Chicken Scarpaniello?

Avoid overcooking the chicken to keep it moist. Also, make sure the flavors are balanced. Following the recipe and adjusting the seasoning can help you avoid these mistakes and make a delicious dish.

What are some traditional Italian side dishes that pair well with Chicken Scarpaniello?

Traditional sides for Chicken Scarpaniello include pasta, risotto, and polenta. Modern options are roasted vegetables, sautéed spinach, and grilled asparagus.

How can I achieve restaurant-quality results when making Chicken Scarpaniello at home?

For top-notch results, use the best ingredients and cook slowly. Pay close attention to the recipe. With practice, you can make a Chicken Scarpaniello as good as any restaurant.

Are there any regional variations or family recipes for Chicken Scarpaniello?

Yes, Chicken Scarpaniello has many variations. In New York, it’s often made with sausage and peppers. In Italy, it’s made with chicken and hot cherry peppers. Exploring these can be a fun culinary adventure.

Can Chicken Scarpaniello be made ahead and stored?

Yes, you can make Chicken Scarpaniello ahead and store it. To refrigerate, prepare it a day before serving. For freezing, use an airtight container or bag.

Best 20-Minute Steak Diane Recipe

The classic steak diane recipe, from Europe, is now a favorite in America. You can learn to make it like a pro and enjoy it at home.

The steak diane is loved in restaurants for its rich taste and history. This article will teach you to make the classic beef steak . You’ll learn about choosing the right meat and making the sauce. Making the steak is easy, and the taste is amazing.

Key Takeaways

  • Learn how to make the classic steak diane recipe at home
  • Discover the rich history and popularity of steak diane in American cuisine
  • Get tips on choosing the right cut of meat for your steak diane
  • Master the art of making the perfect steak diane sauce
  • Enjoy a delicious and tender steak diane, just like a professional chef
  • Impress your friends and family with your new cooking skills

The Rich History of Steak Diane

Steak Diane’s story begins in the 19th century in European cuisine. It was a dish for the elite, served in fancy restaurants. It was seen as a luxurious and sophisticated meal.

The traditional steak recipe has changed over time. Yet, its core ingredients and cooking methods stay the same. This makes it a favorite among steak fans.

Origins in European Cuisine

In Europe, Steak Diane was a favorite in fancy restaurants. It was made with top-notch ingredients and presented beautifully. The name comes from Diana, the Roman goddess of the hunt, showing its high status.

Evolution into an American Classic

When European cuisine came to America, steak recipes became a hit in fancy restaurants. It was tweaked to fit American tastes, leading to different versions. Today, it’s still loved by steak lovers, thanks to its rich history and traditional steak recipe.

Why It’s Named “Diane”

The name “Diane” comes from Diana, the Roman goddess of the hunt. It shows the dish’s luxurious and sophisticated side. This name has made Steak Diane a favorite among food lovers.

Essential Ingredients for the Perfect Steak Diane

To make a tasty Steak , you need top-notch ingredients. When you’re learning how to make steak diane, picking the right steak, sauce, and seasonings is key. You’ll also need tender steak, fresh herbs, and rich butter.

A great steak sauce is crucial, made with shallots, garlic, and Dijon mustard. With the right mix, your dish will be both tasty and beautiful. Make sure to choose ingredients that are fresh and flavorful for the best Steak Diane.

  • Fresh parsley and chives
  • High-quality butter and cream
  • Dijon mustard and Worcestershire sauce
  • Shallots and garlic

Using these ingredients and a simple recipe, you can make a beef steak that’s sure to wow. Whether you’re an experienced chef or just starting out, learning how to make this steak is a great skill to have. It’s a delicious way to enjoy a meal.

Choosing the Right Cut of Meat

Choosing the right cut of meat is key for a delicious steak . You want a tender and lean cut that cooks evenly. Filet mignon or ribeye are great choices because they are tender and flavorful.

The quality of the meat matters a lot. High-quality meat with good marbling is best. This ensures tenderness and flavor in your steak diane. The marbling also keeps the meat moist, making it even more delicious.

Best Steak Options

  • Filet Mignon: A tender and lean cut, perfect for steak diane
  • Ribeye: A rich and flavorful cut, ideal for a delicious steak diane
  • Sirloin: A leaner cut, but still packed with flavor and tenderness

Meat Quality Guidelines

Here are some guidelines for choosing the best meat for your steak diane:

  • Look for good marbling, as this will add flavor and tenderness
  • Choose a cut with a good balance of fat and lean meat
  • Opt for meat from reputable sources, such as local farms or high-end butchers

Proper Thickness Recommendations

The thickness of the steak is important too. It affects cooking time and texture. Aim for a steak that’s 1-1.5 inches thick. This ensures even cooking and a nice crust, making your steak diane delicious.

Steak CutRecommended Thickness
Filet Mignon1-1.2 inches
Ribeye1.2-1.5 inches
Sirloin1-1.2 inches

Mastering the Classic Steak Diane Sauce

To make a real diane sauce, mix top-notch ingredients like butter, shallots, garlic, and Dijon mustard. Cook them slowly to blend the flavors. This classic steak recipe brings flavor, moisture, and richness to the steak.

Here are some tips to help you master the steak sauce:

  • Use high-quality ingredients, including fresh shallots and garlic.
  • Cook the sauce slowly over low heat to prevent burning.
  • Stir the sauce constantly to ensure it thickens evenly.

With practice and patience, you’ll make a sauce that’s both tasty and true to the classic recipe. It will take your classic steak recipe to new levels.

By following these tips and using the best ingredients, you’ll make a diane sauce that perfectly complements your steak. Your classic recipe will be a real hit.

Step-by-Step Preparation Method

To make steak diane, follow a detailed guide. This classic dish needs careful attention from start to finish. Begin by seasoning the steak with salt, pepper, and herbs. Then, heat a skillet over medium-high heat and add a bit of oil to prevent sticking.

While cooking the steak, use a thermometer to check the temperature. Aim for medium-rare for the best steak diane. As the steak cooks, start making the sauce. The sauce is key and includes butter, shallots, and cognac. Cook these ingredients slowly to blend their flavors.

Meat Preparation Techniques

  • Season the steak with salt, pepper, and herbs
  • Heat a skillet over medium-high heat
  • Add a small amount of oil to prevent sticking

Sauce Making Process

To make the sauce, mix butter, shallots, and cognac in a skillet. Cook over low heat, stirring now and then, until smooth. You can also add heavy cream or Dijon mustard for extra flavor.

Flambé Safety Tips

Flambeing the sauce adds drama to steak diane. To do it safely, use a long match or lighter to ignite the cognac. Always have a fire extinguisher ready. Never leave the sauce alone, and have a plan for emergencies.

IngredientQuantity
Butter2 tablespoons
Shallots1/4 cup
Cognac1/4 cup

Professional Tips for Restaurant-Quality Results

To make a perfect Steak , controlling the steak and sauce temperature is key. This affects the dish’s texture and taste. By using a best steak recipe, your steak will be cooked just right. A thermometer is essential for checking the steak’s internal temperature and adjusting cooking time.

Temperature Control Secrets

When cooking a traditional diane, the steak’s temperature is crucial. The ideal internal temperature varies based on your desired doneness. For a medium-rare, aim for 130-135°F (54-57°C). A medium steak should be cooked to 140-145°F (60-63°C).

Timing Your Components

Timing is everything in Steak Diane cooking. You must plan the cooking times for the steak, sauce, and any sides. By following a best steak diane recipe and sticking to a traditional steak diane method, you’ll create a dish that’s both tasty and beautiful.

Common Mistakes to Avoid When Making Steak Diane

Learning to make this steak can be tricky. One big mistake is overcooking the steak. This makes it tough and dry. To fix this, use a thermometer to check the steak’s temperature. Let it rest before you serve it.

Choosing low-quality ingredients is another mistake. Fresh, high-quality ingredients make a big difference in taste and texture. Always choose the best ingredients available for a great dish.

Here are some common mistakes to avoid:

  • Overcooking the steak
  • Using low-quality ingredients
  • Not following the recipe

To make a delicious steak , know these common mistakes. Follow the recipe well, use top-notch ingredients, and cook the steak right. This way, you’ll get the best results when making steak diane.

Perfect Pairings and Serving Suggestions

To make your steak even better, think about pairing and presentation. A good wine can enhance the steak diane sauce’s rich flavors. Try a full-bodied red like Cabernet Sauvignon or a lighter Pinot Noir to balance the dish’s bold taste.

For side dishes, you have many choices. Roasted veggies, mashed potatoes, or a fresh salad are all great options. They add flavor, texture, and beauty to your dish. For a fancy touch, serve it with sautéed mushrooms or truffled fries.

Wine Recommendations

  • Cabernet Sauvignon
  • Pinot Noir
  • Merlot

Side Dish Options

  • Roasted vegetables
  • Mashed potatoes
  • Fresh salad

Don’t forget about presentation. A sprinkle of fresh herbs or edible flowers can brighten up your plate. With these tips, your steak diane will impress anyone.

Conclusion: Mastering Your Steak Diane Journey

Now you have the knowledge to make a perfect diane. Follow the guide and tips to create this rich dish at home.

Quality ingredients, timing, and the flambé technique are key. With practice, you’ll impress everyone with your cooking skills.

Enjoy the journey of mastering this classic dish. Let your cooking passion shine. Savor the aromas, admire the presentation, and enjoy the flavors of your steak diane. Bon appétit!

FAQ

What is Steak Diane?

Steak Diane is a classic dish from European cuisine, now loved in America. It’s a tender steak with a rich sauce. The sauce is made with butter, garlic, and herbs.

What is the history of Steak Diane?

Steak Diane started in the 19th century in European restaurants. It’s named after Diana, the Roman goddess of the hunt. Over time, the recipe has changed, but the core ingredients and cooking methods stay the same.

What are the essential ingredients for the perfect Steak Diane?

For a great Steak Diane, use top-notch ingredients. Choose tender steak, fresh herbs, and rich butter. You’ll also need a good sauce, with shallots, garlic, and Dijon mustard.

What is the best cut of meat for Steak Diane?

The best meat for Steak Diane is tender and lean. Filet mignon or ribeye works well. Look for high-quality meat with good marbling for tenderness and flavor. The steak’s thickness is also key for cooking time and texture.

How do you make the classic Steak Diane sauce?

The classic sauce includes butter, shallots, garlic, and Dijon mustard. Cook these together for a smooth sauce. Use quality ingredients and cook slowly to blend the flavors.

What are some tips for achieving restaurant-quality results with Steak Diane?

For a perfect Steak Diane, control the steak and sauce temperatures. Use a thermometer to ensure the steak is cooked right. Plan your cooking time for the steak, sauce, and sides.

What are some common mistakes to avoid when making Steak Diane?

Avoid overcooking the steak and using low-quality ingredients. Follow the recipe carefully and cook the steak to the right temperature.

What are some perfect pairings and serving suggestions for Steak Diane?

Pair Steak Diane with a full-bodied wine like Cabernet Sauvignon or Pinot Noir. Serve with roasted vegetables, mashed potatoes, or a salad. Use garnishes like fresh herbs or edible flowers for a nice presentation.

Hungarian Goulash Recipe: 7 Easy Secrets for a Perfect dish

Goulash is a dish filled with tender beef and a rich, flavorful broth. For centuries, it has been a staple in Hungarian cuisine. Now, you can make this traditional comfort food at home with a simple recipe. As you explore Hungarian goulash, you’ll learn about its rich history and cultural significance.

This article will teach you how to make an authentic Hungarian goulash. It will become a family favorite. You’ll learn about the essential ingredients and the perfect cut of beef. This guide will help you make a delicious and authentic goulash, whether you’re a fan of traditional Hungarian cuisine or just looking for a new comfort food.

Key Takeaways

  • Learn how to make an authentic Hungarian goulash with a simple and easy-to-follow recipe
  • Discover the rich history and cultural significance of goulash in Hungarian cuisine
  • Get tips on selecting the perfect cut of beef for your goulash
  • Understand the essential ingredients and spices needed for a traditional goulash recipe
  • Find out how to prepare a delicious and authentic Hungarian goulash at home
  • Explore the various regional variations and modern adaptations of goulash

The Rich History of Hungarian Goulash

Exploring traditional goulash takes you into the heart of Hungarian culture. This dish’s history is a captivating story of how a simple shepherd’s meal became a national favorite. You’ll see how authentic goulash is a big deal in Hungarian cuisine, especially on special days.

Goulash’s roots go back to the 9th century. Hungarian shepherds made a hearty stew with meat, veggies, and paprika. Over time, it became popular across the country, with each area putting its own spin on it. Today, it’s a key part of Hungarian food, loved for its rich taste and smell.

Origins of Goulash in Hungarian Culture

In Hungarian culture, goulash is more than food. It’s a sign of welcome and togetherness. Hungarians love to gather, share stories, and enjoy goulash together. This tradition is still alive, with families and friends coming together to enjoy this dish.

From Shepherd’s Meal to National Dish

Goulash’s journey from a simple meal to a national dish shows food’s power to unite. As you learn about authentic goulash, you’ll uncover a rich history filled with tradition and culture. Whether it’s for a special event or just a cozy meal, you’ll taste a bit of Hungarian heritage.

Traditional Goulash IngredientsAuthentic Goulash Preparation
Beef, pork, or lambBrowning the meat in a pot
Onions, garlic, and paprikaAdding vegetables and spices
Tomatoes and sour creamServing with crusty bread or dumplings

Essential Ingredients for Authentic Goulash

To make a delicious easy goulash, you need the right ingredients. The type of beef goulash you choose is key. It affects the flavor and texture of your dish. Look for high-quality beef that is tender and has a good balance of fat and lean meat.

Some essential ingredients for easy goulash include:

  • Beef: Choose a cut of beef that is suitable for slow cooking, such as chuck or shank.
  • Onions: Use a combination of yellow and red onions for added flavor and texture.
  • Garlic: Mince three to four cloves of garlic and sauté them with the onions.
  • Paprika: This spice is a staple in Hungarian cuisine and gives beef goulash its distinctive flavor.
  • Caraway seeds: Add a teaspoon of caraway seeds to give your goulash a nutty flavor.

When making easy goulash, use high-quality ingredients and cook slowly over low heat. This helps develop flavors and tenderizes the beef. Serve your beef goulash with bread or over egg noodles.

By following these tips and using the right ingredients, you can make a delicious and authentic easy goulash. It’s sure to please even the most discerning palate.

IngredientQuantity
Beef1 pound
Onions2 medium
Garlic3-4 cloves
Paprika1 teaspoon
Caraway seeds1 teaspoon

Choosing the Perfect Cut of Beef for Your Goulash

The type of beef you choose can greatly affect your homemade goulash’s taste and texture. For a tender and flavorful dish, use cuts like shank or short ribs. These are ideal for slow cooker goulash, as they become tender and fall-apart with slow cooking.

It’s crucial to trim excess fat and cut the meat into bite-sized pieces. This ensures even cooking and prevents toughness. Browning the meat before adding it to the slow cooker also boosts the flavor of your goulash.

For those on a budget, chuck or round cuts are good options. They’re less expensive than shank or short ribs but still offer great flavor and texture. Here are some tips for choosing the perfect cut of beef for your goulash:

  • Opt for cuts with a good balance of fat and lean meat for tender and flavorful results.
  • Consider using a combination of cuts, such as shank and chuck, for a more complex flavor profile.
  • Don’t be afraid to experiment with different cuts and cooking methods to find your perfect homemade goulash recipe.

By selecting the right cut of beef and preparing it correctly, you can make a delicious slow cooker goulash. It’s perfect for any occasion.

Cut of BeefFlavor ProfileTenderness
ShankRich and beefyTender and fall-apart
Short RibsMeaty and slightly sweetTender and juicy
ChuckBeefy and slightly fattyTender and flavorful

The Secret to Perfect Hungarian Paprika Selection

To make the best goulash, you need to understand the importance of Hungarian paprika. This key ingredient can elevate your goulash recipe, adding a rich, slightly sweet flavor. When selecting paprika, consider the different types available, including sweet, smoked, and hot paprika. Each type will give your goulash a unique flavor profile, so it’s essential to choose the right one for your taste preferences.

For a traditional goulash recipe, sweet paprika is often the best choice. It adds a mild, slightly sweet flavor that complements the beef and vegetables. Smoked paprika, on the other hand, gives a deeper, smokier flavor that’s perfect for those who like a bit of heat. Hot paprika is the spiciest of the three and is best used in small amounts to add a kick to your goulash.

When shopping for paprika, look for high-quality brands that use fresh, aromatic spices. You can store paprika in an airtight container to preserve its flavor and aroma. To get the most out of your paprika, use it within a few months of opening, as it can lose its potency over time.

Some popular brands of Hungarian paprika include Szegedi and Kalocsa. These brands offer a range of paprika types, from sweet to hot, and are known for their high quality and rich flavor. By choosing the right type of paprika and using it in your goulash recipe, you’ll be able to create a delicious, authentic dish that’s sure to please.

  • Sweet paprika: mild, slightly sweet flavor
  • Smoked paprika: deeper, smokier flavor
  • Hot paprika: spiciest, adds a kick to your goulash

By following these tips and using high-quality Hungarian paprika, you’ll be well on your way to making the best goulash possible. Whether you’re a seasoned cook or just starting out, the right paprika can make all the difference in your goulash recipe.

Step-by-Step Traditional Goulash Preparation

To make a true hungarian goulash, start by making a flavorful base. Sauté onions, garlic, and sometimes bell peppers in a big pot. This brings out their sweetness and fills your kitchen with a delicious smell.

After your base is done, add the meat and veggies. For a classic hungarian goulash, use beef, pork, or a mix, with carrots, potatoes, and other root veggies. Cook everything slowly to let the flavors mix and the meat get tender.

Preparing the Base

  • Chop onions, garlic, and bell peppers
  • Sauté the mixture in a heavy pot until the vegetables are soft
  • Add a pinch of salt and a sprinkle of black pepper to taste

Cooking Techniques

There are key techniques for cooking traditional goulash. Braising is great for tender meat and rich flavors. Simmering is best for cooking veggies and making a smooth broth.

Timing and Temperature Control

To get your hungarian goulash just right, control the timing and temperature. Cook it over low heat for at least an hour, stirring now and then. This ensures the meat is tender and the flavors are perfect. By following these steps, you’ll make a delicious traditional goulash that everyone will love.

Slow Cooker Goulash: Modern Convenience Meets Tradition

Making an authentic goulash doesn’t mean you have to give up convenience. A slow cooker makes it easy to prepare a delicious goulash for a weeknight dinner. Just brown the meat and cook the veggies in a pan, then add them to the slow cooker with broth and spices.

Using a slow cooker for goulash is super easy. You just add all the ingredients and let it cook. This is great for busy days when you’re short on time. For the best taste, use quality beef and fresh veggies.

Here are some tips for slow cooker goulash:

  • Choose a lean beef to avoid greasiness
  • Add spices like paprika and caraway seeds for flavor
  • Cook it on low for 8 hours for tender meat and flavors

Follow these tips and you’ll have a tasty, authentic goulash. It’s perfect for a cozy night in or a party.

This slow cooker goulash is a real treat. It has a rich broth, tender meat, and fresh veggies. Try it out and enjoy the mix of convenience and tradition.

Common Mistakes to Avoid When Making Goulash

When making beef goulash, knowing common mistakes is key. Temperature control is crucial for tender beef and the right sauce consistency.

For a slow cooker goulash, cook at a low temperature. This prevents tough beef and a too-thick sauce.

Seasoning Mistakes

Seasoning is another area where mistakes can happen. The right amount of paprika, salt, and pepper is essential. Too little makes it bland, too much overpowers the dish.

Texture Problems

Texture issues can also occur. To avoid a thick or thin goulash, balance beef and sauce. Aim for one part beef to two parts sauce.

Knowing these mistakes helps make a delicious beef goulash. Whether using a slow cooker goulash or stovetop, attention to detail is key.

MistakeSolution
Temperature control issuesCook at a low temperature
Seasoning mistakesUse the right amount of paprika, salt, and pepper
Texture problemsUse the right ratio of beef to sauce

Regional Variations and Modern Adaptations

Goulash, a traditional Hungarian dish, has changed over time. It now has many regional variations and modern twists. Understanding these changes can help you make your own delicious goulash.

American-style goulash is a great example. It uses ground beef, tomatoes, and macaroni. This version is quite different from the Hungarian original. Yet, it shows how goulash can be adapted to different tastes. Try using Hungarian paprika, beef, and vegetables in your recipe, then add your own twist.

European Variations

In Europe, goulash has many variations. Austrian goulash is known for its rich beef flavor. German goulash is thicker and more stew-like. You can use these as inspiration for your own goulash. Mix traditional ingredients with new flavors to create a unique dish.

  • Austrian goulash: features a rich, beefy flavor and a thick, creamy sauce
  • German goulash: often features a thicker, more stew-like consistency and a blend of beef and pork
  • Italian goulash: typically features a tomato-based sauce and a blend of ground meats

Exploring these variations can deepen your understanding of goulash. It can also inspire you to create your own version. This way, you can make the best goulash that fits your taste.

Perfect Side Dishes and Serving Suggestions

When serving your goulash recipe, choose side dishes that match its rich flavor. Traditional Hungarian choices include bread, dumplings, and veggies. These help soak up the hungarian goulash‘s flavorful broth.

Serving the goulash with crusty bread or dumplings is a classic move. It lets guests enjoy the stew’s hearty flavor. Adding veggies like carrots, potatoes, or peas brings color and freshness to the table.

For a modern twist, pair the goulash recipe with roasted veggies or a green salad. This balances the dish’s richness with a refreshing contrast. Some great sides include:

  • Roasted carrots and Brussels sprouts
  • Sauteed spinach and garlic
  • Grilled asparagus with lemon butter

Remember, the secret to a great goulash is to have fun with your sides. Try different combos and see what your guests love.

Conclusion: Mastering Your Homemade Goulash

Making a traditional goulash is all about paying attention to details and using the best ingredients. With a bit of practice, you can make this beloved Hungarian dish in your kitchen.

The secret to a great goulash is knowing how each ingredient and technique works. Choosing the right beef and balancing spices are key. This article will help you make goulash that feels like a trip to Hungary.

Don’t be shy to try new things with your goulash recipe. Add your own twist to keep it interesting. Goulash is flexible, so you can make it your own while keeping its traditional charm.

So, get ready to cook! Start with the ingredients and learn to make authentic Hungarian goulash. With time, patience, and creativity, you’ll impress everyone with this delicious dish.

FAQ

What is goulash?

Goulash is a traditional Hungarian dish. It’s a thick stew or soup. It’s made with beef, vegetables, and spices, especially paprika.

What are the essential ingredients for authentic Hungarian goulash?

For real Hungarian goulash, you need beef, onions, garlic, and tomatoes. Bell peppers, paprika, and spices like caraway seeds and bay leaves are also key.

What is the best cut of beef to use for goulash?

Use tougher, less expensive beef cuts for goulash. These include chuck, shank, or short ribs. They get tender and flavorful when slow-cooked.

How do I choose the right type of Hungarian paprika?

For traditional Hungarian goulash, pick high-quality Hungarian paprika. It comes in sweet, smoked, or hot varieties. Choose based on your taste preference and the dish’s flavor you want.

Can I make goulash in a slow cooker?

Yes, making goulash in a slow cooker is easy. It tenderizes the meat and blends the flavors beautifully.

What are some common mistakes to avoid when making goulash?

Avoid overcooking the meat and using the wrong beef cut. Don’t forget to season well and keep the cooking temperature right.

What are some regional variations of goulash?

Besides traditional Hungarian goulash, there are other versions. American-style goulash and variations from Serbia, Austria, and Germany are popular.

What are some good side dishes to serve with goulash?

Serve goulash with bread, dumplings, spaetzle, mashed potatoes, or roasted vegetables. These are classic choices.

Exit mobile version