7 Secrets to Perfectly Grilled Chicken Thighs and Legs

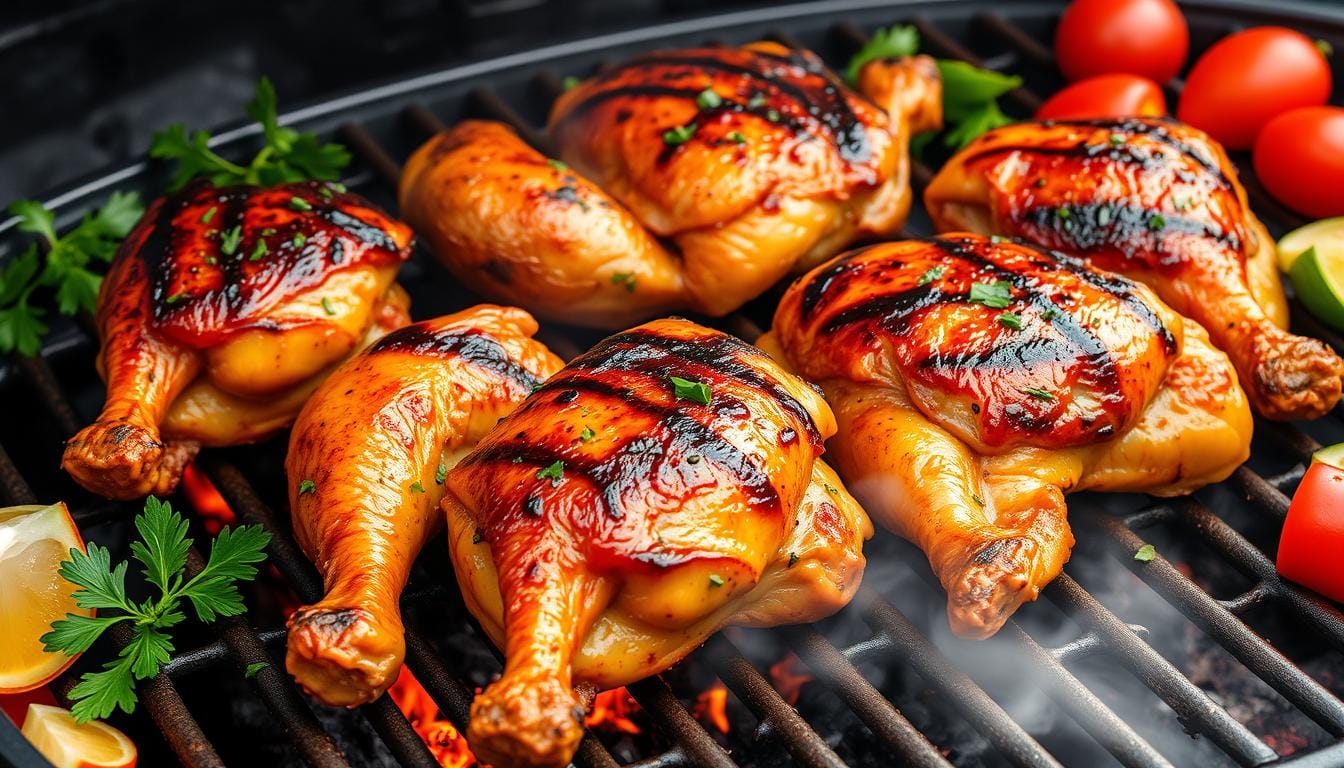
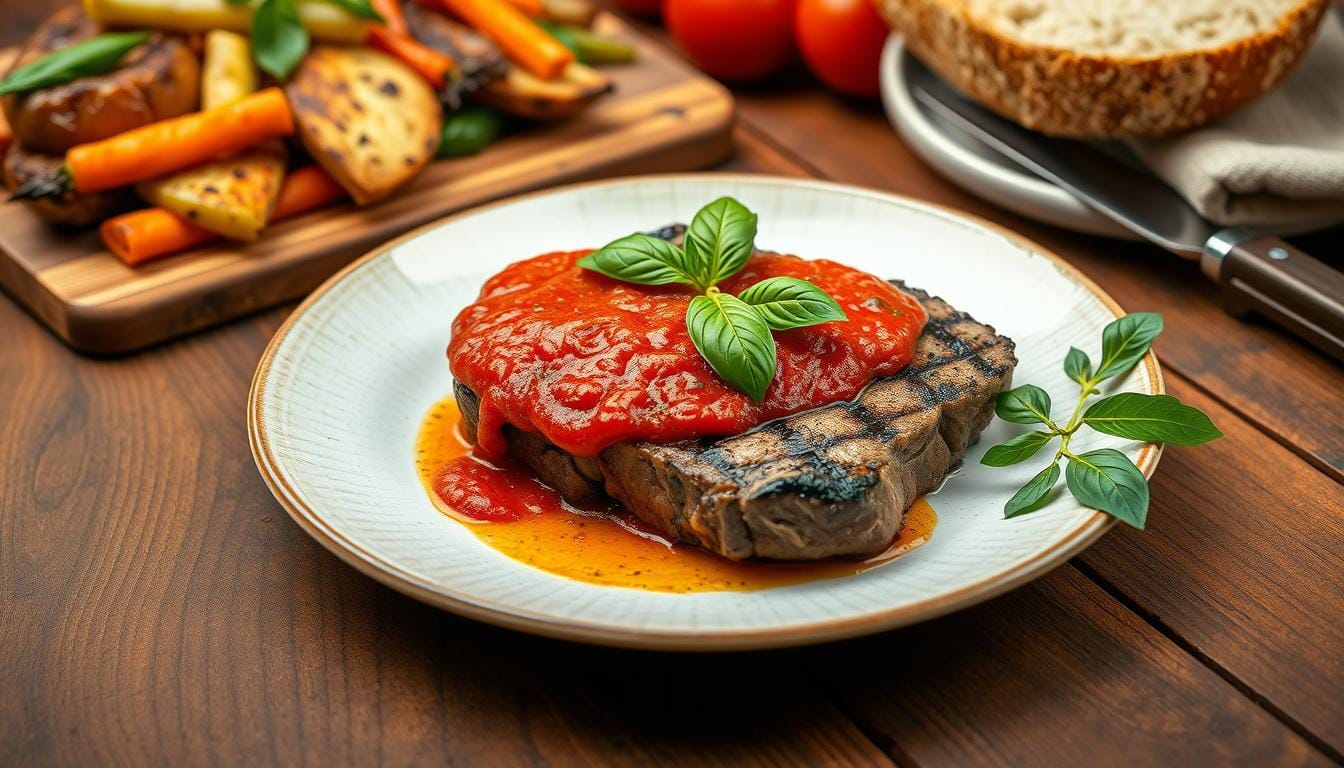
Imagine the smell of sizzling grilled chicken thighs and legs filling the air. It makes your mouth water, ready for a tasty meal. You’re searching for the best grilled chicken recipe to wow your family and friends. You’ve found the right spot.

Grilled chicken thighs and legs are a BBQ or family dinner favorite. With the right methods, you can make them tender and juicy every time.

So, what makes grilled chicken thighs and legs so great? It’s their rich flavor and flexibility. They’re perfect for a classic BBQ or something new. The right recipe and techniques will make your meal unforgettable, leaving everyone craving more.

Key Takeaways

  • Grilled chicken thighs and legs are a delicious and versatile option for any BBQ or family dinner
  • The key to achieving tender, juicy results is in the technique and recipe
  • Grilled chicken thighs and legs offer a rich flavor profile that can be enhanced with various seasonings and marinades
  • With the right guidance, you can create a truly unforgettable dining experience with your best grilled chicken recipe
  • Grilled chicken thighs and legs are a staple of many cuisines, offering endless possibilities for experimentation and creativity
  • By following the right techniques and recipes, you can become a master griller and impress your friends and family with your culinary skills

Why Choose Grilled Chicken Thighs and Legs for Your BBQ

Planning a BBQ means you want tasty, easy, and affordable food. Juicy chicken thighs and legs fit the bill perfectly. They have a natural flavor that you can enhance with seasonings and marinades.

Easy grilled chicken thighs are also budget-friendly. They’re cheaper than other meats, great for big groups or parties. Plus, they’re simple to grill, even for beginners.

Benefits of Dark Meat Cuts

Dark meat like chicken thighs and legs is full of flavor and nutrients. They’re rich in protein, iron, and zinc. Grilling them brings out their natural flavor even more.

Cost-Effectiveness of These Cuts

Juicy chicken thighs and legs are also a smart choice for your wallet. They’re cheaper than other meats, perfect for big events. You can make many tasty dishes with them, like grilled chicken or chicken skewers.

Natural Flavor Profile

The natural flavor of chicken thighs and legs is a big plus. With some seasoning and marinade, they become a mouthwatering dish. Whether you like classic BBQ flavors or something new, easy grilled chicken thighs are a hit with everyone.

Essential Equipment for Grilling Chicken

To make delicious grilled chicken legs, you need the right tools. This includes a grill, utensils, and containers for your grilled chicken marinade. Having the right tools makes grilling easier and more efficient.

Here are the must-have items for grilling chicken:

  • A grill: You can choose between gas, charcoal, or electric grills, depending on your preference and available space.
  • Utensils: Tongs, spatulas, and forks are essential for handling and flipping the chicken.
  • Marinade containers: Airtight containers are necessary for storing and marinating the chicken.

When choosing your equipment, think about the size of your grill and how many people you’ll serve. A bigger grill lets you cook more chicken at once. A smaller grill is better for smaller gatherings.

Also, consider getting a meat thermometer. It helps ensure your chicken is cooked safely. With the right equipment and a bit of practice, you’ll make delicious grilled chicken legs and a tasty grilled chicken marinade.

EquipmentDescription
GrillGas, charcoal, or electric grill for cooking chicken
UtensilsTongs, spatulas, and forks for handling and flipping chicken
Marinade containersAirtight containers for storing and marinating chicken

Preparing Your Chicken for the Perfect Grill

To get crispy grilled chicken thighs, you need to prepare the chicken right. Start by cleaning and trimming it to remove fat and feathers. Use kitchen shears or a sharp knife to cut off extra skin or fat.

Choosing between a dry rub or marinade is your next step. A dry rub adds flavor without extra moisture. Mix spices like paprika, garlic powder, and thyme to rub on the chicken. A marinade tenderizes the chicken and adds flavor. You can use store-bought or homemade marinades with olive oil, lemon juice, and herbs.

Cleaning and Trimming

  • Remove any excess fat or feathers from the chicken
  • Trim any excess skin or fat around the thighs and legs
  • Rinse the chicken under cold water and pat it dry with paper towels

Dry Rub vs. Marinade Options

Both dry rub and marinade can make your chicken taste great. A dry rub gives a crispy outside and juicy inside. But, a marinade adds more flavor and makes the chicken tender.

Temperature Guidelines

Grilling chicken right means cooking it to 165°F (74°C) for safety. Use a meat thermometer to check the chicken’s temperature.

The Ultimate Marinade for Grilled Chicken Thighs and Legs

To get flavor-packed chicken thighs and legs, a great marinade is key. A good marinade makes the meat taste better and stay tender. You can mix olive oil, vinegar or lemon juice, and spices like garlic, salt, and pepper for a basic marinade.

A good marinade can change your grilled chicken game. It makes the chicken juicy and full of flavor. You can try Italian-style with thyme and rosemary, Asian-inspired with soy sauce and ginger, or spicy with hot sauce and cumin.

Basic Marinade Recipe

  • 2 cups olive oil
  • 1 cup acid such as vinegar or lemon juice
  • 2 cloves garlic, minced
  • 1 teaspoon salt
  • 1/2 teaspoon black pepper

Marinating Time Guidelines

Marinate your chicken for at least 30 minutes or even overnight. This lets the meat soak up the flavors and get tender. Always marinate in the fridge, not at room temperature, for safety.

Flavor Variations

Try different flavors to find what you like best. Add honey for sweetness, Greek yogurt for creaminess, or Indian spices like cumin and coriander for a unique taste.

Setting Up Your Grill for Success

To get perfectly grilled chicken thighs and chicken legs, setting up your grill is key. You need to clean the grates and get the temperature right. Make sure the grates are clean and brush them with oil to avoid sticking.

For chicken thighs, medium-high heat works best. Chicken legs do better at a bit lower heat.

Here are some tips for setting up your grill:

  • Preheat the grill to the right temperature, making sure it’s hot before adding the chicken.
  • Use a meat thermometer to check the chicken’s internal temperature. It should reach a safe minimum.
  • Keep the grill lid closed to keep the temperature steady and cook evenly.

By following these steps and using the right techniques, you’ll get delicious grilled chicken. Always remember to keep food safe and handle the chicken carefully to avoid contamination.

With your grill ready, you’re close to enjoying a tasty meal of grilled chicken. Success comes from preparation and paying attention to details. So, take your time and get it just right.

Step-by-Step Grilling Technique

To get the perfect grilled chicken recipe, you must learn the grilling technique. Cooking chicken thighs on grill requires attention to heat, flipping, and temperature.

Direct vs. Indirect Heat Methods

Direct heat is great for searing the chicken. Indirect heat cooks it evenly. Use both methods for the best grilled chicken recipe.

Flipping and Basting Tips

Flip the chicken thighs on grill every 5-7 minutes for even cooking. Use a thermometer to check the temperature. Baste with your favorite sauce in the last few minutes.

Temperature Control Strategies

Keep the temperature between 375°F to 400°F. Here’s a table to help with temperature control:

Chicken PartInternal Temperature
Chicken Thighs165°F
Chicken Legs180°F

Follow these steps and tips to make a tasty grilled chicken recipe. Your chicken thighs on grill will be perfectly cooked.

Common Grilling Mistakes to Avoid

Grilling chicken thighs and legs can go wrong if you’re not careful. Knowing the common mistakes helps you cook chicken perfectly. It’s all about avoiding these pitfalls.

Temperature control is key when grilling. Wrong temperatures can make chicken undercooked or overcooked. Always keep an eye on the heat. Also, don’t overcook, as it makes chicken dry and tough.

Temperature Management Errors

Use a meat thermometer to check chicken’s internal temperature. For thighs and legs, aim for 165°F (74°C). This ensures your chicken is safe to eat.

Timing Mistakes

Set a timer and check the chicken often. Don’t overcrowd the grill. This helps prevent uneven cooking and foodborne illness.

Seasoning Problems

Seasoning is important. Use a mix of herbs and spices. Marinating before grilling adds flavor and moisture. Knowing these mistakes helps you avoid them and cook great chicken.

  • Use a grill mat to prevent sticking and make cleanup easier
  • Don’t press down on the chicken with your spatula, as this can squeeze out juices and make the chicken dry
  • Let the chicken rest for a few minutes before serving, allowing the juices to redistribute and the chicken to stay moist

Follow these tips and avoid common mistakes. You’ll get delicious, perfectly cooked chicken every time you grill.

How to Tell When Your Chicken is Perfectly Done

Learning how to grill chicken means knowing when your grilled chicken thighs and legs are just right. This is key for safety and taste. Use a meat thermometer in the thickest part, avoiding bones or fat. The chicken should hit 165°F (74°C) inside.

Another way to check is by cutting into the meat. If the juices are clear, it’s cooked. Also, if the chicken is tender and flakes, it’s ready.

  • Use a meat thermometer for accuracy
  • Check the internal temperature of the chicken
  • Verify the juices run clear
  • Check the texture of the chicken

By following these steps, you’ll know when your grilled chicken thighs and legs are perfect. This ensures a tasty and safe meal when you learn how to grill chicken.

Serving Suggestions and Pairings

Now that you’ve learned how to grill chicken thighs and legs, it’s time to think about serving them. Grilled chicken thighs ideas are endless. You can serve them as a main dish or use them in salads, wraps, or sandwiches.

For chicken legs recipes, pair them with tasty side dishes. Here are some ideas:

  • Roasted vegetables, like asparagus or Brussels sprouts
  • Grilled or sautéed mushrooms
  • Coleslaw or potato salad

For sauces, classic choices like BBQ or honey mustard are great. But don’t be afraid to try new flavors. Spicy mango salsa or tangy tzatziki sauce are great options.

How you present your grilled chicken matters too. Add fresh herbs like parsley or rosemary. Or sprinkle paprika for color. With these tips, you’ll make a meal that will impress everyone.

Conclusion: Mastering Grilled Chicken Thighs and Legs

Grilling chicken thighs and legs is an art that takes patience and practice. By following the techniques in this guide, you’ll become a BBQ master. Start by preparing your chicken right and then grill it to perfection.

Don’t forget to try out different marinades and seasonings. This will help you create your own unique flavor. Adjust cooking times and temperatures to suit your taste. With these tips, you’ll make grilled chicken thighs and legs that everyone will love.

So, fire up the grill and show off your new skills. You’ll enjoy the delicious results of your hard work. Get ready to impress your family and friends with your amazing grilled chicken.

FAQ

What are the benefits of choosing grilled chicken thighs and legs?

Grilled chicken thighs and legs are great for BBQs or family dinners. They are juicier and tastier than chicken breasts. Plus, they’re cheaper, so you can feed your family without spending a lot.

What essential equipment do I need for grilling chicken?

To grill tasty chicken legs and thighs, you need a good grill, quality tools, and the right marinade containers. Having these will help you make crispy, flavorful chicken every time.

How should I prepare my chicken for the perfect grill?

Getting your chicken ready is important for great grilling. Clean and trim the chicken first. Then, choose between a dry rub or marinade. Make sure to cook it at the right temperature for perfect chicken.

What is the ultimate marinade for grilled chicken thighs and legs?

The marinade is key for flavorful chicken. Our basic recipe is a good start. But feel free to try different flavors to find what you like. Just remember to marinate for the right amount of time.

How do I set up my grill for success?

Setting up your grill right is crucial for great grill marks and even cooking. This guide will show you how to prepare the grates and keep the temperature just right for perfect chicken.

What’s the best grilling technique for chicken thighs and legs?

The right grilling technique is essential for delicious chicken. Choose between direct and indirect heat, learn how to flip and baste, and control the temperature for perfectly cooked chicken every time.

What are the common grilling mistakes I should avoid?

Avoid common mistakes like wrong temperature, timing errors, and seasoning problems. Knowing these will help you grill chicken thighs and legs perfectly, every time.

How do I know when my chicken is perfectly done?

Knowing when your chicken is cooked just right is important for safety and flavor. This section will teach you how to check for doneness, so you can serve juicy, flavorful chicken every time.

What are some serving suggestions and pairings for grilled chicken thighs and legs?

After grilling your chicken to perfection, think about how to serve it. We have suggestions for sides, sauces, and presentation to make your chicken the main attraction.

5-Step Beef Satkara -A Flavorful Dish!

Imagine a dish that mixes the richness of beef with satkara’s unique taste. Satkara is a citrus fruit often used in South Asian cooking. This journey will uncover the secrets of beef satkara, a recipe that elevates your taste buds.

Beef satkara is a must-try for anyone who loves food. This article will show you how to cook beef satkara. You’ll learn about the right ingredients and the authentic satkara beef recipe. Get ready to explore beef satkara and find a new favorite dish.

Key Takeaways

  • You will learn about the origins of satkara and its cultural significance
  • You will discover how to prepare the perfect beef satkara dish
  • You will understand the importance of using high-quality ingredients in beef satkara
  • You will learn about the traditional cooking methods used in satkara beef recipe
  • You will get tips on how to master the authentic beef satkara recipe
  • You will explore the various serving suggestions and accompaniments for beef satkara

Understanding Satkara: The Citrus Secret of South Asian Cuisine

To truly appreciate beef satkara, you must grasp the concept of satkara. It’s a citrus fruit key to South Asian cuisine. You’ll learn about its cultural importance, origins, and cooking uses. This knowledge will enhance your beef satkara cooking skills.

Satkara is a citrus fruit native to the region, known for its unique taste and smell. It’s a crucial ingredient in many South Asian dishes. When cooking beef satkara, understanding satkara’s role and balancing its flavor is essential.

  • Its cultural significance in South Asian cuisine
  • Its traditional uses in cooking, including its use in marinades and sauces
  • Its unique flavor and aroma, which are essential components of many South Asian dishes

Understanding satkara will help you make the best dish. You’ll learn to cook it like a pro.

Essential Ingredients for Perfect Beef Satkara

To make a true traditional satkara dish, you need the right ingredients. The beef, spices, and herbs you choose greatly affect the taste and smell. Quality is crucial for ingredients. Choose tender, flavorful beef and fresh spices and herbs for depth.

Here are the key ingredients :

  • Beef (preferably grass-fed or organic)
  • Satkara fruit or citric acid
  • Onions, garlic, and ginger
  • Spices like cumin, coriander, and turmeric
  • Fresh herbs like cilantro and mint

Using the right ingredients is key to a delicious dish. With these, you can make a traditional beef satkara that’s full of flavor. It will impress everyone.

Follow these tips and use the best ingredients for a perfect satkara. Always choose high-quality ingredients and stick to traditional recipes for the best taste.

The Art of Selecting and Preparing Your Beef

To make a tasty dish, start with the best ingredients. The quality of the beef is key for a great easy recipe. You can pick from various cuts and grades of meat.

Choosing the right cut of beef is important. It affects the flavor and texture of your dish. For a real recipe, pick a tender cut with a good mix of fat and lean meat. Ribeye, sirloin, and tenderloin are good choices.

Choosing the Right Cut

When picking a cut of beef, consider these factors:

  • Fat content: A mix of fat and lean meat is crucial for flavor.
  • Tenderness: Choose a cut that’s tender and easy to chew.
  • Marbling: Marbling adds flavor and tenderness to the dish.

Meat Preparation Techniques

After picking the right cut, prepare it for cooking. Trim excess fat, cut it into smaller pieces, and marinate it in spices and herbs.

Marination Methods

Marination is key for an authentic recipe. You can marinate in yogurt, lemon juice, and spices, or use a store-bought marinade. The goal is to enhance the beef’s flavor and make it tender and juicy.

Marination MethodDescription
Yogurt and Spice MarinadeA mix of yogurt, lemon juice, and spices that makes the beef tender and juicy.
Store-bought MarinadeA pre-made marinade that adds flavor to the beef.

Mastering the Authentic Beef Satkara Recipe

To make a real dish, you must use the right satkara seasoning. This special mix of spices makes beef satkara stand out. When cooking your satkara, mix traditional spices and seasonings to get the right taste.

Here are some key ingredients for your beef satkara recipe:

  • High-quality beef, preferably grass-fed or organic
  • A blend of traditional spices, including cumin, coriander, and turmeric
  • Fresh citrus juice, such as lemon or lime
  • Aromatic herbs, like cilantro or parsley

For beef satkara, cook the beef slowly. This lets the flavors mix well. You can grill, roast, or sauté the beef. Just make sure it’s cooked right, so it’s tender and juicy.

By following these tips and using the right beef satkara seasoning, you can make a tasty and authentic dish. Don’t be afraid to try different ingredients and spices to find the flavor you like best.

Crucial Spice Combinations and Seasoning Tips

To make a real recipe, knowing about spice mixes and seasoning tips is key. When you learn how to cook beef satkara, you’ll see how the right spices can make the dish amazing. A classic mix often has cumin, coriander, and turmeric. These spices give a deep, aromatic taste.

Some important things to think about for the perfect spice mix are:

  • Balance: Making sure no spice is too strong
  • Harmony: Finding a mix that goes well with the beef’s natural taste
  • Depth: Adding more flavor with different spices and seasonings

When you’re figuring out how to cook satkara, you might find new spice mixes. These can include paprika or chili powder for a fresh twist. Trying out different spice blends and seasoning tips lets you make a satkara recipe that’s all your own.

Step-by-Step Cooking Process

To make the best satkara dish, follow a step-by-step guide. This traditional recipe needs careful attention and the right techniques. This ensures the perfect flavor and texture.

Here are the key steps to follow:

  • Prepare the ingredients, including the beef, satkara fruit, and spices.
  • Marinate the beef in a spice and satkara fruit juice mix. This tenderizes it and adds flavor.
  • Cook the beef in a pan with oil and spices until it’s browned and cooked through.
  • Add the satkara fruit juice and other ingredients to the pan. Simmer until the flavors mix well.

The result is a delicious and aromatic traditional dish. It’s sure to impress your family and friends. With the right cooking process, you can make a truly authentic best dish. It showcases the unique flavors of this traditional recipe.

By following these steps and using the right ingredients and techniques, you can create a mouth-watering traditional dish. It’s perfect for any occasion.

IngredientQuantity
Beef1 pound
Satkara fruit juice1 cup
Spices1 teaspoon

Common Mistakes to Avoid When Cooking Beef Satkara

Cooking beef satkara can be tricky, especially for beginners. To make a tasty dish, you need the right ingredients and a simple recipe. But, many people make mistakes that can spoil the dish.

Temperature Control Issues

One big mistake is not controlling the temperature right. This can make the beef tough or raw. To fix this, use a thermometer to check the temperature.

Seasoning Errors

Another mistake is not seasoning correctly. Beef satkara needs spices like cumin, coriander, and turmeric. The wrong mix or missing spices can mess up the flavor.

Timing Mistakes

Timing is key when cooking satkara. If the beef isn’t cooked long enough, it won’t be tender or tasty. Stick to a good recipe and adjust cooking time as needed.

To avoid these mistakes and make a great beef satkara, use quality ingredients. Follow a simple recipe and take your time for the best results.

  • Use fresh and high-quality ingredients
  • Follow an easy beef satkara recipe
  • Monitor the temperature and cooking time

With practice and patience, you’ll get better at cooking beef satkara. You’ll enjoy this flavorful dish with your family and friends.

IngredientQuantity
Beef1 pound
Onion1 medium
Garlic3 cloves

Serving Suggestions and Accompaniments

When serving your authentic satkara recipe, the right sides can make it even better. Traditional options like steamed basmati rice, naan bread, and roasted vegetables are great. They match the flavors of the satkara seasoning well.

For a modern twist, try pairing your beef satkara with some new side dishes. Here are a few ideas:

  • Roasted sweet potatoes with a hint of cinnamon and nutmeg
  • Sauteed spinach with garlic and lemon juice
  • Grilled asparagus with a drizzle of olive oil and balsamic glaze

Creating a balanced meal is key. The right sides can make your beef satkara experience unforgettable. Use top-quality beef satkara seasoning and follow a true recipe for the best taste and aroma.

Be creative with your beef satkara pairings. Try different sides and seasonings to find your favorite. With practice, you’ll become great at making authentic beef satkara that will wow everyone.

Side DishDescription
Steamed Basmati RiceA classic pairing for beef satkara, steamed basmati rice helps to soak up the flavorful sauce.
Roasted Sweet PotatoesA modern twist on a classic side dish, roasted sweet potatoes add a nice contrast in texture to the dish.

Storage and Reheating Guidelines

To keep your satkara tasting great, follow these storage and reheating tips. Store recipe in an airtight container in the fridge. Eat it within 3 to 4 days for the best taste.

For longer storage, freeze the beef satkara. Split it into portions and put them in airtight containers or freezer bags. Store them in the freezer for up to 3 months. Always heat the dish to 165°F (74°C) before eating to avoid foodborne illnesses.

Here are some reheating tips for satkara beef recipe:

  • Reheat the dish in the oven or on the stovetop, covered with a lid to retain moisture.
  • Avoid reheating the dish in the microwave, as it can lead to uneven heating and affect the texture.
  • Add a little water or broth to the dish if it becomes too dry during reheating.

By following these guidelines, you can enjoy your beef satkara for longer. Remember, always prioritize food safety when storing and reheating cooked dishes.

Conclusion

Discovering how to make the perfect satkara is a journey of flavors and culture. With the right ingredients and techniques, you can create a dish that will wow your guests. It’s a culinary adventure that will make your taste buds happy.

Creating the best beef satkara is all about paying attention to the details. Choose the right meat and balance the spices just right. With time and effort, you’ll master this dish and enjoy it for years.

Invite your loved ones over and start cooking. Let the amazing smells of beef satkara fill your kitchen. Enjoy every bite and celebrate the rich culinary heritage it brings. Bon appétit!

FAQ

What is Beef Satkara?

Beef Satkara is a unique dish from South Asian cuisine. It’s made with beef and satkara fruit. This fruit adds a special aroma and taste.

What is the cultural significance of Satkara Fruit?

Satkara fruit is deeply rooted in South Asian culture. It’s a citrus fruit known for its unique flavor and aroma. It’s used in many traditional recipes and rituals.

What are the essential ingredients for Beef Satkara?

Beef Satkara needs high-quality beef, satkara fruit, and spices. Onions, garlic, and tomatoes are also key ingredients.

How do you choose the right cut of beef for Beef Satkara?

The right beef cut is important for Beef Satkara. Cuts like chuck, brisket, or shoulder work best. They have the right mix of tenderness and flavor.

What is the traditional spice blend used in Beef Satkara?

The spice blend for Beef Satkara includes cumin, coriander, and chili powder. Turmeric and other aromatic spices are also used. They enhance the citrusy flavor of the satkara fruit.

What are some common mistakes to avoid when cooking Beef Satkara?

Avoid temperature control issues, seasoning errors, and timing mistakes when cooking Beef Satkara. Following the right techniques and using the right ingredients is key to a delicious dish.

What are the best side dishes and accompaniments for Beef Satkara?

Basmati rice, naan, and vegetable curries are great with Beef Satkara. Modern options like mashed potatoes, roasted vegetables, or a fresh salad also work well.

How should Beef Satkara be stored and reheated?

Store Beef Satkara in the fridge or freezer. Reheat it gently to keep the texture and flavor. Following proper storage and reheating prevents foodborne illnesses and keeps the dish fresh.

5-Minute Mongolian Beef – Quick Stir-Fry!

Imagine enjoying a tasty Asian dish at home, without spending hours cooking. This quick mongolian beef recipe lets you have a delicious meal in under 30 minutes. It’s ideal for those who are always on the go but still want to enjoy a flavorful dish.

This recipe is fast, simple, and full of flavor. You can make a dish that tastes like it came from a restaurant, all from your kitchen. Whether you love Asian food or just want to try something new, this minute mongolian beef will be a hit.

Key Takeaways

  • You can make a delicious minute mongolian beef in under 30 minutes
  • This easy mongolian beef recipe is perfect for busy individuals
  • The quick mongolian beef recipe is simple and packed with flavor
  • You can create a restaurant-style dish in the comfort of your own home
  • This recipe is great for fans of Asian cuisine and those looking for a new recipe to try
  • The minute mongolian beef is a quick and easy meal option

Understanding Minute Mongolian Beef: A Modern Take on Asian Cuisine

Exploring Mongolian beef, you find a dish that’s evolved for busy cooks. The idea of mongolian beef in under 30 minutes is now popular. It lets you make a tasty, authentic meal quickly, thanks to a simple mongolian beef recipe.

Preparing homemade mongolian beef with a “minute” method is beneficial. It cooks a delicious meal fast, ideal for those short on time. A simple mongolian beef recipe makes it easy and flavorful.

Origins of Mongolian Beef

Mongolian beef comes from traditional Asian cooking, which used slow-cook methods. But now, with modern techniques, you can make mongolian beef in under 30 minutes. This makes it easier for busy cooks to enjoy a tasty meal without long hours in the kitchen.

Why “Minute” Makes It Perfect for Busy Cooks

The “minute” method is great for quick meals. Using a simple mongolian beef recipe, you can make a flavorful dish fast. It’s perfect for those who want a delicious meal without spending hours cooking.

MethodCooking TimeDifficulty Level
Traditional1-2 hoursHigh
Quick-Cook30 minutesLow

Traditional vs. Quick-Cook Methods

Traditional Mongolian beef cooking takes a lot of time. But the quick-cook method is a quicker, easier option. With a simple mongolian beef recipe, you can make a delicious meal in under 30 minutes. It’s great for busy cooks who want a tasty dish without spending too long cooking.

Essential Ingredients for the Perfect Mongolian Beef

To make a tasty fast mongolian beef dish, choose the best ingredients. You’ll need tender beef, fresh veggies, and real Asian spices. For beef, pick sliced ribeye or sirloin. These cuts are tender and flavorful, perfect for mongolian beef dinner idea.

Vegetables like bell peppers, onions, and snow peas are crucial. They add crunch and flavor. For a true taste, mix soy sauce, hoisin sauce, and oyster sauce (if you like). Don’t forget garlic and ginger for extra depth.

  • 1 cup sliced beef
  • 2 cups mixed vegetables (bell peppers, onions, snow peas)
  • 2 cloves garlic, minced
  • 1 tablespoon grated ginger
  • 2 tablespoons soy sauce
  • 1 tablespoon hoisin sauce
  • Salt and pepper to taste

With these key ingredients, you’ll whip up a delicious mongolian beef dinner idea. It’s quick to make and full of flavor. The secret to great Mongolian beef is using top-notch ingredients and cooking them fast to keep their texture and taste.

Kitchen Tools and Equipment You’ll Need

To make a tasty Mongolian beef dish at home, you need the right tools. A wok or large skillet is key for quick and even cooking. It helps cook the ingredients perfectly.

Other essential tools include a cutting board, chef’s knife, and tongs or a spatula. These make preparing and cooking the ingredients easy. For an easy Mongolian beef recipe, a meat thermometer is also useful. It ensures the beef is cooked just right.

Must-Have Utensils

  • Wok or large skillet
  • Cutting board
  • Chef’s knife
  • Tongs or spatula

Optional but Helpful Tools

  • Meat thermometer
  • Immersion blender
  • Garlic press

With these kitchen tools, you can make a delicious Mongolian beef dish at home. An easy Mongolian beef recipe and the right utensils mean you can get restaurant-quality results in your own kitchen.

ToolDescription
Wok or large skilletFor cooking the Mongolian beef
Cutting boardFor preparing the ingredients
Chef’s knifeFor slicing the beef and vegetables

Preparing Your Ingredients: Time-Saving Tips

To make a tasty quick mongolian beef dish, you need to prepare your ingredients well. Slice the beef thinly, chop the veggies, and mix the sauces. This way, you can cook your simple mongolian beef recipe fast.

Here are some tips to save time:

  • Slice the beef against the grain for even and quick cooking.
  • Chop veggies like bell peppers and onions into small pieces for faster cooking.
  • Mix soy sauce and hoisin sauce in a bowl for a tasty sauce.

These tips help you prepare quickly, so you can cook your quick mongolian beef fast. Always use fresh, high-quality ingredients for the best taste and texture.

With these tips, you can make a delicious simple mongolian beef recipe at home. Try it out and enjoy the flavors of Mongolia in every bite!

The Secret to Restaurant-Style Minute Mongolian Beef

To make minute Mongolian beef like a restaurant, focus on a few key things. Choosing the right beef is important. It affects the dish’s tenderness and taste. Use thinly sliced beef, like flank steak or ribeye, for a homemade recipe.

It’s also key to prepare your beef right. Slice it against the grain and season with soy sauce, garlic, and ginger. The sauce is crucial too. It should mix sweet, sour, and savory flavors. Use hoisin sauce, rice vinegar, and sesame oil for a great sauce.

Meat Selection and Preparation

There are many meat options for minute Mongolian beef. Here are a few favorites:

  • Flank steak: A lean and flavorful cut that’s perfect for stir-frying.
  • Ribeye: A richer and more tender cut that’s great for minute Mongolian beef.
  • Sirloin: A leaner cut that’s still packed with flavor and texture.

Sauce Ingredients and Balance

A good sauce balances flavors well. Here are some key ingredients:

  • Hoisin sauce: Adds a sweet and savory flavor.
  • Rice vinegar: Provides a sour and tangy flavor.
  • Sesame oil: Adds a nutty and aromatic flavor.

Cooking Temperature Guidelines

Cooking minute Mongolian beef to the right temperature is key. Here are some guidelines:

IngredientCooking TemperatureCooking Time
BeefMedium-high heat3-5 minutes
VegetablesMedium heat2-3 minutes

Step-by-Step Cooking Instructions

To make a tasty fast mongolian beef dish, just follow these steps:

Start by heating a wok or large skillet over high heat. Add a bit of oil to the pan and swirl it to coat the bottom. This prevents the mongolian beef dinner idea from sticking.

Next, add the sliced beef to the pan. Cook until it’s browned, about 3-4 minutes. Then, remove the beef and set it aside.

After that, add the vegetables like bell peppers and onions to the pan. Cook until they’re tender. This adds flavor and texture to the fast mongolian beef dish.

Finally, put the beef back in the pan and stir in the sauce. Cook for 1-2 more minutes. This makes the sauce thick and coats the beef well.

Here are some tips for cooking mongolian beef dinner idea:

  • Use high-quality ingredients, like fresh veggies and tender beef.
  • Cook quickly over high heat for the best texture and flavor.
  • Adjust the sauce amount to your liking. Add seasonings or spices as needed.

Customization Options and Variations

When you make Mongolian beef at home, you can make it your own. You can change the spice level to your liking. If you like it milder, use less or no red pepper flakes. For more heat, add more flakes or try diced jalapenos.

You can also add different veggies to your Mongolian beef. Bell peppers, carrots, and mushrooms are great choices. They add flavor and nutrients. Just sauté them with the beef and sauce for a filling meal.

Spice Level Adjustments

  • Reduce red pepper flakes for a milder flavor
  • Add more red pepper flakes for a spicier version
  • Introduce other spicy elements like diced jalapenos

Vegetable Additions

  • Bell peppers for a crunchy texture
  • Carrots for a sweet and earthy flavor
  • Mushrooms for an earthy and savory taste

Dietary Modifications

To make your Mongolian beef recipe more inclusive, think about dietary changes. Use gluten-free soy sauce for a gluten-free version. For a vegetarian or vegan option, swap beef with tofu or tempeh and use a plant-based sauce.

With these customization options, you can enjoy a delicious Mongolian beef that fits your taste and dietary needs.

Customization OptionDescription
Spice Level AdjustmentsAdjust the spice level to your taste preference
Vegetable AdditionsAdd different vegetables to enhance flavor and nutrition
Dietary ModificationsMake dietary modifications for a more inclusive recipe

Perfect Side Dish Pairings

When serving quick mongolian beef, pick sides that match its taste and texture. A simple mongolian beef recipe gets better with the right sides.

Here are some great side dish options for quick mongolian beef:

  • Steamed veggies like broccoli or carrots offer a nice contrast in texture.
  • Fried rice is a hit, made with veggies, meat, or eggs.
  • Egg rolls add a crispy touch to the dish.

For a special touch, add sliced green onions or a sprinkle of sesame seeds. These pairings make your meal complete and delicious, highlighting your quick mongolian beef.

Choosing the right sides boosts your simple mongolian beef recipe. It makes for a memorable meal.

Storage and Reheating Guidelines

To keep your homemade mongolian beef fresh, store it right. Put it in an airtight container in the fridge for up to 3 days. Or freeze it for up to 2 months. Always heat it to 165°F when you reheat it for safety.

Reheating is perfect for a quick mongolian beef fix. You can use the microwave or stovetop. Here’s how to reheat:

  • Reheat in short intervals, checking the temperature until it reaches 165°F.
  • Stir-fry the reheated mongolian beef with some oil and garlic to refresh the flavors.
  • Add some vegetables, such as bell peppers or carrots, to add texture and nutrients.

Follow these tips for storing and reheating. You can enjoy your mongolian beef anytime. It’s great for a quick meal or snack. With these tips, you can have delicious mongolian beef in under 30 minutes, perfect for a busy day.

Always check leftovers for spoilage before reheating. If it smells bad or is slimy, throw it away. Proper storage and reheating mean you can enjoy your mongolian beef longer. It’s perfect for meal prep or planning ahead.

Storage MethodShelf Life
RefrigeratorUp to 3 days
FreezerUp to 2 months

Troubleshooting Common Issues

When making fast mongolian beef, you might run into some common problems. These can mess up the taste and quality of your dish. We’ve got some tips and solutions to help you out. Whether it’s overcooked beef or a sauce that’s too bland, we’ve got you covered.

A great mongolian beef dinner idea needs the right mix of flavors and textures. To avoid common mistakes, follow some basic tips. Here are a few to keep in mind:

  • Use high-quality ingredients for the best taste and texture.
  • Don’t overcook the beef. It should be cooked just right for you.
  • Season the sauce to your liking. Add more soy sauce or chili flakes if needed.

By following these tips and watching out for common issues, you can make a tasty fast mongolian beef dish. It’s sure to impress. Remember to be flexible and adjust your recipe as you go. This will help you get the perfect mongolian beef dinner idea.

With a bit of practice and patience, you’ll make a delicious fast mongolian beef dish. It’s perfect for any time. So, don’t be afraid to try new things. And if you have questions or need help, just ask.

Conclusion: Mastering Your Homemade Mongolian Beef

Congratulations! You’ve learned how to make tasty minute mongolian beef at home. This article has given you all the steps to make this Asian dish easily. It’s perfect for both experienced cooks and beginners.

To make your minute mongolian beef perfect, focus on preparing your ingredients well. Pay attention to the cooking time and the sauce’s flavors. Try different spices and add your favorite veggies to make it your own. Soon, you’ll make minute mongolian beef that tastes like it’s from a restaurant.

Now, it’s time to get creative and make this recipe your own. Enjoy learning and making minute mongolian beef. Happy cooking!

FAQ

What is Minute Mongolian Beef?

Minute Mongolian Beef is a quick version of the traditional Mongolian beef dish. It can be made in under 30 minutes. This recipe is perfect for busy cooks who want a delicious Asian meal fast.

What are the key ingredients in Minute Mongolian Beef?

The main ingredients are tender beef, fresh veggies, and a tasty sauce. The sauce is made with soy sauce, brown sugar, and Asian spices.

What kitchen tools and equipment do I need to make Minute Mongolian Beef?

You’ll need a wok or large skillet, a sharp knife, and a spatula or tongs. A meat thermometer and an immersion blender are optional but helpful.

How do I prepare the ingredients for Minute Mongolian Beef?

To save time, pre-slice the beef and chop the veggies in advance. Also, mix the sauce ingredients ahead of time. This makes cooking faster and easier.

What is the secret to achieving restaurant-style Minute Mongolian Beef?

To make it like a restaurant, choose the right beef and cook it right. Balance the sauce flavors well. Cooking the beef at the right temperature is also crucial for the perfect texture.

Can I customize or make variations to the Minute Mongolian Beef recipe?

Yes, you can customize the recipe to your liking. Adjust the spice level, add different veggies, or make dietary changes to fit your needs.

What are some good side dish pairings for Minute Mongolian Beef?

Good side dishes are steamed rice, fried rice, and stir-fried veggies. They complement the flavors and textures of the dish well.

How should I store and reheat leftover Minute Mongolian Beef?

Store leftovers in an airtight container in the fridge for 3-4 days. Reheat in the microwave or a skillet over medium heat to keep it fresh and flavorful.

What are some common issues I might encounter when making Minute Mongolian Beef?

Common issues include overcooked beef, unbalanced sauce, or not enough seasoning. Troubleshoot these by following the recipe closely. This ensures your dish turns out perfectly every time.

Thai Style Grilled Steak: 5 Must-Try

Imagine the smell of sizzling thai style grilled steak in your backyard. It feels like you’re in Thailand. You can make this taste at home by learning traditional cooking methods and ingredients.

To start, you need to know the key ingredients and techniques for a thai grilled steak. You’ll learn about the best meat cuts and marinades. This way, you can make a thai style grilled steak that will wow everyone.

Key Takeaways

  • Learn how to create authentic thai style grilled steak at home
  • Understand the traditional cooking methods and ingredients used in thai cuisine
  • Discover the best cuts of meat for a grilled steak recipe
  • Find out how to make the perfect marinades for thai style grilled steak
  • Get tips on how to grill up a delicious and flavorful authentic thai steak
  • Explore the world of thai style grilled steak and its unique flavors and aromas
  • Master the art of creating a mouth-watering grilled steak recipe at home

Understanding Thai Grilled Steak Traditions

Thai grilled steak has a rich history. Its popularity comes from the delicious flavors and aromas of traditional Thai street food. Exploring regional variations of Thai grilled steak is key to finding the best.

Traditional cooking involves marinating steak in fish sauce, lime juice, and spices. Then, it’s grilled over high heat. This creates a charred outside and a tender inside. The marinade, made from fish sauce, lime juice, and spices, adds depth to the dish.

Origins in Thai Street Food Culture

In Thai street food culture, vendors grill meats over charcoal. They infuse them with aromatic spices and herbs. This method has been passed down through generations, shaping how Thai cuisine steak is made today.

You can find the best grilled steak at street food stalls and restaurants in Thailand. Each place has its own twist on the dish.

Traditional Cooking Methods

To make perfect Thai cuisine steak, traditional cooking methods are key. This includes marinating the steak and grilling it over high heat. These steps ensure a charred outside and a tender inside.

Regional Variations

Thai grilled steak varies by region in Thailand. The north offers spicy flavors, while the south has sweet and sour notes. Exploring these variations can introduce new flavors and techniques to your cooking.

Some popular regional variations include:

  • Northern-style Thai grilled steak, known for its spicy flavors and aromas
  • Southern-style Thai grilled steak, with its sweet and sour flavors
  • Isan-style Thai grilled steak, famous for its bold and smoky flavors

Essential Ingredients for Thai Style Grilled Steak

To make a tasty grilled steak, start with the right ingredients. You’ll need a good steak, fish sauce, lime juice, palm sugar, and spices like lemongrass and cilantro. These help make a marinade that boosts your steak’s flavor.

Choose a steak with lots of marbling for tenderness. A ribeye or sirloin works well. The marinade is key, mixing fish sauce, lime juice, and palm sugar for a sweet and savory taste.

Here are some must-haves for a simple Thai steak recipe:

  • Fish sauce
  • Lime juice
  • Palm sugar
  • Lemongrass
  • Galangal
  • Cilantro

With these, you can whip up a marinade that’s both true to Thai taste and delicious. Just mix the ingredients, add your steak, and marinate for 30 minutes before grilling. You’ll get a steak that’s bold yet refined, great for an easy Thai steak recipe.

Selecting the Perfect Cut of Meat

To make a tender and flavorful thai steak, picking the right meat is key. You need a cut that soaks up the thai steak seasoning well. The perfect cut makes a big difference in taste and texture.

For thai grilling, ribeye, sirloin, and flank steak are top choices. These cuts are tender and soak up flavors well. Look for marbling and tenderness when picking meat. Marbling adds flavor and texture.

It’s also important to think about where the beef comes from. You can choose local or imported beef. Local beef might taste fresher, while imported beef is often tenderer. Your choice depends on what you like and your recipe’s needs.

Quality Indicators to Look For

  • Marbling: The amount of fat that is dispersed throughout the meat
  • Tenderness: The level of tenderness or softness of the meat
  • Color: The color of the meat, with brighter red colors generally indicating fresher meat

By focusing on these factors, you can make a delicious thai steak. The right meat and seasoning will make your dish unforgettable.

Creating the Perfect Thai Marinade

To make a great thai steak marinade, mix fish sauce, lime juice, palm sugar, and spices. This blend will bring out the steak’s natural flavors, making it taste amazing. You can tweak the marinade to your liking by changing the amounts of each ingredient.

Here are some tips for making the perfect thai steak marinade:

  • Choose high-quality fish sauce for the best taste.
  • Be careful with the palm sugar, as too much can make it too sweet.
  • Adjust the spices to your liking, depending on how spicy you want it.

A great thai steak marinade is key to a fantastic grilled steak. By following these tips, you can make a marinade that will take your steak to the next level.

Remember, the secret to a great thai steak marinade is finding the right balance of flavors. Try different ingredients and ratios to find what works best for you.

IngredientQuantity
Fish sauce2 tablespoons
Lime juice1 tablespoon
Palm sugar1 teaspoon

Preparing Your Grill for Thai-Style Cooking

To get the perfect thai style grilled steak, you must prepare your grill well. This means controlling the temperature, choosing the right fuel, and having the right tools. With these steps, you can cook your steak just right, whether it’s rare, medium, or well-done.

For the best best grilled steak, you need to find the right temperature. Aim for medium-high heat, around 400°F to 450°F. This way, you get a great sear on the outside and the inside cooked just right.

When it comes to fuel, you can choose between charcoal and gas. Charcoal grills give a smoky flavor, while gas grills are easier to use. The choice depends on what you like best. You’ll also need a grill mat and tongs to cook your steak perfectly.

Temperature Control Techniques

  • Preheat your grill to the desired temperature
  • Use a thermometer to monitor the temperature
  • Adjust the heat as needed to maintain a consistent temperature

Charcoal vs. Gas Considerations

Think about the pros and cons of each fuel type. Consider the flavor, convenience, and cost. By preparing your grill and choosing the right tools, you’ll make delicious thai style grilled steak. It’s sure to impress your friends and family.

Step-by-Step Thai Style Grilled Steak Process

To make a delicious thai steak, follow a simple process. Start by marinating the steak, then grill it to perfection. Serve it with various sides to enhance the flavors and textures.

Here are some tips to keep in mind:

  • Choose a high-quality steak, such as ribeye or sirloin, for the best results.
  • Marinate the steak for at least 30 minutes to allow the flavors to penetrate.
  • Preheat the grill to medium-high heat to achieve a nice char on the outside.

Marination Times

The marination time depends on the steak type and flavor desired. For a true thai steak, marinate for at least 2 hours or overnight.

Grilling Techniques

For a perfect thai cuisine steak, use the right grilling techniques. Cook the steak for 4-5 minutes per side, or until it reaches your desired doneness.

Doneness Guidelines

The steak’s doneness is up to your preference. For a medium-rare thai steak, cook for 5-6 minutes total. A medium steak will need 7-8 minutes.

DonenessCooking Time
Medium-Rare5-6 minutes
Medium7-8 minutes
Medium-Well9-10 minutes

Traditional Thai Dipping Sauces

To make your delicious grilled steak even better, try traditional Thai dipping sauces. These sauces bring a new level of flavor and authenticity. You can make different sauces like nam jim (chili sauce) and nam prik (spicy sauce) to go with your steak.

Some favorite Thai dipping sauces include:

  • Nam jim: a spicy and sour chili sauce made with chilies, garlic, and fish sauce
  • Nam prik: a spicy sauce made with chilies, garlic, and sometimes fish sauce or shrimp paste
  • Sriracha sauce: a spicy and sweet sauce made with chilies, vinegar, and sugar

When you serve your thai steak marinade grilled steak, offer a few dipping sauces. This can make the flavor and experience even better. You can also mix ingredients to create your own special sauces.

Adding traditional Thai dipping sauces to your grilled steak brings more flavor and authenticity. Whether you like spicy and sour or sweet and spicy, there’s a sauce for you.

SauceIngredientsFlavor Profile
Nam jimChilies, garlic, fish sauceSpicy and sour
Nam prikChilies, garlic, fish sauce or shrimp pasteSpicy
Sriracha sauceChilies, vinegar, sugarSpicy and sweet

Side Dishes to Complete Your Thai Steak Meal

Enjoying a delicious Thai steak recipe is even better with the right side dishes. Traditional accompaniments can make your meal complete. They perfectly complement the flavorful Thai steak.

Traditional Accompaniments

Popular side dishes include sticky rice, som tam (papaya salad), and khao niew (coconut ice cream). These dishes are tasty and easy to make. They go well with the grilled steak.

Modern Fusion Options

For a twist, try fusion options that mix Thai flavors with international ingredients. Some ideas are:

  • Thai-style BBQ ribs
  • Grilled pineapple with spicy mango salsa
  • Coconut-infused quinoa salad with roasted vegetables

These modern options add a unique and exciting touch to your Thai steak meal.

Adding these side dishes to your Thai steak recipe makes a well-rounded meal. It’s sure to impress your family and friends. Whether you like traditional dishes or modern fusion, there’s something for everyone.

Common Mistakes to Avoid

When making thai style grilled steak, it’s key to steer clear of common mistakes. These errors can spoil the dish. Some common mistakes include over-marinating, under-seasoning, and incorrect grilling temperatures.

Marinade Mishaps

Don’t use too much acid in your marinade. It can make the meat tough. For a thai style grilled steak, aim for a balanced marinade with both acidic and oily ingredients.

Grilling Errors

Ensure your grill is preheated to the right temperature. Use a meat thermometer to check the steak’s doneness. For a grilled steak recipe, medium-rare is often the best choice.

Serving Blunders

Don’t serve your thai style grilled steak without letting it rest for a few minutes. This makes the steak tender and flavorful. Serve it with your favorite sides, like sticky rice or roasted vegetables, for a complete meal.

Other mistakes to avoid include:

  • Not letting the steak come to room temperature before grilling
  • Pressing down on the steak with your spatula while it’s grilling
  • Not using a cast-iron or stainless steel pan to grill the steak

Storage and Leftover Tips

Storing leftovers of your authentic thai steak is key to keeping it fresh and safe. You can keep the steak in the fridge or freezer. Make sure to use an airtight container to lock in the flavors and texture.

To reheat your thai cuisine steak, use the oven or microwave. Make sure it heats up to a safe temperature to avoid food poisoning. Reheating to the right temperature is important for both taste and safety.

Here are some creative ways to use leftovers:

  • Make a steak salad with mixed greens, vegetables, and a tangy dressing
  • Use the leftover steak to make sandwiches, wraps, or subs
  • Add the steak to a stir-fry or noodle dish for a quick and easy meal

By following these tips, you can enjoy your authentic thai steak for longer. Always handle and store food safely to avoid foodborne illness.

Storage MethodShelf Life
Refrigerator3 to 5 days
Freezer3 to 6 months

With these tips and guidelines, you can enjoy your thai cuisine steak safely and with great quality.

Conclusion

Creating thai style grilled steak at home is a fun journey. It lets you bring the lively flavors of Thailand to your own place. You’ve learned how to marinate, grill, and serve it, opening a door to delicious best grilled steak experiences.

The secret to great thai style grilled steak is in the details. It’s about trying new things and enjoying the special touches that make it unique. Whether you stick to traditional Thai flavors or try something new, your dish will be a hit with everyone.

We hope you keep exploring and sharing your cooking stories. Your experiences will inspire others to try thai style grilled steak too. And you’ll help grow the world’s love for different foods.

FAQ

What is the best cut of meat for Thai-style grilled steak?

For Thai-style grilled steak, choose ribeye, sirloin, or flank steak. These cuts are tender and full of flavor. They also handle high-heat grilling well.

How long should I marinate the steak?

Marinate the steak for 2-4 hours. This lets the marinade flavors soak into the meat fully.

What are the key ingredients in a Thai steak marinade?

A good Thai steak marinade includes fish sauce, lime juice, and palm sugar. Also, lemongrass, galangal, and cilantro are key. These give the steak its unique Thai taste.

What is the best way to grill Thai-style steak?

Grill the steak at high heat for a charred outside and a juicy inside. Sear for 2-3 minutes on each side. Then, lower the heat and cook until it’s just right.

What are some traditional Thai dipping sauces to serve with the grilled steak?

Serve the steak with nam jim (chili sauce) and nam prik (spicy sauce). These sauces add a burst of flavor and make the dish more authentic.

What are the best side dishes to accompany Thai-style grilled steak?

Serve the steak with sticky rice, som tam (papaya salad), and khao niew (coconut ice cream). For something new, try Thai-style BBQ ribs or grilled pineapple.

How can I avoid common mistakes when making Thai-style grilled steak?

Watch out for marinade mistakes, grilling errors, and serving blunders. Make sure the marinade is balanced, grill at high heat, and serve with the right sides for a true Thai taste.

How should I store and reheat leftover Thai-style grilled steak?

Keep leftover steak in the fridge for 3-4 days or freeze for 3 months. Reheat it gently to keep it tender and flavorful.

7 Amazing Steak Pizzaiola Recipes to Try

Imagine enjoying a tasty italian steak recipe that feels like a trip to Italy. Steak pizzaiola is a beloved dish from Naples, loved by many in Italy. It’s a mix of rich flavors and traditions.

Steak pizzaiola lets you bring Italy’s flavors to your home. It’s all about the right ingredients and cooking methods. Whether you love food or just want to try something new, this dish will impress you.

Key Takeaways

  • Steak pizzaiola is a classic Italian dish that originated in Naples
  • This italian steak recipe is a staple in many Italian households and restaurants
  • The dish is known for its rich flavors and traditional Italian ingredients
  • Steak pizzaiola can be made with a variety of steak cuts and ingredients
  • The recipe is relatively simple and can be made at home with a few basic ingredients
  • Steak pizzaiola is a great option for special occasions or everyday meals

The Rich History of Steak Pizzaiola

This classic Italian dish with a long history. It started in Naples, where tender steak, flavorful sauce, and fresh ingredients came together. This created a culinary masterpiece.

The recipe has been passed down for generations. Each region in Italy has added its own twist. Understanding its history helps us appreciate the flavors and techniques used in making this traditional steak .

Steak pizzaiola is more than just a dish. It brings people together, creating a sense of community and shared love for good food.

Origins in Naples

Naples is famous for its vibrant culinary scene. Steak pizzaiola was born here in the 18th century. Chefs experimented with ingredients and techniques, creating a recipe that quickly became popular.

Evolution of the Dish

Steak pizzaiola has changed over time. New spices, herbs, and sauces were added, making it more diverse and exciting. Today, it remains a beloved part of Italian cuisine, inspiring chefs and home cooks.

Cultural Significance

Steak pizzaiola is more than just a dish. It celebrates tradition, community, and the joy of sharing meals. Whether for a special occasion or a casual gathering, it’s a memorable experience.

By embracing the history and cultural significance , you can create a truly authentic dining experience. Its unique flavors, techniques, and traditions will continue to delight and inspire food lovers for generations.

Essential Ingredients for Authentic Steak Pizzaiola

To make a real Pizzaiola, you need the right steak pizzaiola ingredients. This dish has meats, veggies, and spices common in Italian food. You’ll need good steak, fresh tomatoes, garlic, and herbs like oregano and basil.

The ingredients call for top-notch steak. You can pick ribeye or sirloin, but it must be tender and tasty. Cook the steak until it’s charred outside and juicy inside.

Here are the key ingredients you’ll need:

  • 1.5-2 pounds of high-quality steak
  • 2-3 fresh tomatoes, diced
  • 3-4 cloves of garlic, minced
  • 1/4 cup of olive oil
  • 2 tablespoons of chopped fresh oregano
  • 1 teaspoon of salt
  • 1/2 teaspoon of black pepper

With these steak pizzaiola ingredients, you can make a tasty Steak Pizzaiola. It will wow your family and friends. Use the freshest, best ingredients for the best taste and texture.

Choosing the Perfect Cut of Meat

Choosing the right meat for easy steak pizzaiola is key. You want it to be tender, flavorful, and affordable. With many options, picking the right one can be tough. Think about how tender and flavorful you want your steak to be.

Look for cuts with a mix of marbling and lean meat. This makes your steak juicy and full of flavor. Ribeye, sirloin, and flank steak are good choices. Make sure the cut is the right thickness and quality for perfect cooking.

Best Steak Options

  • Ribeye: known for its rich flavor and tender texture
  • Sirloin: a leaner cut with a slightly firmer texture
  • Flank steak: a flavorful and affordable option

Thickness and Quality Guidelines

For homemade , aim for a steak thickness of 1-1.5 inches. This ensures it cooks right without burning. Choose cuts with a good mix of marbling and lean meat for the best taste.

Budget-Friendly Alternatives

On a tight budget? No worries. Use cheaper cuts like skirt steak or tri-tip. They might need more cooking time but still taste great. With a bit of creativity, you can make delicious steak pizzaiola without breaking the bank.

Cut of MeatThicknessQualityPrice
Ribeye1-1.5 inchesHigh$15-$20
Sirloin1-1.5 inchesMedium-High$10-$15
Flank Steak0.5-1 inchMedium$8-$12

Creating the Classic Steak Pizzaiola Sauce

To make a delicious sauce, focus on quality ingredients and techniques. The sauce is key to Steak Pizzaiola, adding rich flavors and aromas. Start with the best tomatoes, like San Marzano, and mix them with olive oil, garlic, and herbs like oregano and basil.

When making the sauce, balance the flavors and get the right consistency. Here’s what you need:

  • 2 cups of crushed tomatoes
  • 1/4 cup of olive oil
  • 4 cloves of garlic, minced
  • 1 teaspoon of dried oregano
  • 1 teaspoon of dried basil
  • Salt and pepper to taste

Cook the ingredients slowly over low heat, stirring now and then. This takes about 30 minutes. But the effort is worth it for the perfect sauce. It’s a key part of the dish, making your Steak Pizzaiola even better.

By following these steps and using the right ingredients, you can make a delicious pizzaiola sauce. It’s a fundamental part of the dish. Making it from scratch lets you enjoy the full flavors and aromas of this classic Italian recipe.

IngredientQuantity
Crushed tomatoes2 cups
Olive oil1/4 cup
Garlic4 cloves
Dried oregano1 teaspoon
Dried basil1 teaspoon

Kitchen Tools and Equipment Needed

To make a tasty classic steak pizzaiola, you need the right tools. Having the right cookware and utensils makes cooking easier and more fun. You’ll need a big skillet, like cast iron or stainless steel, to cook the steak and sauce.

Some key items include:

  • A sharp knife for slicing the steak
  • A cutting board for preparing ingredients
  • A wooden spoon for stirring the sauce
  • A saucepan for heating the sauce

There are also some optional tools that can make cooking better. A meat thermometer helps ensure the steak is cooked just right. A garlic press makes crushing garlic cloves easy.

With the right tools, you can make a delicious classic pizzaiola. It will impress your family and friends. With practice, you’ll get better at this traditional Italian dish.

ToolDescription
SkilletLarge, cast iron or stainless steel pan for cooking steak and sauce
KnifeSharp knife for slicing steak
Cutting BoardWooden or plastic board for preparing ingredients

Step-by-Step Traditional Steak Pizzaiola Preparation

To make authentic dish, follow a series of steps. This will help you create this delicious Italian dish. It’s known for its rich flavors and tender texture.

Using high-quality ingredients and following a step-by-step guide is key. This ensures the best results. Here are the main steps to prepare an authentic steak pizzaiola:

Meat Preparation

Start by selecting and preparing the meat. Choose a steak cut that’s at least 1 inch thick. This helps keep it juicy and tender while cooking.

Sauce Making Process

The sauce is a vital part of traditional pizzaiola. It’s made with garlic, onions, tomatoes, and herbs. Cooking the sauce slowly melds the flavors together, creating a rich, tangy taste.

Cooking Techniques

Cooking the steak and sauce requires skill and attention. Cook the steak to your desired doneness. Simmer the sauce slowly to blend the flavors. Here are some tips:

  • Cook the steak over medium-high heat for a nice crust.
  • Use a meat thermometer to check the steak’s doneness.
  • Simmer the sauce slowly to meld the flavors.

By following these steps and using quality ingredients, you can make an authentic steak pizzaiola. It’s sure to impress your family and friends. Always use fresh ingredients and cook with care for the best results.

IngredientQuantity
Steak1.5 pounds
Garlic3 cloves
Onions1 medium
Tomatoes2 cups

Expert Tips for Perfect Results

To get perfect results with your easy s pizzaiola, follow these expert tips. High-quality ingredients are key. They boost the flavor and texture of your dish. Choose the freshest veggies and the best meat you can find for homemade steak pizzaiola.

Here are some more tips to keep in mind:

  • Let the steak rest before slicing to ensure the juices are evenly distributed
  • Use a cast-iron skillet to achieve a perfect crust on the steak
  • Don’t overcook the steak – it should be cooked to your desired level of doneness

By following these tips, you’ll make a delicious and authentic easy steak pizzaiola. It will impress your family and friends. With practice, you’ll be a pro at making homemade !

The secret to a great steak pizzaiola is in the details. Take your time. Don’t be afraid to try different ingredients and techniques. Find the perfect mix for your taste.

Common Mistakes to Avoid

When making a tasty steak pizzaiola, knowing common mistakes is key. Even with a great italian steak recipe, mistakes can still happen. Being careful can make your steak pizzaiola perfect.

Here are some common mistakes to watch out for:

  • Temperature control issues: Wrong temperatures can make the meat undercooked or overcooked. This affects the dish’s texture and taste.
  • Seasoning errors: Too little or too much seasoning can mess up the flavors in your italian steak recipe.
  • Timing mistakes: Cooking for the wrong amount of time can make your steak pizzaiola tough or dry.

Knowing these mistakes helps you avoid them. Always follow a reliable italian steak recipe. This way, you’ll get a delicious and authentic experience.

With practice and focus, you’ll make a delicious steak pizzaiola that will wow everyone. So, try it out and experiment with different italian steak recipe versions. Find the one that makes your steak pizzaiola the best.

Regional Variations and Modern Twists

This dish has changed a lot, thanks to different parts of Italy and new ideas. This classic Italian dish now has its own special taste in each area. It’s a dish that’s been updated in many ways, showing off the creativity of Italian cooking.

In Italy, the way steak pizzaiola is made varies a lot. In Campania, it’s all about fresh tomatoes, garlic, and oregano. But in Lombardy, they use butter, cream, and Parmesan cheese. These differences make the dish exciting and diverse, loved by many in Italy.

Regional Italian Differences

  • Campania: fresh tomatoes, garlic, and oregano
  • Lombardy: butter, cream, and Parmesan cheese
  • Tuscany: olive oil, rosemary, and lemon

New ideas have also changed steak pizzaiola. Chefs and home cooks have added grilled steak, roasted veggies, and creative sauces. These updates have made the dish fresh and exciting again.

Contemporary Adaptations

Some cool new versions of steak pizzaiola include grilled steak with a lemon-herb sauce. There’s also roasted vegetables with a balsamic glaze. These new takes let you try out different flavors and ingredients.

Serving Suggestions and Wine Pairings

When serving classic steak pizzaiola, how you present it matters a lot. You want it to look good and taste even better. Serve the steak on a big platter or on individual plates. Add fresh herbs and a side of garlic bread or roasted veggies.

For a better dining experience, choose a wine that goes well with the classic steak pizzaiola. Here are some good wine choices:

  • Pinot Noir: a light-bodied red wine that pairs well with the delicate flavors of the steak
  • Chianti: a medium-bodied red wine that complements the bold flavors of the steak pizzaiola sauce
  • Barbera: a light-bodied red wine with high acidity that cuts through the richness of the dish

When you sit down to enjoy your classic steak pizzaiola, remember the little things matter. From how it looks to the wine you choose, every detail should come together. This will make your meal unforgettable.

By following these tips, you’ll create a memorable dining experience. It will highlight the rich flavors and bold spirit of classic steak pizzaiola.

Conclusion

Steak pizzaiola is more than a dish; it’s a journey to Italy’s heart. This Italian steak recipe shows Italy’s rich history and flavors. By learning to make authentic steak pizzaiola, you can share Italy’s love of food with your loved ones.

This article has given you the skills to make this beloved dish at home. You can use a juicy ribeye or a more affordable cut. The secret is to use simple ingredients and traditional methods that make steak pizzaiola special.

So, start cooking now! Get your ingredients ready and let the smells of steak pizzaiola fill your home. It’s like a trip to Naples or Tuscany. Enjoy every bite and make it the highlight of your next meal. Buon appetito!

FAQ

What is Steak Pizzaiola?

Steak Pizzaiola is a traditional Italian dish. It combines tender steak with a flavorful tomato-based sauce. This classic recipe comes from Naples and is loved in Italian cuisine.

What are the key ingredients in Steak Pizzaiola?

Steak Pizzaiola needs high-quality steak, tomatoes, garlic, onions, and herbs like basil and oregano. Sometimes, olives or capers are added. These ingredients make a rich, savory sauce.

How do I choose the best cut of steak for Steak Pizzaiola?

Choose tender and flavorful steak cuts like ribeye, New York strip, or filet mignon. The steak should be 1-1.5 inches thick. On a budget? Flank steak or skirt steak works well too.

What is the traditional way to make the Steak Pizzaiola sauce?

The classic sauce is made by simmering diced tomatoes, garlic, onions, and herbs. This melds flavors and thickens the sauce. Red wine or a bit of sugar might be added to balance the tomatoes.

What are some common mistakes to avoid when making Steak Pizzaiola?

Avoid overcooking the steak to keep it tender. Don’t simmer the sauce too little, or it’ll be watery. Season both the steak and sauce well for the right flavors.

Are there any regional variations of Steak Pizzaiola?

Yes, Steak Pizzaiola varies across Italy. The Campania region has the traditional recipe. But, other areas might use different tomatoes, herbs, or add ingredients like bell peppers or capers.

What are some good wine pairings for Steak Pizzaiola?

Italian red wines like Chianti, Montepulciano d’Abruzzo, or Sangiovese blends pair well. These wines complement the rich sauce and tender steak, making for a great meal.

7 Secrets to Perfectly Crispy Beef Schnitzel

Imagine biting into a crispy beef schnitzel. The tender inside perfectly matches the crunchy outside. You can make this dish at home with a simple recipe. Beef schnitzel is loved by many, and with the right steps, you can make it just like the restaurants.

Making homemade beef is an art. It needs careful attention, from picking the right beef to cooking and serving. This guide will teach you how to make a tasty homemade . You’ll be a pro at making crispy beef schnitzel in no time, whether you’re experienced or new to cooking.

Key Takeaways

  • You can make delicious homemade beef schnitzel with the right ingredients and techniques.
  • Choosing the right cut of beef is crucial for a tender and crispy beef schnitzel.
  • Cooking and serving homemade beef schnitzel requires attention to detail.
  • With practice, you can master the art of making crispy beef schnitzel.
  • Homemade beef schnitzel can be customized to suit your taste preferences.
  • Making homemade beef schnitzel is a fun and rewarding culinary experience.

The History and Origins of Classic Beef Schnitzel

Exploring traditional schnitzel takes you back to European roots. Austrian and German influences shaped its evolution. The classic recipe is a favorite in many places.

The story of this beef evolution is intriguing. Different areas added their own spin, creating diverse flavors and cooking styles. Whether you prefer traditional or modern, quality ingredients and cooking are key.

Austrian and German Influences

Austrian and German cuisines deeply influenced beef schnitzel. It’s often linked to German schnitzel, but Austrians also played a big role. Exploring beef schnitzel reveals the best of Austrian and German cooking.

Evolution of Traditional Recipes

Finding the recipe is a personal journey. Some stick to traditional methods, while others like modern twists. The secret to a great schnitzel is balancing flavors and textures.

Knowing the history of beef schnitzel helps you make your own version at home. With practice, you can become a master of traditional beef . Enjoy it with loved ones.

Essential Ingredients for the Perfect Beef Schnitzel

To make a tasty schnitzel, you need the right stuff. This includes top-notch beef, fresh breadcrumbs, and spices. You’ll also need eggs, flour, and oil for frying. With these ingredients, you can make a crispy, tender schnitzel that will wow everyone.

Some key ingredients to focus on are:

  • Fresh breadcrumbs for a light and crispy coating
  • High-quality beef, such as top round or sirloin, for a tender and flavorful dish
  • Eggs and flour for a smooth and even breading process
  • A variety of spices and seasonings, such as salt, pepper, and paprika, to add depth and flavor to your delicious beef schnitzel

Using these ingredients, you can whip up a schnitzel that’s crispy outside and tender inside. The secret to a great schnitzel is using quality ingredients. Don’t be shy to try different spices and seasonings to find your favorite mix.

With the right ingredients and a bit of practice, you can make a schnitzel that’s a hit at home. So, why not give it a shot and see what you can create with these essential ingredients?

Choosing the Right Cut of Beef

Choosing the right cut of beef is key to a great beef schnitzel. You want it to be tender and full of flavor. Top round and sirloin are popular choices. They both make delicious schnitzel, but pick one that’s the right size and thickness for you.

When picking your beef, think about these things:

  • Marbling: A cut with lots of marbling is tastier and more tender.
  • Tenderness: Go for cuts like top round or sirloin that are known for being soft.
  • Thickness: A 1/4 inch thick cut is best for even cooking and texture.

By picking the right beef, you’ll make a tasty beef schnitzel. Always handle and store the beef safely for the best taste.

With the right beef and a bit of practice, you’ll be a pro at making schnitzel. So, get creative with your best beef schnitzel recipe and enjoy the yummy results!

Cut of BeefThicknessTenderness
Top Round1/4 inchTender
Sirloin1/4 inchTender

Proper Meat Preparation Techniques

To make a tasty homemade , you need to prepare the meat right. This means pounding it to the correct thickness. This is key for even cooking and avoiding meat that’s too thick or too thin. Use a meat mallet to pound it to about 1/4 inch.

After pounding, season the meat with salt and pepper to boost the flavor. Then, get ready for the breading process. First, dredge the meat in flour, then in beaten eggs, and finally in breadcrumbs. This makes the outside crispy and the inside tender, turning your homemade beef schnitzel into a culinary masterpiece.

Here are some tips for preparing the meat:

  • Use a gentle pounding motion to avoid tearing the meat
  • Season the meat evenly to ensure consistent flavor
  • Make sure the meat is at room temperature before breading to help the breadcrumbs adhere evenly

By following these steps, you can make a delicious easy schnitzel. With the right meat preparation, you’ll create a homemade beef schnitzel that’s unforgettable.

The Secret to Perfect Beef Schnitzel Breading

To get a crispy beef , focus on the breading. This is where the magic happens. With the right techniques, you can impress everyone with your delicious schnitzel.

The type of breadcrumbs you use is key. You can pick from Panko or regular breadcrumbs. Panko is best for a crispy beef schnitzel because it offers the perfect crunch and flavor.

Here are some tips for choosing breadcrumbs:

  • Choose fresh breadcrumbs that haven’t been on the shelf for a long time.
  • Try using a mix of breadcrumbs and grated cheese for more flavor.
  • Experiment with different types, like whole wheat or gluten-free, to find your favorite.

Seasoning Mix Guide

A good seasoning mix can really enhance your delicious dish. Use a mix of salt, pepper, and paprika. Feel free to add other herbs and spices to find the perfect flavor.

By following these tips, you can make a crispy beef schnitzel that everyone will love. Always use fresh ingredients and don’t be afraid to try new things.

Step-by-Step Cooking Instructions

To get a crispy outside and a soft inside for your beef schnitzel, follow these steps:

  • Heat the right amount of oil in a large skillet over medium-high heat.
  • Carefully place the homemade in the skillet and cook for 2-3 minutes on each side, or until golden brown.
  • Remove the beef schnitzel from the skillet and place it on a paper towel-lined plate to drain excess oil.

Cooking your homemade beef schnitzel needs careful attention. But with these steps, you’ll make a delicious and crispy beef schnitzel every time.

Don’t overcrowd the skillet. This can lower the oil temperature and affect your beef schnitzel. Cook in batches if needed, and always check the temperature for the perfect cook.

Common Mistakes to Avoid

When making the best beef schnitzel recipe, it’s key to know common mistakes. These can ruin your dish. Paying attention to temperature, breading, and timing is crucial. This way, you can avoid these mistakes and make a tasty homemade.

Some common mistakes include temperature control problems, which can make the meat undercooked or overcooked. Breading problems can also happen, leading to a soggy or uneven coating. And, timing errors can also affect the dish’s quality.

Temperature Control Issues

To avoid temperature control issues, use a thermometer to check the oil’s temperature. The best temperature for frying beef schnitzel is between 350°F and 375°F.

Breading Problems

To prevent breading problems, choose the right breadcrumbs and coat the meat evenly. You can also mix breadcrumbs with grated cheese for extra flavor.

Timing Errors

To avoid timing errors, cook the beef for the right time. The cooking time depends on the meat’s thickness and the oil’s temperature. Cook it for 2-3 minutes on each side, until it’s golden brown and cooked through.

By following these tips and avoiding common mistakes, you can make a delicious and easy beef schnitzel. It’s sure to impress your family and friends.

MistakeSolution
Temperature control problemsUse a thermometer to monitor the oil temperature
Breading problemsUse the right type of breadcrumbs and coat the meat evenly
Timing errorsCook the beef schnitzel for the right amount of time

Traditional Side Dishes and Accompaniments

When serving traditional beef schnitzel, choose side dishes that match its crispy outside and soft inside. For a true German taste, pair it with a fresh salad, a warm soup, or sautéed veggies. Here are some favorites:

  • Sauerkraut, a traditional german side dish made from fermented cabbage
  • Boiled or mashed potatoes, a hearty and comforting accompaniment
  • Steamed broccoli or green beans, a light and healthy option

To enhance your meal, add tangy lemon wedges or spicy mustard. You can also try paprika or thyme for a unique flavor.

For an authentic touch, serve your German beef with spätzle, a traditional German noodle. Offer artisanal breads like dark rye or multigrain to complete the meal.

Pairing your traditional schnitzel with these classic sides will make a satisfying meal. It’s sure to impress anyone. So, be creative and find your favorite combinations!

Signature Sauces for Your Beef Schnitzel

A great sauce can make your schnitzel even better. For delicious beef schnitzel, the right sauce is key. A favorite is beef schnitzel with mushroom gravy, blending beef’s richness with mushrooms’ earthiness.

Classic Mushroom Gravy

This sauce is a classic for a reason. Start by sautéing sliced mushrooms in butter until they’re soft. Then, add flour to thicken. Slowly pour in beef broth, whisking constantly, and season with salt and pepper.

Lemon Butter Sauce

For a lighter taste, try lemon butter sauce. Mix softened butter with lemon juice, garlic, and parsley. It’s great for those who like a fresh, citrusy flavor.

Whether you pick mushroom gravy or lemon butter sauce, your delicious beef schnitzel will wow everyone. These signature sauces elevate your dish, making it unforgettable.

Storage and Reheating Guidelines

Storing and reheating your homemade schnitzel right is key to keeping it tasty and crispy. You’ve made your easy beef schnitzel, and now it’s time to store leftovers. Keep it fresh by putting it in an airtight container in the fridge for up to three days.

To reheat, use the oven or a pan on the stovetop. Here’s how to do it:

  • Preheat your oven to 350°F (180°C).
  • Place the beef schnitzel on a baking sheet lined with parchment paper.
  • Reheat for 10-15 minutes or until crispy and hot.

You can also reheat it in a pan with a bit of oil until it’s golden and crispy.

Freezing your beef is another option for up to two months. Just cool it down, put it in a freezer-safe bag or container, and store it. When you’re ready, thaw it and reheat as instructed above.

By following these tips, you can enjoy your homemade beef schnitzel for longer. Whether you reheat it in the oven or on the stovetop, it will stay crispy and tender.

Storage MethodShelf Life
RefrigeratorUp to 3 days
FreezerUp to 2 months

Wine Pairing Suggestions

Enjoying your homemade beef schnitzel is even better with the right wine. To find the perfect match for your best beef schnitzel recipe, consider these options.

Start by thinking about wines that go well with the crispy outside and tender inside of your beef schnitzel. A dry white wine like Pinot Grigio or Sauvignon Blanc is a classic choice.

Red Wine Options

If you like red wine, try a light-bodied Pinot Noir. It balances the beef schnitzel‘s richness with good acidity.

White Wine Selections

For those who prefer white wine, a crisp Riesling is a great choice. Its high acidity cuts through the breading and richness.

Beer Pairings

For something different, pair your beef schnitzel with a cold beer. A light-bodied lager or pilsner contrasts nicely with the crispy, savory beef schnitzel.

The perfect wine or beer for your beef schnitzel depends on your taste. Experiment with different options to find your favorite.

Conclusion: Mastering Your Homemade Beef Schnitzel

You now have the skills to make your own tasty homemade beef schnitzel. You’ve learned how to pick the right cut of beef and how to get the breading just right. Each step is designed to help you succeed.

Don’t be afraid to try new things with seasonings and sides. It’s fun to see how different flavors can change the dish. And when you serve it, you’ll make everyone happy with your delicious schnitzel.

Mastering beef schnitzel takes time, patience, and attention to detail. Let your creativity guide you as you cook. And when you take that first bite, you’ll know all your hard work was worth it. Enjoy this journey of making a classic dish your own.

FAQ

What is beef schnitzel?

Beef schnitzel is a dish from Europe. It’s made from thin, boneless beef. The beef is breaded and fried, making it crispy outside and tender inside.

What are the essential ingredients for making beef schnitzel?

To make beef schnitzel, you need quality beef, fresh breadcrumbs, eggs, flour, and spices. These ingredients are key to a great schnitzel.

What is the best cut of beef for beef schnitzel?

Top round or sirloin are the best cuts for schnitzel. The size and thickness of the cut matter for the right texture and cooking time.

What is the secret to achieving a crispy breading on beef schnitzel?

For a crispy breading, choose the right breadcrumbs and seasonings. The coating process is also crucial for a delicious, crispy exterior.

What are some common mistakes to avoid when making beef schnitzel?

Avoid temperature control issues, breading problems, and timing errors. Knowing these common mistakes helps you make perfect schnitzel every time.

What are some traditional side dishes and accompaniments that pair well with beef schnitzel?

Salads, soups, vegetables, and German sides like sauerkraut and potatoes go well with schnitzel. These are classic pairings.

What are some signature sauces that can be served with beef schnitzel?

Try classic mushroom gravy, lemon butter sauce, or modern variations. These sauces enhance the crispy and tender nature of schnitzel.

How should leftover beef schnitzel be stored and reheated?

Store leftover schnitzel in the fridge. Reheat it in the oven or air fryer to keep it crispy.

What are some wine pairing suggestions for beef schnitzel?

Pair schnitzel with red wines like Pinot Noir or Cabernet Sauvignon. White wines like Riesling or Sauvignon Blanc also work well. Beer pairings can also complement the dish’s flavors.

10 Irresistible Chicken Stroganoff Recipes

Imagine coming home to a delicious, creamy chicken stroganoff meal. It’s easy to make and super satisfying. This dish features tender chicken in a rich, tangy sauce, served over egg noodles. Chicken stroganoff is a classic that’s great for any meal.

A creamy chicken stroganoff meal brightens up your day. The sauce, made with sour cream, Dijon mustard, and chicken broth, is unique. It perfectly complements the chicken and noodles. Whether you love traditional recipes or want to try something new, chicken stroganoff is a fantastic choice.

Key Takeaways

  • You can make a delicious chicken stroganoff meal with an easy chicken stroganoff recipe
  • Chicken stroganoff features tender chicken in a creamy sauce served over egg noodles
  • The creamy sauce is made with a combination of sour cream, Dijon mustard, and chicken broth
  • Chicken stroganoff is perfect for a quick weeknight dinner or a special occasion meal
  • A creamy chicken stroganoff meal is easy to make and satisfying to eat
  • You can customize your chicken stroganoff recipe to suit your taste preferences

The History Behind Classic Chicken Stroganoff

Many people don’t know the rich history of homemade . It started in 19th-century Russia. Back then, it was a sauté of beef, mushrooms, and sauce. Later, it evolved to include chicken and became a hit in the United States.

To make the best recipes, knowing its evolution is key. The classic recipe has sautéed chicken, mushrooms, and a creamy sauce over egg noodles. But, today, you can find many variations, like classic chicken stroganoff with different proteins, veggies, and sauces.

Some popular variations of chicken stroganoff include:

  • Adding different types of mushrooms, such as shiitake or cremini
  • Using various types of protein, such as beef or pork
  • Experimenting with different sauces, such as a tomato-based or cream-based sauce

Whether you want a traditional recipe or a new twist on classic chicken stroganoff, there’s something for everyone. Its rich history and versatility make it a favorite dish worldwide.

Recipe VariationIngredientsCooking Method
Classic Chicken StroganoffChicken, mushrooms, onions, garlic, sauceSautéing, simmering
Beef StroganoffBeef, mushrooms, onions, garlic, sauceSautéing, simmering
Vegetarian StroganoffMushrooms, onions, garlic, sauce, vegetablesSautéing, simmering

Essential Ingredients for Perfect Chicken Stroganoff

To make a tasty dish, you need the right stuff. It’s all about tender chicken, fresh mushrooms, and a creamy sauce. You’ll also need olive oil, garlic, and Dijon mustard from your pantry.

For an easy recipe, choose top-notch ingredients. Here’s what you’ll need:

  • 1 pound boneless, skinless chicken breast
  • 1 cup of fresh mushrooms, sliced
  • 2 cloves of garlic, minced
  • 1 tablespoon of Dijon mustard
  • 1 tablespoon of olive oil
  • Salt and pepper to taste

With these ingredients, you can whip up a meal that everyone will love. Serve it over egg noodles or rice. Add some steamed veggies for a complete meal.

Follow an easy chicken recipe and use the right ingredients. You’ll get a dish that’s both tasty and healthy. So, why not try making chicken stroganoff and see how good it is?

Preparing Your Kitchen for Stroganoff Success

To make a great homemade , you need the right tools and ingredients. A well-stocked kitchen is key. Start with a large skillet, a saucepan, and a cutting board. These are the basics for your dish.

Efficiency is key in ingredient prep. Chop onions and mushrooms, and cook chicken to the right tenderness. This ensures your dish is flavorful and satisfying. Here are some tips to help:

Required Equipment

  • Large skillet
  • Saucepan
  • Cutting board

Ingredient Prep Guidelines

Prep your ingredients ahead of time to save time. Chop onions and mushrooms, and cook chicken to the right tenderness. This makes for a delicious and satisfying meal.

Time Management Tips

With simple time management, you can make a delicious homemade quickly. Start by prepping your ingredients. Then, cook your chicken and sauce at the same time. This ensures the perfect balance of flavors and textures, making your dish the best.

IngredientPrep TimeCook Time
Chicken10 minutes15 minutes
Onions and mushrooms5 minutes10 minutes
Sauce5 minutes10 minutes

How to Make Chicken Stroganoff

To make a tasty stroganoff, start by seasoning the chicken. Use salt, pepper, and paprika. Cook the chicken in a skillet until it’s tender and juicy. This step is key for a great easy chicken stroganoff recipe.

Preparing the Chicken and Sauce

While the chicken cooks, prepare the sauce. The sauce is a mix of sour cream, Dijon mustard, and chicken broth. Add chopped onions and mushrooms for extra flavor.

Here’s a simple list for the sauce:

  • 1 cup of sour cream
  • 1 tablespoon of Dijon mustard
  • 1/2 cup of chicken broth
  • 1/2 cup of chopped onions
  • 1/2 cup of sliced mushrooms

Combining Components

Once the chicken and sauce are ready, mix them with cooked noodles. This makes a tasty and satisfying chicken stroganoff. Serve it hot, garnished with parsley or dill.

By following these steps, you can make a delicious dish. It’s perfect for anyone looking for an easy or creamy chicken stroganoff recipe.

IngredientQuantity
Chicken breast1 pound
Sour cream1 cup
Dijon mustard1 tablespoon
Chicken broth1/2 cup

Mastering the Creamy Stroganoff Sauce

To make a tasty recipe, you must perfect the sauce. High-quality ingredients like fresh sour cream and Dijon mustard are essential. Also, cooking the sauce slowly and stirring constantly is crucial to avoid curdling or separation.

Here are some tips for making homemade chicken stroganoff sauce:

  • Use room temperature ingredients for a smooth sauce
  • Cook the sauce over low heat to prevent boiling or curdling
  • Stir constantly to avoid the sauce sticking to the pan

With practice and patience, you can make a rich, creamy sauce. This sauce will impress anyone. As you get better, you’ll enjoy a delicious homemade dish anytime.

Remember, a great sauce comes from slow, careful cooking. With a bit of practice, you’ll make a sauce that’s both delicious and impressive.

Slow Cooker Chicken Stroganoff Method

Preparing a tasty stroganoff meal is easy with a slow cooker. It’s great for those who are busy but want a good meal. Just prep the chicken, mushrooms, and sauce, then cook until tender.

The slow cooker chicken method is simple. Start by prepping the ingredients. Slice mushrooms, cut chicken, and mix the sauce. Then, add everything to the slow cooker and cook on low for hours.

Prep Instructions

Here’s how to prep for slow cooker chicken stroganoff:

  • Slice the mushrooms and onions
  • Cut the chicken into bite-sized pieces
  • Mix the sauce ingredients, including the broth, mustard, and sour cream

Cooking Timeline

Cook the slow cooker chicken stroganoff on low for 6-8 hours or high for 3-4 hours. Serve hot, topped with parsley or dill.

The slow cooker chicken stroganoff method makes a delicious meal easy. It’s ideal for busy cooks who want a tasty chicken stroganoff without spending hours cooking.

Instant Pot Chicken Stroganoff Variation

Instant pot stroganoff is a tasty and easy meal. It’s perfect for those who want a quick, flavorful dish without much work.

To make instant pot chicken stroganoff, start by prepping the ingredients. You’ll need chicken, mushrooms, and sauce. Then, cook them in the instant pot until they’re tender. After a few simple steps, you’ll have a hot, delicious meal ready to serve.

Here are some benefits of making instant pot chicken stroganoff:

  • Quick cooking time: The instant pot cooks the dish fast, ideal for busy weeknights.
  • Easy to make: The recipe is simple, making it perfect for cooks of all levels.
  • Delicious flavor: The mix of chicken, mushrooms, and sauce creates a rich, tasty dish.

With an instant pot recipe, you can enjoy a tasty meal quickly. This version of chicken stroganoff adds excitement to your meals.

So, why not try instant pot chicken stroganoff? It’s a delicious, easy meal that’s sure to become a favorite.

IngredientQuantity
Chicken breast1 pound
Mushrooms1 cup
Sauce1 cup

Common Mistakes to Avoid

When making homemade stroganoff, it’s key to know common mistakes. These can ruin the dish. Paying attention to details is crucial for a great meal.

The sauce is a big part of a good stroganoff. Sauce problems can happen if it’s too thick or too thin. Fixing this by adjusting liquid or simmering time helps. Also, the chicken’s texture is important. Overcooking or undercooking can make the meal bad.

Sauce Issues and Solutions

  • Too thick: add a little more broth or cream
  • Too thin: simmer for a few more minutes or add a thickening agent

Seasoning mistakes can also mess up the flavor. Too much or too little salt, pepper, or spices can ruin the taste. This makes the dish less tasty.

Chicken Texture and Seasoning Tips

To make the best chicken stroganoff, cook the chicken until it’s tender and juicy. Season it well with herbs and spices. Avoiding common mistakes and following these tips will help you make a delicious homemade chicken stroganoff.

Serving Suggestions and Side Dishes

There are many ways to serve this chicken . One favorite is over egg noodles, which adds a nice texture contrast. You can also pair it with steamed veggies like broccoli or green beans, or a side salad. For a complete meal, try garlic bread or roasted potatoes on the side.

Adding ingredients like diced bell peppers or mushrooms can make an easy chicken stroganoff recipe even better. Serving it with sour cream or fresh herbs like parsley or dill is also a great idea. Here are some ideas to get you started:

  • Egg noodles
  • Steamed vegetables (broccoli, green beans, etc.)
  • Side salad
  • Garlic bread
  • Roasted potatoes

These suggestions can help you create a delicious meal that everyone will love. So, why not try chicken stroganoff tonight? It’s easy to make a tasty and memorable dinner with an easy chicken stroganoff recipe?

Side DishDescription
Egg NoodlesA classic pairing for chicken stroganoff
Steamed VegetablesA healthy and flavorful addition to the meal
Side SaladA refreshing and light contrast to the rich sauce

Storage and Reheating Tips

After making your homemade , it’s key to store and reheat it right. This keeps the taste and texture just right. You can enjoy it for days or weeks with a few simple steps.

First, let your stroganoff cool down to room temperature. Then, put it in the fridge or freezer. This stops bacteria from growing and keeps it fresh. When you reheat, use low heat and stir often to avoid sauce problems.

Proper Storage Methods

For short storage, use an airtight container in the fridge. For longer, freeze it. You can freeze parts or the whole thing, making reheating easy.

Reheating Instructions

To reheat, put it in a saucepan over low heat and stir. You can also use the microwave, but watch it to avoid sauce separation. If the sauce gets too thick, add a bit of water or cream.

Freezing Guidelines

When freezing, label and date the container or bag. Frozen chicken stroganoff lasts up to three months. To reheat, thaw it in the fridge overnight, then follow the reheating steps.

By storing and reheating your chicken stroganoff correctly, you can enjoy it for longer. It stays tasty and satisfying, whether reheating leftovers or cooking from frozen.

Conclusion

Chicken stroganoff is a delightful dish that’s easy to make. It’s perfect for any night of the week. The creamy stroganoff sauce and tender chicken make it a family favorite.

You can choose to make it on the stovetop, in a slow cooker, or with an Instant Pot. This way, you can enjoy a easy chicken recipe that’s full of flavor. With the tips from this article, you’ll become a pro at making chicken stroganoff.

So, treat yourself and your loved ones to this comforting dish. It’s a delicious choice any day of the week!

FAQ

What is chicken stroganoff?

Chicken stroganoff is a classic dish. It has tender chicken in a creamy sauce, served over egg noodles. It’s a delicious meal for any occasion.

What are the key ingredients in chicken stroganoff?

Chicken stroganoff’s key ingredients are chicken, mushrooms, sour cream, Dijon mustard, and chicken broth. These mix to create a rich, tangy sauce that goes well with the chicken.

How do I make chicken stroganoff from scratch?

To make chicken stroganoff, start by preparing the chicken. Season and cook it until it’s tender and juicy. Then, make the sauce by simmering sour cream, Dijon mustard, and chicken broth.

Finally, combine the chicken and sauce. Serve it over egg noodles.

Can I make chicken stroganoff in a slow cooker or Instant Pot?

Yes, you can make chicken stroganoff in a slow cooker or Instant Pot. These methods are great for busy cooks. Just prep the ingredients, add them to the appliance, and let it work its magic.

What are some common mistakes to avoid when making chicken stroganoff?

Avoid common mistakes like sauce problems (too thick or too thin) and chicken texture issues (overcooking or undercooking). Also, watch out for seasoning errors (too much or too little salt, pepper, or other seasonings). By avoiding these, your chicken stroganoff will always be perfect.

What are some good side dishes to serve with chicken stroganoff?

Good side dishes for chicken stroganoff include egg noodles, steamed vegetables (like broccoli or green beans), and a simple salad. These help balance the rich flavors of the stroganoff.

How can I store and reheat leftover chicken stroganoff?

To store leftover chicken stroganoff, cool it to room temperature and refrigerate it in an airtight container. To reheat, use low heat on the stovetop, stirring constantly. This prevents the sauce from curdling or separating.

You can also freeze chicken stroganoff for longer storage. Follow the same cooling and storage guidelines.

10 Secrets to Perfect Chicken Fried Rice

Imagine a dish that mixes chicken, vegetables, and rice into one amazing meal. Chicken fried rice is a timeless favorite. With the right ingredients and techniques, you can make the best chicken fried rice at home. It’s easy, whether you’re experienced or just starting out.

We’ll cover everything from cooking perfect rice to secret ingredients that make chicken fried rice unforgettable. Follow these tips to make a delicious, authentic chicken fried rice meal. It’s sure to impress your family and friends.

Introduction to Chicken Fried Rice

This Chicken recipe is loved worldwide for its versatility and taste. The right mix of ingredients and cooking methods makes it both healthy and tasty. In this article, we’ll dive into the world of chicken fried rice. We’ll give you the knowledge and skills to make the perfect dish.

Key Takeaways

  • Chicken fried rice is a versatile dish that can be made with a variety of ingredients
  • The best chicken fried rice recipe is one that balances flavors and textures
  • Cooking the perfect rice is essential to making great chicken fried rice
  • Easy chicken fried rice can be made with a few simple ingredients and techniques
  • Practice makes perfect, so don’t be afraid to experiment and try new things
  • With the right ingredients and techniques, you can create a delicious and authentic chicken fried rice meal
  • Chicken fried rice is a great way to use up leftover ingredients and reduce food waste

The Art of Making Perfect Chicken Fried Rice

To make delicious homemade , start with fresh ingredients. Use cooked rice, boneless chicken breast, and various vegetables. The goal is to mix flavors and textures well, so each bite is tasty.

Here are some tips for making authentic chicken fried rice:

  • Use day-old cooked rice for the best texture.
  • Add colorful veggies like carrots, peas, and green onions for taste and looks.
  • Season with soy sauce, oyster sauce, and sesame oil for a rich flavor.

Follow these tips and try different ingredients to make your own chicken fried rice. Whether you’re experienced or new to cooking, you can learn to make perfect chicken fried rice. With practice, you’ll impress everyone with your dish.

Essential Ingredients for Authentic Chicken Fried Rice

To make a tasty dish, you need the right ingredients. The type of rice, protein, and vegetables are key. They make your dish both quick and authentic.

Choose a long-grain rice, preferably day-old. This rice is drier and easier to stir-fry. It gives your dish a better texture. For protein, use chicken, shrimp, or both. Add frozen peas, carrots, and scallions for color and flavor.

Choosing the Right Rice

The right rice is crucial for chicken fried rice. Here are some tips:

  • Opt for long-grain rice
  • Use day-old rice for better texture
  • Avoid using short-grain rice or glutinous rice

Protein and Vegetable Selection

Choose your protein and vegetables based on what you like. Here are some popular choices:

  • Chicken breast or thighs
  • Shrimp or other seafood
  • Frozen peas and carrots
  • Scallions or green onions

Must-Have Seasonings and Sauces

To get the authentic flavor, you need the right seasonings and sauces. Here are some must-haves:

Seasoning/SauceDescription
Soy sauceA salty sauce made from fermented soybeans
Oyster sauceA savory sauce made from oyster extract
Sesame oilA fragrant oil made from sesame seeds

With these essential ingredients and simple tips, you can make a delicious chicken fried rice. It will impress your family and friends.

Pre-Cooking Preparation Steps

To make perfect chicken , follow some key steps before cooking. These steps ensure your dish is flavorful and easy chicken fried rice to prepare. Start by cooking the rice and letting it cool. This prevents the rice from becoming mushy when mixed with other ingredients.

Then, prepare your protein and vegetables. Choose chicken, shrimp, or another protein you like. Cut it into small pieces and season with salt and pepper. Chop the vegetables, like onions, carrots, and peas, into small pieces. This helps them cook evenly and quickly.

Now, let’s talk about seasonings and sauces. Use soy sauce, oyster sauce, or your favorite sauce. Mix the sauces with the cooked rice and add scrambled eggs. This adds a nice flavor and texture to your chicken fried rice.

Here are some tips to keep in mind:

  • Cook the rice at least a day before you plan to make the chicken fried rice.
  • Use a wok or a large skillet to stir-fry the ingredients.
  • Add the ingredients in the right order to prevent them from overcooking.

By following these steps, you can make delicious and easy dish that everyone will enjoy. Remember to use the right ingredients and cook them in the right order. With practice, you’ll become a pro at making perfect chicken fried rice.

Mastering the Chicken Preparation

To make authentic chicken rice, you must master chicken prep. This means marinating, cutting, and cooking the chicken right. Using fresh, high-quality chicken is key when making homemade chicken fried rice.

For real chicken fried rice, try different marinades to flavor the chicken. You can mix soy sauce, olive oil, and herbs, or go for a Korean marinade with gochujang and garlic. The goal is to match the marinade with your dish’s flavors.

Marinating Techniques

  • Use a mixture of soy sauce, olive oil, and herbs for a classic flavor
  • Try a Korean-style marinade with gochujang and garlic for a spicy kick
  • Experiment with different combinations of spices and sauces to find your perfect blend

After marinating, cook the chicken to the right temperature. This is vital for tender, flavorful chicken in your homemade dish. Cook it to 165°F (74°C) for safety.

Proper Cutting Methods

After cooking, cut the chicken into small pieces. This makes the chicken spread out in the dish and easier to eat. Use a sharp knife or kitchen shears to cut it into thin strips or cubes.

The Secret to Restaurant-Style Chicken Fried Rice

To make a best recipe, focus on the right ingredients and cooking techniques. A popular chicken fried rice dish is more than just mixing ingredients. It’s about finding a balance of flavors and textures.

Here are some tips for a restaurant-style chicken fried rice dish:

  • Use fresh vegetables and lean protein for the best taste.
  • Cook the rice just right, so it’s not too dry or wet.
  • Add the right seasonings and sauces for extra flavor.

By following these tips, you can impress your family and friends . The secret to this a popular recipe is using the right ingredients and cooking methods. Also, make sure to present it well.

With practice and patience, you can make a restaurant-style chicken dish. It will be delicious and look great. So, try it out and enjoy making your own best chicken fried rice recipe.

IngredientQuantity
Cooked rice2 cups
Chicken breast1 cup
Vegetables (e.g. peas, carrots, onions)1 cup

Step-by-Step Cooking Process

To make delicious chicken , follow a simple cooking process. Start by preparing your wok and cooking ingredients in the right order. This ensures a quick and tasty meal for any time.

Using the right techniques and equipment is key. A seasoned wok is best for chicken fried rice. It helps distribute heat evenly and prevents sticking. Heat your wok over medium-high heat and add a bit of oil.

Wok Preparation and Cooking Order

Begin cooking by heating your wok. Then, start with your protein, like chicken or shrimp. Next, add vegetables and finally, the rice. This order helps each ingredient cook perfectly.

For quick chicken fried rice, control timing and temperature. Cook over medium-high heat, stirring often to avoid burning. Use a thermometer to keep the wok at the right temperature.

Timing and Temperature Control

Timing and temperature are crucial for perfect chicken fried rice. Cook each ingredient for the right time and adjust heat as needed. By following these steps, you’ll make a delicious, quick dish for any occasion.

IngredientCooking TimeTemperature
Chicken5-7 minutesMedium-high heat
Vegetables3-5 minutesMedium heat
Rice2-3 minutesLow heat

Common Mistakes to Avoid

When making chicken fried rice, it’s easy to make mistakes. These can change the dish’s taste and feel. Knowing these mistakes helps you make a better chicken fried rice.

One common error is overcooking the rice. This makes it dry and sticky. Also, using the wrong rice, like long-grain, can mess up the texture. Not seasoning enough can make the dish taste bland.

  • Use day-old rice to prevent it from becoming mushy or sticky.
  • Choose the right type of rice, such as jasmine or calrose rice, which is specifically designed for making fried rice.
  • Season the dish with soy sauce, oyster sauce, and other ingredients to give it a rich and savory flavor.

By avoiding these mistakes, you can make a tasty dish. It’s great for any meal, from a weeknight dinner to a special occasion. Follow these tips for the best flavor and texture.

Regional Variations and Flavor Combinations

Exploring chicken fried rice reveals a world of flavors. From spicy Korean chili flakes to tangy Thai fish sauce, each region brings its own twist. This makes delicious chicken fried rice a treat for your taste buds.

Some popular variations include:

  • Japanese-style chicken fried rice with soy sauce and sake
  • Indian-inspired chicken fried rice with cumin and coriander
  • Chinese-style chicken fried rice with oyster sauce and scallions

These variations inspire you to create your own popular dishes. By trying different ingredients and flavors, you can make a unique and tasty meal. This shows how versatile this beloved dish is.

Looking for something spicy, savory, or sweet? There’s a chicken fried rice for you. So, let’s get creative and explore the many flavors of chicken fried rice.

Storage and Reheating Tips

Enjoying your homemade means keeping it fresh and safe. You’ve made your easy chicken fried rice. Now, it’s time to store it or reheat it for a quick meal.

Cool the rice to room temperature within two hours of cooking. This stops bacteria from growing. Then, put the rice in an airtight container and chill it at 40°F (4°C) or below.

Proper Storage Methods

  • Use airtight containers to keep moisture and flavors out.
  • Label the container with the date and what’s inside.
  • Keep the container in the fridge at a steady temperature.

Best Reheating Practices

To reheat, use a microwave, stove, or oven. Make sure the rice heats up to 165°F (74°C) for safety.

Safety Guidelines

Check the rice for spoilage before reheating. Look for bad smells or slimy texture. If unsure, throw it away. These tips help keep your chicken fried rice fresh and safe.

Storage MethodTemperatureShelf Life
Refrigerator40°F (4°C)3 to 5 days
Freezer0°F (-18°C)3 to 6 months

Conclusion: Creating Your Perfect Chicken Fried Rice

Now you know how to make tasty recipe. It’s time to get creative in the kitchen. Try out different ingredients and cooking methods to find your favorite flavor. You can also play with seasonings, add new veggies, or try different regional styles.

The secret to the best chicken fried rice is knowing the basics and adding your own twist. This article has given you the skills to make a dish that will impress everyone. So, go ahead and make your own special recipe in the kitchen.

FAQ

What are the essential ingredients for making authentic chicken fried rice?

To make authentic chicken fried rice, you need high-quality long-grain or jasmine rice. Also, fresh chicken, carrots, peas, and onions are key. Don’t forget a mix of soy sauce, sesame oil, garlic, and ginger for flavor.

How do I choose the right type of rice for chicken fried rice?

Choose long-grain or jasmine rice for chicken fried rice. These types have the right texture and moisture. Avoid short-grain or sticky rice, as they can become mushy.

What are the key steps for pre-cooking preparation when making chicken fried rice?

Start by cooking the rice in advance. Then, dice or shred the chicken and chop the vegetables. Prepare the seasoning mix of soy sauce, sesame oil, and spices beforehand.

How do I properly marinate and cook the chicken for the best texture and flavor?

Marinate the chicken in soy sauce, rice vinegar, garlic, and ginger. Cook it at high heat to ensure it’s tender and juicy.

What are some common mistakes to avoid when making chicken fried rice?

Avoid overcooking the rice and using the wrong rice type. Don’t forget to season well and manage cooking temperature and timing. Also, avoid overpacking the wok or pan to prevent steaming.

How can I create restaurant-style chicken fried rice at home?

Use high-quality ingredients and cook the rice and chicken right. Master the wok or pan-frying technique. Pay attention to seasoning and sauces. Add sesame oil or toasted sesame seeds for that restaurant taste.

How should I store and reheat leftover chicken fried rice?

Store leftover chicken fried rice in an airtight container in the fridge within 2 hours. Reheat in the microwave or a hot pan, adding water or broth to prevent drying. Heat it to at least 165°F for safety.

Irresistibly 30-Minute Beef and Chicken Stir-Fry

Looking for a fast dinner? Try a delicious chicken and beef stir fry. It’s a tasty mix of chicken, beef, and veggies in a yummy sauce. This dish is inspired by Asian flavors and can be made just the way you like it.

This stir fry is perfect for a weeknight meal. It’s simple to make and needs just a few ingredients. You can enjoy it with rice or noodles for a complete meal. This recipe is a classic that you can tweak to your liking. With simple ingredients, you can whip up a tasty stir fry for any time.

Key Takeaways

  • Chicken and beef stir fry is a quick and easy dinner option
  • This Asian stir fry recipe can be customized to suit your taste
  • Easy stir fry recipe requires minimal ingredients
  • Chicken and beef stir fry can be served with rice or noodles
  • This dish is perfect for a weeknight dinner or any occasion

Understanding the Perfect Chicken and Beef Stir Fry

A quick stir fry is a fantastic way to make a meal. Mixing chicken and beef opens up a world of flavors. To make a healthy stir fry, use fresh ingredients and the right cooking methods. We’ll look into stir-frying’s history, its growth, and why chicken and beef are great together in a stir fry.

Stir-frying started in ancient China as a fast way to cook food over high heat. It has grown and changed, with different cultures adding their own twist. A good stir fry needs fresh ingredients, the right cooking techniques, and balanced flavors.

Origins of Stir Frying

Stir-frying has a long history, showing how versatile this cooking method is. It began in ancient China and has become popular worldwide. Stir-frying has evolved a lot over time.

Benefits of Combining Chicken and Beef

Putting chicken and beef together in a stir fry has many advantages. Chicken adds lean protein, while beef brings a richer taste. The benefits include:

  • Increased protein content
  • Improved flavor profile
  • Texture variety

Key Elements of a Successful Stir Fry

A great stir fry needs the right ingredients, cooking methods, and flavor balance. Key elements include:

IngredientImportance
Fresh vegetablesHigh
Lean protein sourcesHigh
Aromatics and seasoningsMedium

Essential Equipment for Stir Frying

To make the perfect stir fry, you need the right tools. A wok or large frying pan is key for quick and even cooking. Look for a large, heavy-bottomed one made of cast iron or stainless steel.

The right tools can really improve your stir fry. A wok is great for quick stir-frying, while a frying pan works for smaller amounts. You’ll also need a blender or food processor for your homemade stir fry sauce.

  • A spatula for stirring and scooping
  • Tongs for handling stir fry vegetables
  • A whisk for mixing homemade stir fry sauce

With the right equipment and utensils, you’re set to make a tasty stir fry. Enjoy your favorite stir fry vegetables and homemade sauce.

Selecting the Best Ingredients

Preparing a tasty chicken and beef stir fry starts with the ingredients. A simple recipe can become amazing with the right mix of meats, veggies, and seasonings. It’s important to pick tender and flavorful meats for this dish.

To begin, choosing quality meats is key. Go for lean beef like sirloin or ribeye, and use boneless, skinless chicken breast or thighs. Fresh veggies are also crucial. Pick colorful bell peppers, broccoli, and carrots for texture and taste.

Choosing Quality Meats

  • Lean cuts of beef, such as sirloin or ribeye
  • Boneless, skinless chicken breast or thighs

Fresh Vegetables Selection

  • Bell peppers
  • Broccoli
  • Carrots

By mixing these ingredients with simple seasonings, you’ll make a delicious chicken and beef stir fry. It’s a dish that everyone will love. With a bit of practice, you’ll be making easy stir fry recipes like a pro.

Aromatics and Seasonings

IngredientQuantity
Garlic3 cloves
Ginger1 inch
Soy sauce2 tablespoons

The secret to a great chicken and beef stir fry is using fresh, quality ingredients. Don’t be shy to try new seasonings and sauces. With a bit of creativity, you can make a simple stir fry that’s both tasty and healthy.

Preparation Techniques for Perfect Results

To get a perfect quick stir fry, start by preparing your ingredients ahead of time. Slice meats and veggies thinly for even cooking. For a chicken beef stir fry, marinating the meats boosts flavor and tenderness.

Creating a great stir fry sauce is key. You can whip up your own with soy sauce, garlic, and ginger. Or, pick a store-bought one. The goal is to match the flavors with the chicken beef stir fry without overwhelming it.

When cooking, use the right heat and timing. A healthy stir fry cooks fast over high heat. This keeps the ingredients crunchy and flavorful. Here are some tips:

  • Use a large skillet or wok for even heat.
  • Start with meats, then add veggies.
  • Stir constantly to avoid burning and ensure even cooking.

By following these steps, you can make a tasty quick stir fry for a chicken beef stir fry dinner. Always choose fresh ingredients. Don’t be afraid to try new flavors and combinations to find your favorite stir fry recipe.

Creating the Ultimate Stir Fry Sauce

To make a delicious stir fry, a great sauce is key. A homemade stir fry sauce can make your dish special. It’s the sauce that brings all the flavors together in a simple stir fry recipe.

A good stir fry sauce balances sweet, sour, and savory flavors. Use soy sauce, hoisin sauce, and rice vinegar for this. Adding garlic and ginger can deepen the flavor, making your stir fry stand out.

Basic Sauce Components

The basic sauce includes soy sauce, hoisin sauce, and rice vinegar. You can also add sugar, salt, and pepper to taste. For a richer flavor, try oyster sauce and sesame oil. These ingredients will enhance your sauce and stir fry.

Flavor Variations

Customize your sauce with different flavors. Add chili flakes for spice or grated ginger for aroma. Lemon juice or orange zest can add a bright, citrusy taste.

By making your own stir fry sauce, you can tailor a simple stir fry recipe to your liking. An easy stir fry recipe uses fresh ingredients to highlight their natural flavors. With a great sauce, your stir fry will impress everyone.

Step-by-Step Cooking Method

To make a tasty chicken and beef stir fry, heat a tablespoon of oil in a large skillet or wok. Cook the chicken until it’s browned, then set it aside. Next, cook the beef until it’s done to your liking. Remove the beef and chicken from the skillet.

Then, add more oil if needed. Stir-fry your favorite veggies like bell peppers, carrots, and broccoli. Cook them until they’re tender but still crisp. Add the cooked chicken and beef back into the skillet.

For a quick stir fry, it’s key to have everything ready. Here are some tips for cooking fast:

  • Prepare your ingredients ahead of time, like slicing meats and chopping veggies.
  • Use a large skillet or wok to cook ingredients quickly and evenly.
  • Avoid overcrowding the skillet, as it can lower the temperature and slow cooking.

By following these steps and tips, you can make a delicious chicken and beef stir fry. Customize the recipe to fit your taste and dietary needs. Feel free to try different ingredients and sauces to find your favorite quick stir fry mix.

Common Stir Frying Mistakes to Avoid

When making a tasty chicken beef stir fry, knowing common mistakes is key. One big error is not controlling the temperature right. This can make your veggies undercooked or overcooked. Make sure your wok or pan is hot before adding food.

Another mistake is putting too much in the pan. This makes food steam instead of sear. Cook the chicken and beef in batches to ensure even cooking. Also, using the right amount of homemade stir fry sauce is important to keep flavors balanced.

Temperature Control Issues

Getting the temperature right is crucial in stir-frying. Use a thermometer to check your pan’s heat. This ensures your chicken beef stir fry turns out perfect, with crispy veggies and tender meat.

Overcrowding the Pan

Too much in the pan turns stir-frying into stewing. Cook in batches and leave space between each piece. This way, everything cooks evenly and sears well.

Timing Errors

Timing is everything in stir-frying. Add ingredients at the right moment and cook them for the right time. This way, you get a dish that’s perfectly cooked, with tender meat and crispy veggies. Follow these tips to make a delicious chicken beef stir fry with homemade sauce.

MistakeSolution
Temperature control issuesUse a thermometer to ensure the right temperature
Overcrowding the panCook ingredients in batches
Timing errorsAdd ingredients at the right time and cook for the recommended time

Vegetable Combinations and Substitutions

Choosing the right vegetables is key to a tasty stir fry. A simple recipe can shine with bell peppers, broccoli, and carrots. Mix vegetables with different cooking times for a perfect balance. Quick-cooking snow peas pair well with slower-cooking Brussels sprouts.

Start with onions and garlic for a solid base. Then, pick your favorite vegetables. Here are some great pairs:

  • Mushrooms and bell peppers for a savory flavor
  • Broccoli and carrots for a burst of color and nutrients
  • Snow peas and baby corn for a sweet and crunchy texture

Try swapping zucchini for carrots or cucumbers for bell peppers. This way, you can make your stir fry unique and tasty.

The secret to a great stir fry is balance. Choose the right vegetables and follow a simple recipe. Soon, you’ll be making delicious stir fries with ease.

Making Your Stir Fry Healthier

To make a healthy stir fry, start by cutting down on sodium. Use low-sodium soy sauce or tamari instead. Adding more veggies like bell peppers, carrots, and broccoli boosts the meal’s nutrition.

For protein, choose leaner cuts of chicken and beef. Or, add tofu or tempeh for plant-based options. This makes your dish healthier and more eco-friendly. Using fresh ingredients and the right cooking methods can also make your stir fry healthier.

Reducing Sodium

To cut down on sodium, use herbs and spices for flavor instead of salt. Use low-sodium broth or stock for cooking. Also, be careful with soy sauce, as it’s high in sodium.

Adding More Vegetables

Adding more veggies to your stir fry makes it healthier. Use colorful veggies like bell peppers, carrots, and broccoli. Frozen veggies like peas and corn are also good for convenience and cost.

Protein Modifications

Changing your protein sources can also improve your stir fry. Opt for leaner meats like chicken breast or sirloin. Or, add tofu or tempeh for plant-based options. Mixing different proteins, like chicken and tofu, adds variety and texture. These simple changes make your stir fry a quick, healthy, and tasty meal.

IngredientHealth Benefit
Leafy GreensRich in vitamins and antioxidants
Bell PeppersHigh in vitamin C and fiber
Lean ProteinLow in saturated fat and high in protein

Serving Suggestions and Pairings

A well-cooked chicken beef stir fry is great for any occasion. Serve it with rice or noodles to enhance flavor and presentation. The choice of rice or noodle can change the dish’s taste and texture.

Rice and Noodle Options

Here are some popular choices:

  • Jasmine rice complements the savory flavors of the stir fry.
  • Brown rice offers a nuttier and healthier option.
  • Udon noodles add a chewy texture to the dish.
  • Rice noodles are a light and gluten-free choice.

Using homemade stir fry sauce can make the rice or noodles even tastier. Adding stir fry vegetables like bell peppers and carrots can boost flavor and nutrition.

Garnishing Ideas

For a burst of color and freshness, garnish with green onions, sesame seeds, or citrus slices. These add a nice contrast to the rich flavors of the dish. They make the chicken beef stir fry more appealing to the eye.

Conclusion

Making a tasty chicken and beef stir fry is more than just tossing ingredients in a pan. You need to know the dish’s origins, benefits, and key elements. This way, you can make a simple stir fry that will wow your loved ones.

Use fresh, high-quality ingredients and learn the right cooking techniques. Don’t be afraid to try new flavor combinations. This will help you find your favorite easy stir fry recipe.

Stir frying is a quick way to make a healthy meal. You can use chicken and beef or try something new. The important thing is to pay attention to every step.

With practice, you’ll make a stir fry that’s full of flavor and perfectly cooked. So, get creative in the kitchen and explore the many possibilities of stir frying.

By mastering stir frying, you’ll have a meal you can easily change to suit your taste and diet. Enjoy trying new things and finding your own unique stir fry recipe!

FAQ

What is the main difference between a chicken and beef stir fry?

Chicken stir fries are lighter and more delicate. Beef stir fries are richer and more robust. Chicken cooks faster than beef.

How do I get the perfect sear on the meat in a stir fry?

Make sure the pan is hot before adding meat. Don’t overcrowd the pan. Pat the meat dry with paper towels for a crispy exterior.

What is the best way to prepare the vegetables for a stir fry?

Cut vegetables into bite-sized pieces for quick cooking. Choose vegetables with similar cooking times for even cooking.

How can I make my stir fry sauce healthier?

Use low-sodium soy sauce or tamari to reduce sodium. Choose fresh or homemade ingredients over pre-made sauces. Add more vegetables like garlic, ginger, or chili peppers for flavor and nutrition.

What are some tips for getting the perfect texture in a stir fry?

Cook at high heat and avoid overcrowding. Slice meat and vegetables thinly for even cooking. Add cornstarch or arrowroot powder to the sauce for a glossy texture.

The Ultimate 5-Step Herb-Crusted Filet Mignon

Imagine a dish that’s both elegant and full of flavor, perfect for any special event. The herb crusted filet mignon is a standout recipe. It combines unique flavors and textures, making it a hit with your guests. It’s easy to make and tastes amazing, perfect for a memorable meal.

This dish is a real showstopper. Its tender filet mignon is covered in a rich, aromatic herb crust. It’s ideal for special events, leaving a lasting taste in your guests’ mouths. Whether it’s a romantic dinner or a big dinner party, this dish is a great pick.

Key Takeaways

  • You can create a delicious and elegant gourmet beef dish with the herb crusted filet mignon recipe.
  • This dish is perfect for special occasions and offers a unique blend of flavors and textures.
  • The herb crusted filet mignon is relatively easy to prepare, making it a great choice for anyone looking to create a memorable dining experience.
  • The dish features a tender filet mignon coated in a rich and aromatic herb crust.
  • The herb crusted filet mignon is a great choice for romantic dinners or dinner parties.
  • This recipe offers a lot of flexibility, allowing you to customize the herb crust to your taste.

Understanding Filet Mignon: The Premium Cut

Filet mignon is a top choice for gourmet beef lovers. It’s tender and full of flavor, making it perfect for fine dining. To make the best filet mignon, knowing its unique qualities is key.

What Makes Filet Mignon Special

Filet mignon comes from the tenderloin’s small end. It’s low in fat but rich in taste. This makes it great for those who want a lean yet indulgent dish.

Selecting the Perfect Cut

Choose a filet mignon with the right color, marbling, and thickness. A top-quality cut will have a deep red color and a tender feel.

Grade and Quality Considerations

The filet mignon’s grade and quality matter a lot. Opt for “prime” or “choice” labels for better flavor and texture. With the right cut and practice, you can make a memorable gourmet dish.

Understanding filet mignon’s special qualities and choosing the right cut will help you impress. Whether you’re experienced or new to cooking, mastering filet mignon is rewarding and delicious.

GradeQualityFlavorTexture
PrimeHighIntenseTender
ChoiceMediumRichFirm

Essential Ingredients for Herb Crusted Filet Mignon

To make a tasty steak, you need fresh, high-quality ingredients. The herb crust is key, made from herbs and spices that match the filet mignon’s flavor. Thyme, rosemary, and garlic add a savory, aromatic taste.

For filet mignon seasoning, balance is key. You want to boost the steak’s flavor without overwhelming it. Start with salt, pepper, and olive oil. Add lemon zest or paprika for extra depth.

  • Fresh thyme and rosemary
  • Garlic
  • Salt and pepper
  • Olive oil
  • Lemon zest (optional)
  • Paprika (optional)

For a great herb crust, use top-notch ingredients and don’t overdo it. Aim for a balance of flavors that enhance the steak without dominating it. With these ingredients, you’re set to make a delicious herb crusted steak.

Preparing Your Herb Crust Mixture

To make a tasty filet mignon, you need a great herb crust mixture. This mix is key to the dish’s flavor. You can choose between fresh or dried herbs, each with its own benefits.

Fresh herbs give a lively taste, but dried herbs are easier to store and use. When making your herb crust, mix herbs like rosemary and garlic or thyme and lemon zest. These pairs enhance the filet mignon’s flavor.

  • Choose top-quality herbs and spices for the best taste.
  • Try different herb mixes to find your favorite.
  • Remember, a little herb goes a long way.

By using these tips and the right ingredients, you’ll make a filet mignon with a fantastic herb crust. It will surely impress your loved ones.

Herb CombinationFlavor Profile
Rosemary and GarlicSavory and aromatic
Thyme and Lemon ZestBright and citrusy

Equipment and Kitchen Tools Needed

To make a tasty steak recipe like herb crusted filet mignon, you need the right tools. The right tools can really improve your dish’s quality. For cooking filet mignon, a cast-iron skillet is key for a great crust.

You’ll need a meat thermometer, a cutting board, and a sharp knife. A meat thermometer ensures your steak is cooked just right. A cutting board keeps your workspace clean and stable. A sharp knife is important for chopping herbs and handling the steak carefully.

Here are some extra tools that might be helpful:

  • A pastry brush for applying the herb crust mixture
  • A spatula for flipping the steak
  • A plate and serving utensils for presenting your dish

Choose tools that are high quality and durable. A good cast-iron skillet, for example, will heat evenly and last a long time. By following these tips and using the right tools, you’ll make a delicious steak that will wow your guests.

ToolDescription
Meat ThermometerEnsures the perfect level of doneness
Cast-Iron SkilletProvides even heat distribution for a perfect crust
Cutting BoardOffers a clean and stable surface for preparing ingredients

How to Make the Perfect Herb Crusted Filet Mignon

To get the best filet mignon, make sure it’s at room temperature. This helps it cook evenly and lets the seasoning go deeper into the meat. Let it sit for 30 minutes to 1 hour before cooking.

Room Temperature Preparation

While the filet mignon warms up, start making the herb crust. Mix different herbs and spices to find the perfect blend for your steak.

Seasoning Techniques

When the filet mignon is ready, season it. Use salt, pepper, and your favorite herbs for a tasty crust. Coat it evenly so all sides are seasoned.

Now, you’re set to add the herb crust and cook the filet mignon. Follow these steps to make a delicious steak that will wow your guests.

Cooking Methods and Temperatures

Cooking a gourmet beef dish like filet mignon requires the right techniques and temperatures. You can cook it perfectly using pan-searing or oven roasting. To start, preheat your oven and make sure your pan is hot before adding the filet.

Understanding the ideal temperatures for different doneness levels is key. Here are some guidelines:

  • Rare: 120-130°F (49-54°C)
  • Medium-rare: 130-135°F (54-57°C)
  • Medium: 135-140°F (57-60°C)
  • Medium-well: 140-145°F (60-63°C)
  • Well-done: 145-150°F (63-66°C)

To cook a gourmet beef dish perfectly, use a meat thermometer. This ensures the internal temperature is just right. Let the filet rest for a few minutes before serving. This allows the juices to redistribute.

By following these filet mignon cooking tips, you’ll make a delicious gourmet beef dish. It’s sure to impress your guests. Whether you’re experienced or new to cooking, with practice, you’ll soon be a pro.

Cooking MethodTemperatureCooking Time
Pan-searingMedium-high heat2-3 minutes per side
Oven roasting400°F (200°C)10-15 minutes

Creating the Perfect Sear

To make a delicious filet mignon, you need a perfect sear. This step is key, as it boosts the flavor and texture. Use a skillet or cast-iron pan, as they hold heat well.

Before adding the steak, make sure the pan is hot. Test the heat by flicking water – if it sizzles, it’s ready. Add oil, swirl it, then sear the steak for 2-3 minutes on each side.

Pan-Searing Techniques

Pan-searing is an art that takes practice. To get the perfect sear, follow these tips:

  • Use a hot pan: A hot pan is key for a great sear.
  • Don’t overcrowd the pan: Cook each filet mignon separately for even searing.
  • Don’t stir the steak: Let it sear for a few minutes before stirring or flipping.

Achieving the Right Crust

Getting the right crust on your herb crusted filet mignon is important. Make sure the herb crust is evenly spread and the pan is hot. With these tips, you’ll get a perfect sear and enjoy a tasty steak.

Steak RecipeHerb CrustSearing Time
Herb Crusted Filet MignonThyme, Rosemary, Garlic2-3 minutes per side

Temperature Guide for Different Levels of Doneness

Cooking filet mignon to the perfect doneness is key. To get it right, using a meat thermometer is crucial. It helps you know if your filet mignon is rare, medium rare, or well done.

For a great filet mignon, aim for these internal temperatures:

  • Rare: 120°F – 130°F
  • Medium rare: 130°F – 135°F
  • Medium: 140°F – 145°F
  • Medium well: 150°F – 155°F
  • Well done: 160°F – 170°F

These temperatures are key to a great filet mignon. A meat thermometer ensures you get it right. Also, don’t forget the importance of seasoning in enhancing flavor.

Great filet mignon isn’t just about cooking. It’s also about preparation and seasoning. Follow these tips and use the right seasoning for a memorable dish.

With these temperatures and tips, you’ll make a delicious filet mignon. It’s perfect for a romantic dinner or a special occasion. This guide ensures perfect doneness every time.

Level of DonenessInternal Temperature
Rare120°F – 130°F
Medium rare130°F – 135°F
Medium140°F – 145°F
Medium well150°F – 155°F
Well done160°F – 170°F

Resting and Serving Your Filet

After cooking your herb crusted filet mignon perfectly, let it rest. This step makes the meat tender and flavorful. Let it rest for 5-10 minutes, depending on its size.

There are many ways to serve your delicious filet mignon. You can pair it with roasted veggies, mashed potatoes, or a fresh salad. For a fancy touch, serve it with a rich demiglace or a flavorful gourmet beef dish reduction.

Here are some popular ways to serve your herb crusted filet mignon:

  • With a side of garlic butter and roasted asparagus
  • Paired with a rich cabernet sauce and truffled mashed potatoes
  • As part of a surf and turf dish, paired with seared scallops and a citrus-herb sauce

Your herb crusted filet mignon will impress everyone. Its tender texture and rich flavor make it perfect for any special occasion or romantic dinner.

Wine Pairing and Side Dish Suggestions

Enjoying a gourmet beef dish like herb crusted filet mignon is even better with the right wine and side dishes. You want to match the rich flavors of the steak without overpowering them. Think about how the herbal notes in the crust mix with the wine.

A Cabernet Sauvignon or Pinot Noir pairs well with the herb crusted filet mignon. Their subtle tannins and fruit notes boost the flavor. For sides, try roasted vegetables, mashed potatoes, and sautéed spinach. These dishes balance the bold flavors of the gourmet beef dish nicely.

  • Grilled asparagus with a light vinaigrette
  • Sautéed mushrooms with garlic and thyme
  • Roasted Brussels sprouts with a balsamic glaze

These options add variety in texture and flavor, enhancing the herb crusted filet mignon. Pairing your steak with these wines and sides creates a complete and enjoyable meal. It highlights the best of your gourmet beef dish.

Conclusion: Mastering the Art of Herb Crusted Filet Mignon

Creating the perfect herb crusted filet mignon is an art that needs precision and patience. It’s about choosing the best filet mignon and making a tasty herb crust. This way, you can make this top beef cut even better. Try out different herb combinations and cooking methods to create your own special dish.

To make a great filet mignon recipe, you need the right tools and seasoning. Knowing how to check for doneness is also key. Remember to let the meat warm up before cooking and rest it well before serving.

Getting good at herb crusted filet mignon takes time, but it’s worth it. The joy of biting into a juicy, flavorful steak is amazing. So, keep trying new things and find what works best for you. Enjoy making this dish perfect in your kitchen.

FAQ

What makes filet mignon a premium cut of beef?

Filet mignon comes from the tenderloin, a muscle that’s not used much. This makes it incredibly tender and lean. It has a delicate flavor that’s hard to find in other cuts.

How do I select the perfect filet mignon?

Look for a filet mignon that’s well-marbled and has a deep red color. It should be at least 1-inch thick. Stay away from any cuts that look dry or discolored.

What herbs work best for the herb crust?

For a classic herb crust, use rosemary, thyme, garlic, and parsley. You can also try oregano, basil, or lemon zest for different tastes.

How do I make the herb crust adhere to the filet mignon?

To make the herb crust stick, mix the herbs with olive oil, Dijon mustard, and sometimes breadcrumbs or Parmesan cheese. This creates a binding paste.

What temperature should I cook the filet mignon to?

Cook the filet mignon to 130-135°F for a medium-rare. Use a meat thermometer to check. Remember, the temperature will rise a bit as it rests.

How long should I let the filet mignon rest before serving?

Let the filet mignon rest for 5-10 minutes after cooking. This lets the juices spread evenly, making it juicy and tender.

What wine pairs best with herb crusted filet mignon?

A full-bodied red wine like Cabernet Sauvignon or Merlot pairs well. The wine’s tannins balance the richness of the meat.

Exit mobile version